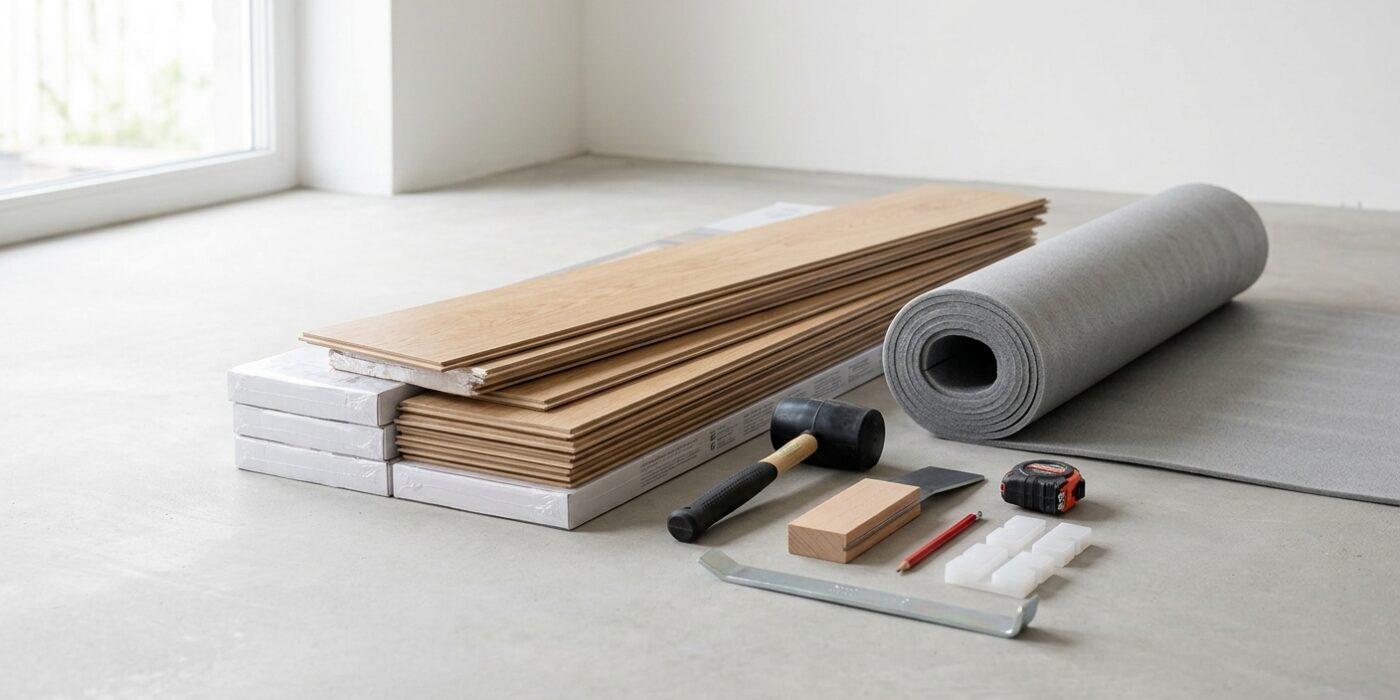
Project Shopping List
Laminate flooring clicks together without glue, nails, or staples – the planks lock together with a tongue-and-groove profile and float over the subfloor. It’s one of the most DIY-friendly flooring types, installs quickly, and produces a result that looks excellent for years. The common failure points are poor subfloor prep, missing expansion gaps, and misaligned first rows – all of which are preventable with good planning.
This guide covers a complete click-lock laminate installation from room prep and layout through the final row and transition strips, with specific tips for the cuts around door frames and obstacles that trip up most first-time installers.
What You’ll Need
Tools
- Miter saw or circular saw with fine-tooth blade (80 tooth or higher)
- Tapping block and pull bar (usually included in laminate installation kits)
- Rubber mallet
- Chalk line and tape measure
- 1/4-inch spacers (or coins) for expansion gap
- Jigsaw for notching around casings and obstacles
- Jamb/undercut saw for door casings
- Pencil and square
Materials
- Laminate flooring (add 10% waste to room square footage)
- Foam or combination underlayment with vapor barrier
- Transition strips (T-molding, reducer, end cap)
- Baseboards or quarter-round to cover expansion gaps
Step-by-Step Instructions
Step 1: Prep the Subfloor for Flatness
Laminate flooring requires a flat subfloor – 3/16 inch maximum variation over 10 feet. Use a long straightedge to find high spots and low spots. High spots in a concrete subfloor must be ground down with a concrete grinder. Low spots must be filled with floor-leveling compound mixed per instructions and allowed to cure before installation. Laminate planks are rigid; they bridge minor variations but will eventually crack at locking joints over significant humps or voids.
Step 2: Install Underlayment
Roll out underlayment perpendicular to the direction you’ll install the laminate, taping seams with the tape provided or with standard packing tape. If your underlayment doesn’t have an integrated vapor barrier, use a 6-mil poly film under the foam on concrete slabs. Do not overlap underlayment – butt the edges together. Do not double-layer underlayment – too much cushion makes the locking joints flex excessively and eventually causes them to open or crack.
Step 3: Plan the Layout
Determine the direction of your planks – typically parallel to the longest wall in the room, or parallel to the main light source. Calculate whether the last row will be a narrow sliver: if so, shift the starting position by cutting the first row narrower so both first and last rows are similar in width and both at least 2 inches wide. Snap a chalk line 1/4 inch from the starting wall as your straight reference. The first row runs along this line.
Step 4: Install the First Row
Place 1/4-inch spacers between the wall and your first plank. Lay the first row with the groove side facing the wall – this leaves the tongue exposed for the second row to click onto. Click the end joints of the first row together and use the tapping block and mallet to fully close them. Every end joint must be completely tight – no gaps, no raised edges. A crooked or gapped first row cannot be corrected later without pulling up the entire floor and starting over.
Step 5: Click Rows Together
Most click-lock laminate uses an angled-drop system: tilt the long edge of a new row’s first plank into the tongue of the previous row at approximately 20 to 30 degrees, then lower it flat – the locking profile clicks and snaps into place. Walk the plank into alignment and close the end joint with the pull bar and mallet. For stubborn joints, use the tapping block on the long edge to seat the full plank length – an incompletely locked joint creates a visible ridge and a weak spot.
Step 6: Stagger End Joints
End joints must be staggered a minimum of 8 to 12 inches between rows – check your manufacturer’s specification. Most installers start alternating rows with a half-plank or cut piece from the previous row’s end cut, which creates natural stagger and minimizes waste. Avoid creating an H-pattern where end joints from three or four rows align in two adjacent locations – this is the weakest joint configuration and looks unprofessional.
Step 7: Undercut Door Casings
Rather than cutting laminate to fit around door casings, undercut the casings to allow the laminate to slide under them. Lay a piece of scrap laminate on the subfloor next to the casing and use it as a height guide for your jamb saw or oscillating tool. Cut horizontally through the casing at this height so the laminate plank slides under it. The casing hides the joint and no transition piece is needed at doorways where the same flooring continues into the next room.
Step 8: Install Last Row and Transitions
Rip the final row to width (measure at multiple points – walls vary). Use a pull bar to click the final row into place since there’s no room to angle-drop it. Remove all spacers. Install T-molding transitions in doorways between two laminate surfaces at the same level, reducer strips where laminate meets lower surfaces (tile, carpet), and end caps where laminate meets a vertical surface. Install baseboards or quarter-round over the expansion gap, nailing only to the wall, not through the floor.
Pro Tips
- Mix planks from multiple boxes throughout installation to distribute any shade variation between boxes evenly across the floor.
- On concrete subfloors in basements, run the vapor barrier under the underlayment up the walls an inch before trimming – this prevents moisture from wicking in at the wall-floor junction.
- A fine-tooth blade (80+ teeth) produces cleaner cuts with less chip-out on the laminate surface – worth the extra cost of a quality blade.
- Cut laminate face-down on a circular saw (the blade cuts on the upstroke and can chip the top face) or face-up on a miter saw (blade cuts on the downstroke, cleaner on the top face). Know which direction your saw cuts from.
- For cutting around an angled wall or fireplace hearth, make a paper template of the shape and trace it onto the plank rather than trying to measure complex angles.
Frequently Asked Questions
Can laminate flooring be installed in a bathroom?
Standard laminate is not recommended for full bathrooms with a shower – it’s water-resistant but not waterproof, and prolonged exposure or standing water causes the core to swell and the surface to delaminate. Waterproof laminate (newer products with a completely sealed plastic core) is rated for bathrooms. Check the manufacturer’s water resistance rating before installing in wet areas.
How do I fix a damaged plank in the middle of the floor?
Laminate planks in a floating floor are interlocked, so you technically need to disassemble from the wall to reach a damaged plank. In practice, most people use a circular saw to cut out the damaged plank, carefully break out the pieces, and then insert a new plank glued in place – this non-floating repair works well and is much faster than disassembling an entire floor.
What causes laminate floors to buckle or gap?
Buckling is almost always caused by inadequate expansion gap at walls, around fixed objects, or under transitions. Laminate expands significantly with temperature and humidity changes – if it can’t expand, it buckles upward. Gapping occurs when the floor contracts in very low humidity and the gaps are larger than the locking profile can bridge. Both problems are solved by maintaining proper expansion gaps and keeping the room humidity between 35% and 55%.