Project Shopping List
Squeaky, bouncy stair treads are more than annoying – they’re a warning that the wood is worn, the fasteners have loosened, or the treads have cracked. Replacing old treads is a focused carpentry project that dramatically improves both safety and the look of your stairs without tearing out the entire staircase structure.
This guide covers replacing treads on an open-string staircase (the most common residential type) with solid hardwood. You’ll remove old treads, cut new ones to fit precisely, fasten them solidly, and eliminate all squeaks in the process. Budget a full weekend – the precision fitting takes time.
What You’ll Need
Tools
- Pry bar and hammer
- Circular saw and miter saw
- Table saw (for ripping to width if needed)
- Drill and countersink bit
- Jigsaw
- Random orbital sander
- Tape measure, combination square
- Stair gauge (optional but helpful)
Materials
- Stair tread blanks – 1-inch thick hardwood (oak is standard), 11-1/2 inches wide
- Construction adhesive (PL Premium or similar)
- 2-1/2-inch finish nails or screws
- Wood filler
- Sandpaper (80, 120, 180 grit)
- Stain and polyurethane to match existing treads (if applicable)
Step-by-Step Instructions
Step 1: Identify What Needs Replacing
Walk each step and apply downward and forward pressure. Mark any tread that flexes, cracks, or squeaks with tape. Note whether the squeak is at the front (nose), the back, or the sides – this tells you where the fastening has failed. Not every tread necessarily needs replacement; some may need only re-fastening from below through the riser.
Step 2: Remove the Old Treads
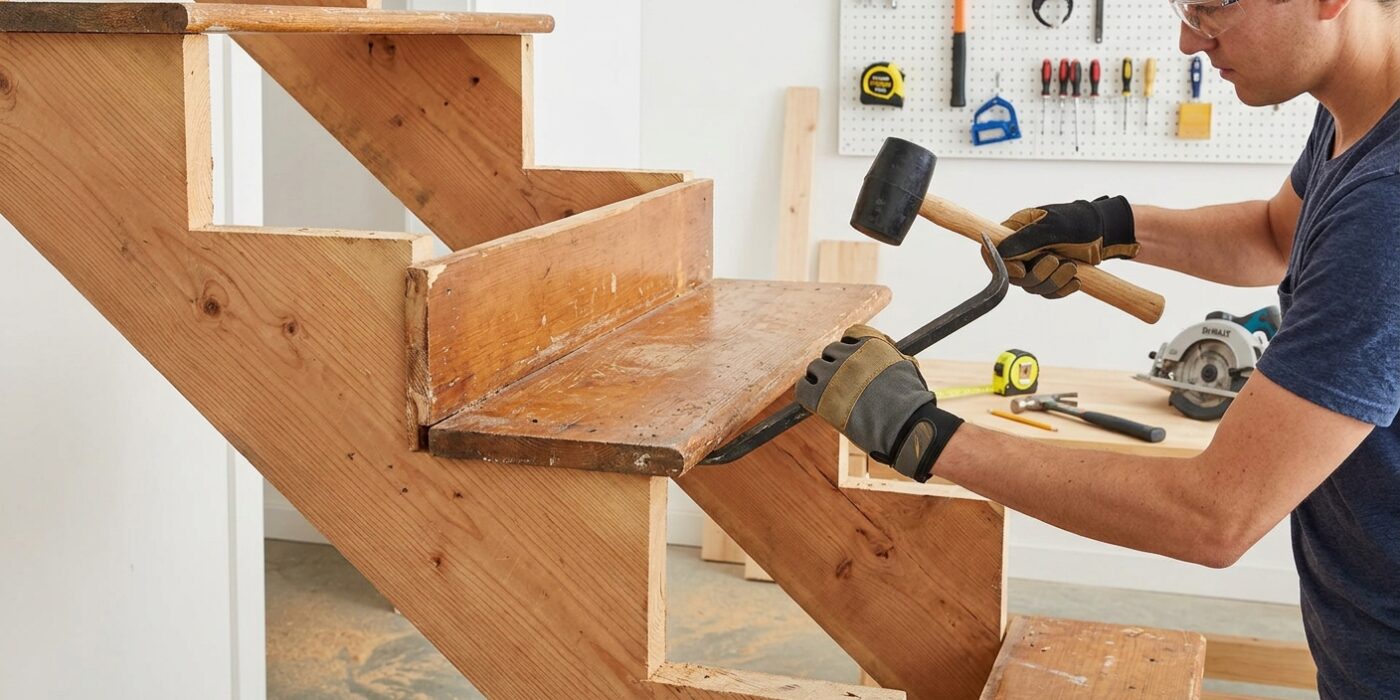
Score the caulk or paint joint between the tread and the riser with a utility knife before prying. Slide a flat pry bar under the tread nose and work slowly – old treads are often glued in addition to being nailed, and rushing causes damage to the riser below. If the tread won’t budge, drill through it at the nail locations and drive the nails deeper before prying. Remove all old nails and adhesive from the stringers.
Step 3: Measure Each Tread Individually
Never assume all treads are the same width or that the staircase is perfectly square. Measure each tread opening independently at front and back – if they differ by more than 1/8 inch, the staircase is out of parallel and you’ll need to scribe-cut treads to fit. Measure depth from the riser to the nosing line. Note any notches needed at the stringers on the sides.
Step 4: Cut Treads to Length and Notch for Stringers
Cut treads 1/8 inch shorter than the measured width – a tight fit in an out-of-plumb staircase can cause the tread to bind and pop. For open-string stairs where the tread extends over the side stringer, cut the return nosing so it wraps around and terminates at the face of the stringer. Notch the back corners to fit around the stringers using a jigsaw – dry-fit each tread before applying adhesive.
Step 5: Address the Substructure
Before installing new treads, check each riser and the stringers for damage or looseness. Squeaks from old stairs often come from the riser rubbing on the back of the tread. Glue and screw any loose risers from behind or from above through the substructure. Shim any low spots in the substructure so new treads will sit flat and solid.
Step 6: Apply Adhesive and Set the Tread
Run two beads of construction adhesive along the top of the riser and along the substructure ledge where the tread will sit. Set the tread in place and press down firmly. The adhesive does most of the long-term work here – nails just hold it while the glue cures. For added squeak prevention, apply a thin bead of adhesive at the back of the tread where it contacts the riser.
Step 7: Fasten the Tread
Nail or screw through the face of the tread into the riser at the front (two fasteners, evenly spaced) and through the back of the tread into the substructure. For a finished look, countersink screws and fill with wood filler. If using nails, drive them at a slight angle so they resist being pulled back out as the wood moves seasonally.
Step 8: Sand and Finish
Sand new treads through 80, 120, and 180 grit, feathering into any adjacent areas you need to blend. Vacuum and wipe with a tack cloth before applying stain. Test stain color on the underside of a tread cutoff before committing to the full staircase – new wood absorbs stain very differently than aged wood. Apply two to three coats of a durable polyurethane, sanding lightly with 220 grit between coats.
Pro Tips
- Most stair squeaks in older stairs come from the riser flexing against the back of the tread, not from the tread itself – adding construction adhesive at that joint solves 80% of squeak complaints without replacing anything.
- Buy treads 1 inch longer than needed – it’s easier to trim to fit than to discover you cut too short.
- Pre-drill nail holes within 1 inch of the ends of treads to prevent splitting – hardwood will split without pre-drilling, especially in cold conditions.
- If matching existing stained treads, mix two stain colors to create a custom match – a single off-the-shelf color rarely matches perfectly.
Frequently Asked Questions
Do I have to replace the risers too?
Not necessarily. If the risers are solid and the paint or finish is in reasonable condition, you can paint them fresh after the new treads are installed. Replacing risers is more complex than treads because they’re sandwiched between treads – you’d need to remove treads above and below to access a riser properly.
Can I install new treads directly over old ones?
Yes, with caveats. Tread-over-tread installation raises the floor level at the top of the staircase, which can create a tripping hazard at the landing. It also doesn’t address any structural looseness in the old tread. That said, it’s a legitimate approach if the old treads are solid but just worn or stained. Use a 3/4-inch thick tread and ensure the nosing is properly returned.
My stairs squeak only in winter. Why?
Wood shrinks across the grain in low humidity winter conditions, opening small gaps at fastener points. The squeak is wood rubbing against a nail or adjacent wood through those gaps. The fix is injection of thin-set glue into the joint – carpenter’s glue with a syringe applicator – which fills the gap and stops the movement. Long term, maintaining indoor humidity above 35% reduces seasonal wood movement dramatically.