Project Shopping List
Mounting a TV on the wall is one of those projects that looks intimidating until you understand exactly what you’re actually attaching it to. Once you know how to find studs reliably, how to pick the right mount for your situation, and what the numbers mean on the spec sheet, the job itself is straightforward. This guide walks through the full process – planning, execution, and cable management – so you can do it right the first time without extra holes in the wall.
Budget about two to three hours for your first time, with most of that time spent on layout and planning rather than drilling. Have a helper available for the actual lift – this is not safely a one-person job once the TV is larger than 40 inches.
What You’ll Need
Tools
- Stud finder – Electronic models (around $20–$40) are more reliable than magnetic versions. The DeWalt and Zircon models are the most consistent for drywall up to 3/4″ thick.
- Drill – Any corded or cordless drill works. You’ll need a 1/8″ bit for pilot holes and a 5/16″ bit for toggle bolt openings if needed.
- Socket wrench or ratchet – For driving lag screws. A drill with a nut driver works, but a hand ratchet gives you more feel so you don’t overtighten.
- 4-foot level – A longer level is more accurate than a torpedo level across a wide mount. A laser level is even better if you have one.
- Tape measure
- Pencil – Not a pen. Pencil marks sand off cleanly if you overshoot.
- Helper – Mandatory for TVs larger than 40″. A 65″ TV can weigh 60–80 lbs and is awkward to control solo.
- Utility knife (optional but handy for trimming drywall paper around the mount area)
Materials
- TV wall mount kit (see Part 1 for how to choose the right type)
- 3″ lag screws – Usually included with the mount. If not, use 5/16″ × 3″ lag screws; they need to penetrate at least 1.5″ into the stud after passing through drywall and the mount plate.
- 3/8″ toggle bolts (snap-type or SnapToggle preferred) – Only needed if your stud spacing doesn’t line up with the mount. Rated for wall use, not ceiling – make sure the packaging specifies wall-mount shear load, not just pull-out load.
- Cable management channel – Surface-mount raceway in white or paintable. Wiremold brand fits standard gang boxes and looks the cleanest.
- In-wall cable kit (optional upgrade) – Passes HDMI and power through the wall cavity with code-compliant recessed faceplates. PowerBridge is the standard brand.
Step 1: Planning (Don’t Skip This)
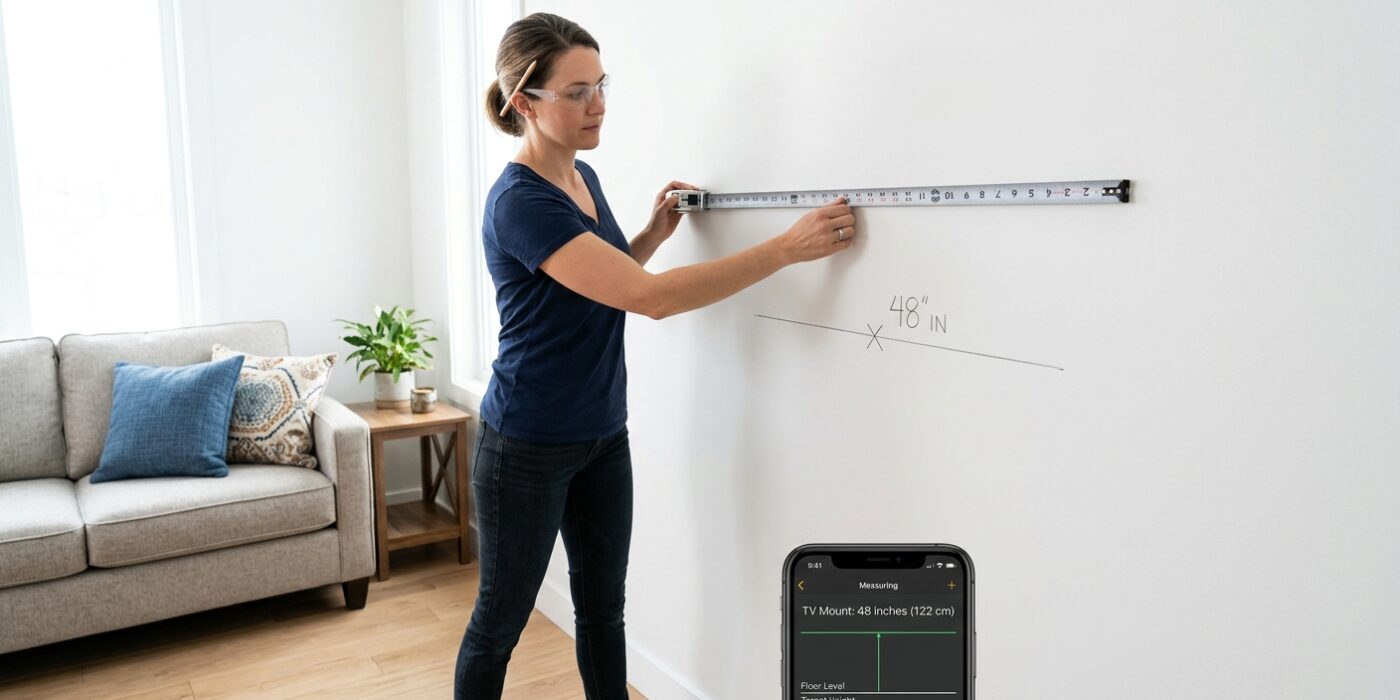
Most wall-mounting mistakes happen during planning, not execution. Spending 20 minutes with a tape measure and a pencil before you touch a drill saves you from the two worst outcomes: a mount that’s crooked, or a TV that’s 8 inches too high for comfortable viewing.
Step 1.1 – Choose Your Mount Type
There are three categories of TV mounts, and they’re not interchangeable for every situation:
Fixed (flat) mounts hold the TV parallel to the wall with no adjustment. They sit closest to the wall (often under 2 inches of clearance), look the cleanest, and are the most structurally stable. The trade-off: once it’s up, you can’t adjust the angle at all. Best for: a dedicated viewing wall where everyone sits directly in front of the TV at the same height.
Tilt mounts allow the screen to angle downward, typically 0 to 15 degrees. This is useful if you’re mounting above eye level – above a fireplace, on a high bedroom wall, or in a room where the seating is unusually low. A downward tilt reduces glare and neck strain when viewing from below. Best for: above-mantel installs and bedroom TVs where you’re watching from bed.
Full-motion (articulating) mounts extend from the wall on an arm and swivel left-right, tilt up-down, and rotate. They’re the most flexible and the most expensive – good full-motion mounts for large TVs run $80–$200. The arm also adds 4–18 inches of depth when extended. Best for: corner installations, open-plan rooms watched from multiple angles, or spaces where the TV needs to tuck against the wall when not in use.
One important warning about fireplace mounting: heat rises, and electronics don’t tolerate sustained heat well. TV manufacturers generally void warranties for overheating from improper installation. If you must mount above a fireplace, use a down-tilt mount so the screen faces the room, choose a TV model rated for higher ambient temperatures, and make sure the fireplace has a working damper that closes when not in use.
Step 1.2 – Find Your TV’s VESA Pattern
VESA (Video Electronics Standards Association) defines the bolt-hole pattern on the back of your TV – four threaded holes arranged in a rectangle, measured center-to-center in millimeters. The mount must support your TV’s VESA pattern, or the holes won’t line up.
Common VESA patterns by TV size:
- 32″–43″ TVs: typically 200×200 or 400×200
- 50″–55″ TVs: typically 400×300 or 400×400
- 65″–75″ TVs: typically 600×400 or 700×400
- 85″+ TVs: typically 800×400 or 900×600
To confirm your TV’s exact VESA pattern, look in your TV’s manual (it’s listed in the specifications section) or search the model number + “VESA” online. You can also measure directly: lay the TV face-down on a soft surface and measure the horizontal and vertical distance between the centers of the four mounting holes. That’s your VESA pattern.
Also note the bolt thread size and depth for your specific TV – usually M6 or M8 screws, 10–20mm deep. The mount kit includes bolts, but they’re often too long for thinner TVs. Thread the bolts in by hand before installing; if they bottom out before the bolt head reaches the bracket, you need shorter bolts. Bottoming out can crack the TV’s internal chassis.
Step 1.3 – Find the Right Location
Before choosing a wall, confirm two things: what’s behind the drywall, and where the power outlet is.
Check for hidden hazards: gas lines typically run in exterior walls or up through floors to ranges – not usually in interior walls, but worth checking. Plumbing runs vertically near kitchens and bathrooms. Electrical wiring runs everywhere. You won’t see any of these with a standard stud finder (advanced models with AC detection help). If you’re uncertain, a borescope camera (about $30 on Amazon) lets you drill a small inspection hole and look inside the wall cavity before committing to the full install.
Power location matters a lot. The TV needs to plug in somewhere, and a power cord dangling down the wall defeats the purpose of a clean mount. Ideally, there’s an outlet directly behind where the TV will sit. If not, your cable management options are: a surface raceway down to the nearest outlet, an in-wall power kit that adds a recessed outlet behind the TV, or having an electrician add an outlet – usually a 1–2 hour job, $100–$300 depending on your market.
Step 1.4 – Determine the Ideal Viewing Height
The goal is to have the center of the TV screen at approximately seated eye level. For most adults seated on a standard couch, that’s 42–48 inches from the floor. For bar-height seating, aim for 54–60 inches to center. For a bedroom TV watched from a reclined position, lower is better – around 36–40 inches to center.
Here’s how to calculate where the mount’s wall plate goes: measure the TV’s total height, halve it to get the distance from the bottom edge to the center, then add that to your desired center height. That gives you the center height. The mount’s wall plate center is usually 2–4 inches above the TV’s center (because the TV hangs down from the bracket), so add that offset to get your wall plate height. Mark this on the wall.
Example: 55″ TV, 31″ tall. Desired center height: 45″. TV center to plate offset: 3″. Wall plate center height: 48″. Mark 48″ on the wall.
Step 2: Finding the Studs
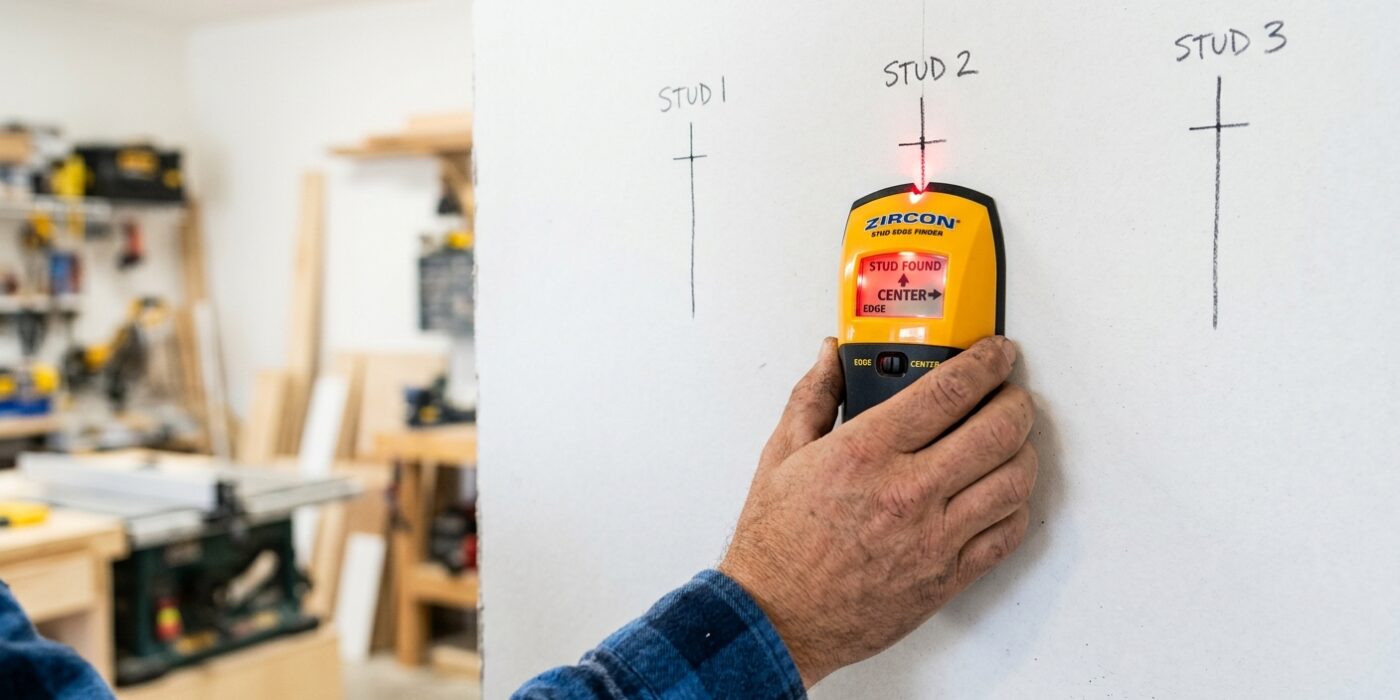
This is the step most people rush, and it’s where most mounting failures start. A TV mount is only as strong as its connection to the framing – drywall alone will not hold a large TV safely.
Step 2.1 – Use a Stud Finder Correctly
Hold the stud finder flat against the wall and calibrate it first (most models require you to press a button while the device is on open drywall, away from any stud). Drag it slowly – 2–3 inches per second – from left to right. Mark both edges of each stud, not just the first indication. The stud is 1.5″ wide, and the center of the stud is what you want to hit with your screw. Mark the center with a pencil.
Run two horizontal passes at slightly different heights and compare the results. Stud finders can give false positives from backing blocks, pipes, or electrical cables. If both passes agree on the location, you’ve found the stud.
Step 2.2 – Verify with a Nail Test
Drive a finish nail or thin screw at your marked stud center. It should hit resistance at about 1/2″–5/8″ (the drywall thickness) and stop when it meets solid wood. If it goes in easily all the way – you’re in a wall cavity and the stud is nearby but not where you marked. Move 3/4″ left or right and try again. This costs you a 1/16″ hole you can fill with spackle, but it confirms your location before you commit to lag screws.
Step 2.3 – Map the Stud Layout
Mark all studs in your mounting area. Standard framing is 16″ on center – once you find one stud, measure 16″ left and right to find the neighbors. Older homes may use 24″ on center. Corner framing, doorways, and window surrounds often have extra studs at non-standard spacing.
Hold the mount’s wall plate up at your target height and see how the plate’s mounting holes align with your stud marks. Most mount plates are designed to span two studs at 16″ spacing. If they don’t line up, see the troubleshooting section below.
Step 3: Mounting the Wall Plate
Step 3.1 – Mark Your Drill Points
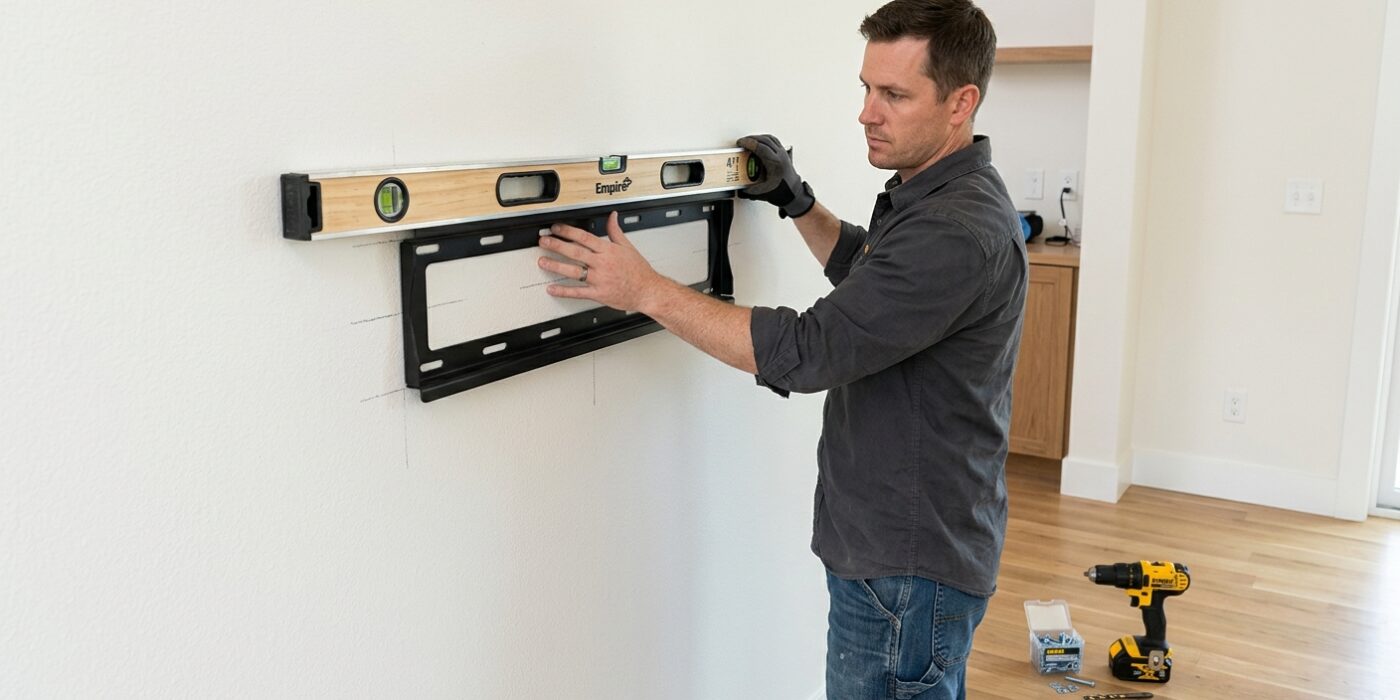
Hold the wall plate at your target height with a helper, or tape it temporarily to the wall. Use a level to make sure it’s perfectly horizontal – tilt the plate 3–4 degrees and it’ll be visible once the TV is hanging. Mark through each mounting hole with a pencil. Remove the plate and double-check that your pencil marks are on the stud centers you confirmed in Step 2.2.
Step 3.2 – Drill Pilot Holes
Drill a 1/8″ pilot hole at each mark. The pilot hole serves two purposes: it confirms you’re in solid wood (you’ll feel the resistance difference immediately versus drywall), and it prevents the lag screw from splitting the stud as it threads in.
Drill perpendicular to the wall – not angled. An angled screw has less shear strength and can work its way loose over years of thermal expansion and contraction. Drill to a depth of about 2.5″ (the lag screw needs at least 1.5″ of thread in solid wood; your drywall takes up 1/2″–5/8″).
If you hit solid resistance immediately and consistently, you’re in stud. If the bit breaks through to air partway in, you’re in a wall cavity – the stud shifted. Patch the hole, recheck your stud location, and try again.
Step 3.3 – Mount the Wall Plate
Hold the plate in position with the pilot holes aligned. Thread each lag screw through the plate and into the pilot hole by hand until it’s snug. Then tighten with a socket wrench – 3/8″ drive or 1/2″ drive depending on your lag screw head size. Tighten until the plate is pulled firmly against the wall, but stop before the plate starts to deform or the screw head strips. The goal is the plate being solid with zero movement, not maximum torque.
Check level one final time before the screws are fully tight. You can still make small adjustments with the plate slightly loose. Once you’re satisfied, snug everything down.
Give the mounted plate a firm shake in all directions. It should feel completely immovable. If you feel any flex or the plate lifts slightly off the wall under upward force, the screws aren’t fully seated or missed the stud center. Do not hang the TV on a plate that isn’t completely solid.
Step 4: Preparing the TV
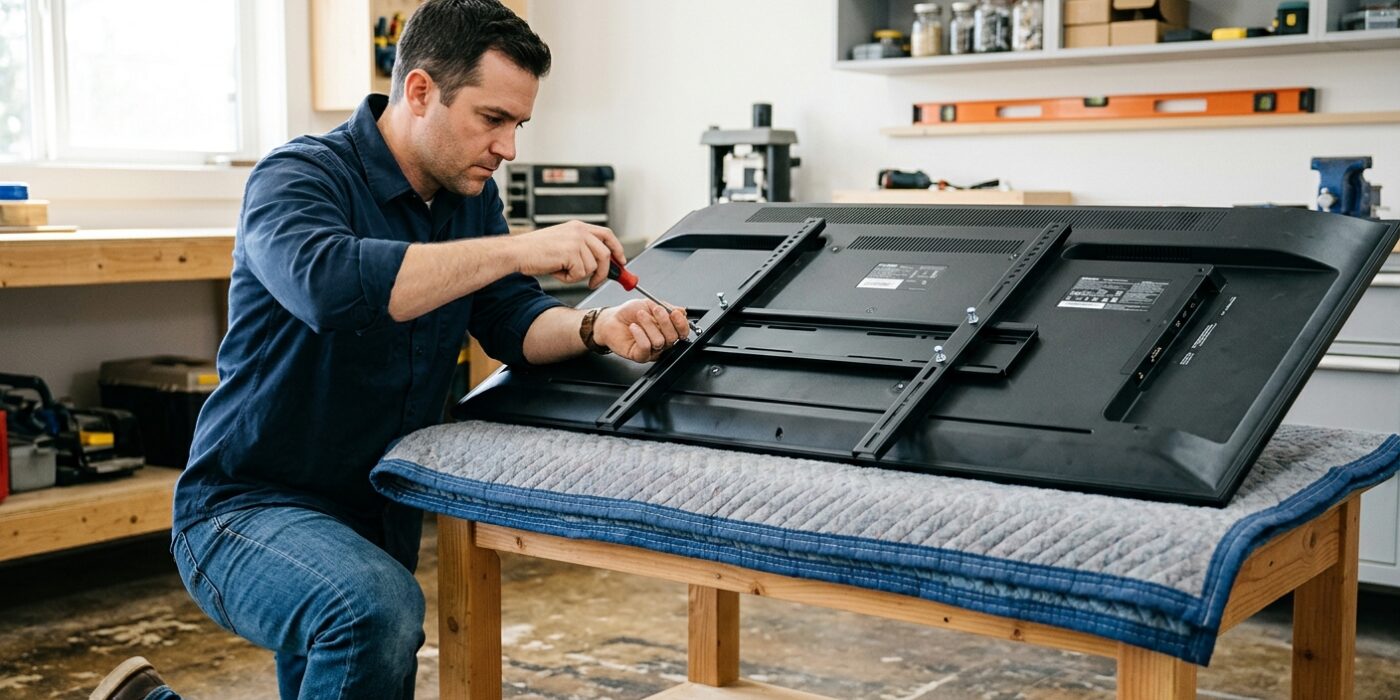
Step 4.1 – Attach the Mounting Arms to the TV
Lay the TV face-down on a padded surface – the foam it shipped in is ideal, or a folded moving blanket on a low table. Never lay a TV on bare floor or a hard surface; the glass panel isn’t as rigid as it looks and can flex and crack under its own weight.
Identify which arm bracket goes on which side – most mounts are asymmetric, with left and right pieces that only fit one orientation. Check the included instructions for the diagram before picking up the bolts.
Thread the bolts through the arm bracket holes and into the TV’s VESA bolt holes. Hand-tighten first to confirm all four bolts engage cleanly. If a bolt spins without catching, the hole is likely stripped or you have the wrong thread pitch – check the TV manual for bolt specifications. Once all four are hand-tight, snug them down with a screwdriver or hex key. Do not use a power drill on these; plastic TV chassis can crack if the bolts are overtorqued. Firm hand-tight is sufficient.
Step 4.2 – Plan Your Cables Before Lifting
This is the step most people skip and then regret. Once the TV is on the wall, routing cables behind it is awkward. Before the lift, decide: which cables will you route where? Run your HDMI and power cables through any cable management you’ve planned, leaving slack on both ends. Connect the cables to the TV while it’s still face-down on the table – it’s much easier than reaching behind a mounted screen.
Step 5: Hanging the TV
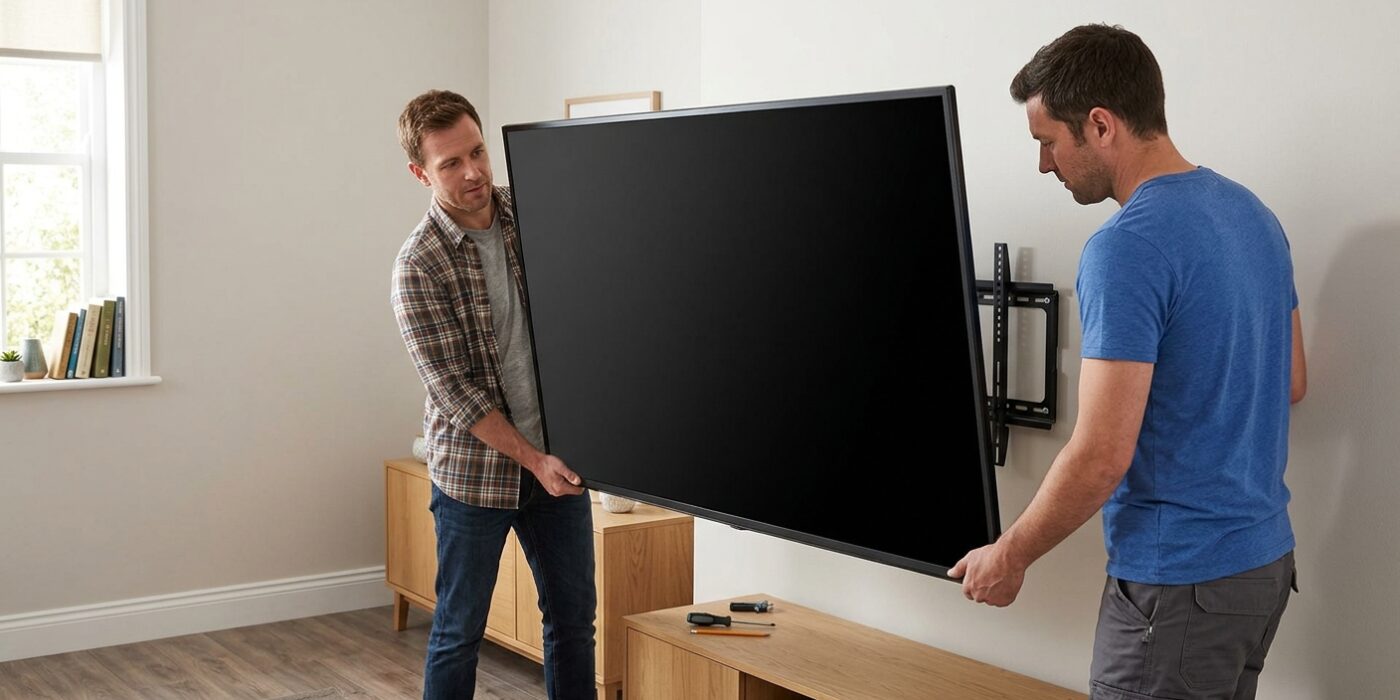
Step 5.1 – The Two-Person Lift
Position one person on each side of the TV. Lift from the bottom corners – never the top or sides, and never grip the screen surface. Approach the wall with the TV held slightly above the wall plate. One person holds the TV; the other guides the arm hooks onto the wall plate’s receiver rail or hooks.
Most mounts use a hook-and-receiver design: the TV-side arm has hooks or pins that drop into a rail or slots on the wall plate. Lower the TV slowly until the hooks seat fully into the receiver. You’ll typically feel a click or a definite drop into position. Do not let go until both of you are confident it’s seated.
Step 5.2 – Lock the Mount and Verify
Most mounts include a safety screw or locking tab that prevents the TV from lifting off the wall plate accidentally. Locate and engage this lock now – it’s usually a small thumbscrew in the bottom or side of the bracket. This safety feature is not optional: without it, a bump or an earthquake tremor can unhook the TV from the plate.
Give the TV a firm but controlled push upward and toward the wall. It should not budge or rattle. If it feels loose, the hooks aren’t fully seated – lift the TV slightly, re-seat, and try again.
Step 5.3 – Set Tilt or Swivel Adjustments
For tilt mounts: loosen the tilt adjustment bolts, angle the TV to where you want it, then retighten. Have someone sit in the main viewing position and direct the angle before you lock it – what looks level while standing rarely looks right from the couch.
For full-motion mounts: the arm pivot tension is usually adjustable. Set it so the arm holds position without drifting but doesn’t require muscle to move. There’s typically a set screw on the pivot joint; tighten it until the arm stays where you put it.
Step 6: Cable Management
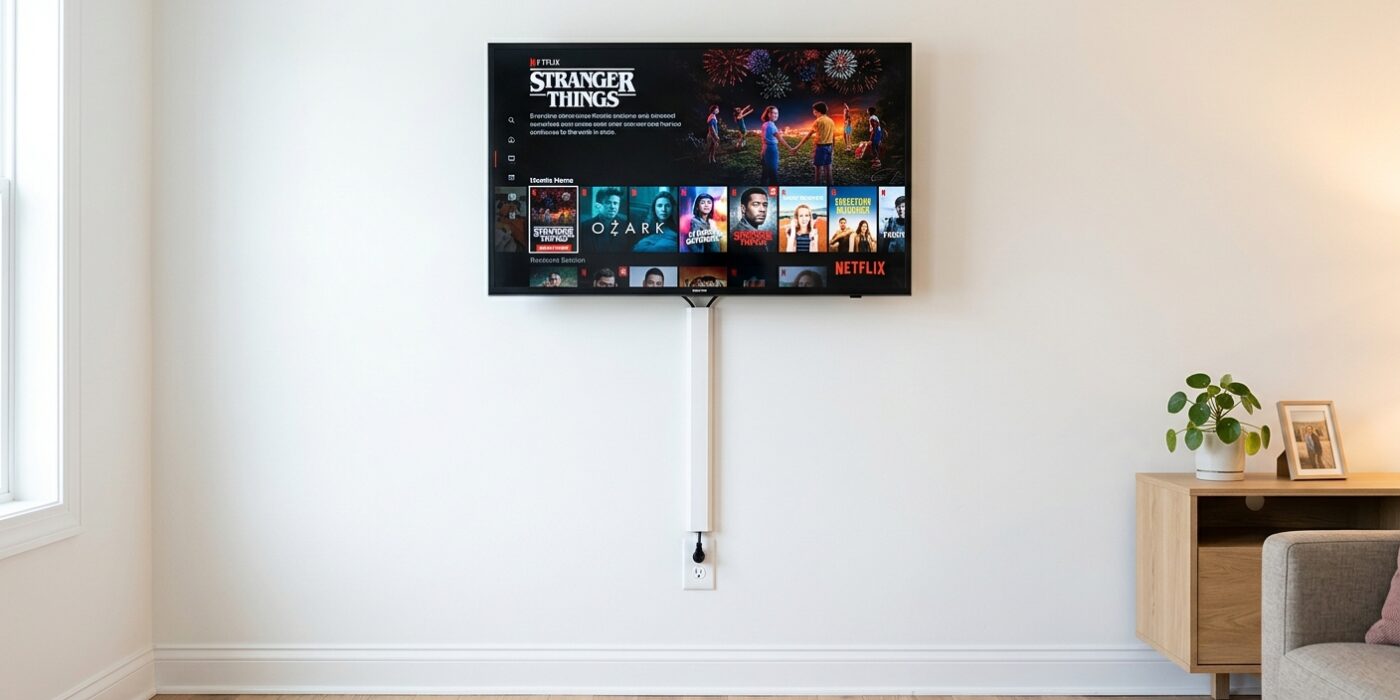
The goal is no visible cables hanging down the wall. You have three good options depending on your situation and budget.
Option A – Surface Cable Channel (Simplest, $15–$30)
Flat plastic raceways that mount to the wall surface and hide cables inside. Wiremold and similar brands make paintable versions that nearly disappear on a painted wall. The install is: peel and stick or use included screws to mount the base, route cables inside, snap the cover on. To paint: tape off after installation, prime, paint with a small roller to match the wall.
Route the channel along the wall edge or in a corner where it’s least visible. Go straight down to the outlet, not at an angle – angled channels look improvised.
Option B – In-Wall Cable Kit (Cleanest DIY Option, $30–$60)
These kits (PowerBridge One is the most popular) add two drywall recessed boxes – one behind the TV and one near the outlet – connected through the wall cavity. The TV-side box holds your HDMI and other signal cables; the outlet-side box accepts the power cable. The power cable runs through the wall from a recessed outlet, eliminating the surface-mounted power cord entirely.
Installation requires cutting two drywall openings (the kit includes a template), fishing the included cables through the wall, and snapping the faceplates into place. Total time is about 30–45 minutes with no new wiring – these kits use a pass-through power cable that plugs into your existing outlet, so no electrician is required. However: some local codes consider any power cable in a wall cavity to require conduit or a permanent outlet. Check your local code or call your municipality’s building department before using a pass-through kit if you’re planning to sell your home.
Option C – Recessed Outlet Behind TV (Cleanest Possible, Requires Electrician)
An electrician adds a new outlet in the wall stud bay directly behind the TV. All cables – power and signal – disappear into the wall through the TV mount’s backplate. This is the only truly code-compliant solution for in-wall power in most jurisdictions. Budget $100–$300 for an electrician depending on access and your local market. Worth it if you’re doing a home theater or high-end living room install where the finish really matters.
Troubleshooting
The studs don’t line up with the mount holes
You have two options. First, check if your mount has alternate hole positions – many mounts have multiple bolt positions to accommodate different stud spacings. Second, use SnapToggle or WingIts-brand toggle bolts rated for the TV’s weight. Standard drywall toggle bolts are not adequate – use only toggles with a published shear-load rating that exceeds the mount weight plus the TV weight with a safety margin of at least 2×.
The plate won’t sit flush against the wall
The drywall texture (orange peel, knockdown) may be creating a gap. You can mount through it – the screws will pull the plate flush as you tighten. If there’s a significant texture ridge, use a wide washer under each lag screw head to spread the load. Do not try to grind or sand the wall texture under the mount – it’ll leave a visible flat spot.
The TV looks level but feels wrong
Check the TV’s bezel, not the wall plate. Some TVs have slightly asymmetric bezels from the factory. Level the screen content (most smart TVs have a test pattern or grid you can display) rather than the bezel edge.
The mount feels slightly loose after a few months
Wood studs dry slightly over time, especially in new construction. Snug the lag screws down a quarter-turn. If the lag screws continue to feel loose, the screw holes may have stripped – fill with epoxy wood consolidant, let cure 24 hours, then re-drive the screws.
Safety Checklist Before You’re Done
- Both lag screws are tight and the plate does not flex when shaken
- The TV-side brackets are snug to the TV back (no rattle)
- The safety lock screw or tab is engaged on the wall plate
- All cable connections are secure and the cable management is clipped in place
- The power cable is not kinked or pinched behind the TV
- The mount weight rating (marked on the box) is higher than your TV’s actual weight
A TV that falls off the wall is a significant injury risk and an expensive insurance claim. This checklist takes 2 minutes and is worth doing every time.
Frequently Asked Questions
Can I mount a TV on a plaster wall?
Yes, but plaster over wood lath requires slightly different technique. Use longer pilot bits (plaster is typically 7/8″–1″ thick vs. drywall’s 1/2″). Drive screws slowly – plaster cracks under vibration from a hammer drill. Use a standard drill bit, not a masonry bit, since you’re going through plaster into wood lath or wood studs.
How much weight can a stud hold?
A single 2×4 stud with a properly installed 3″ lag screw can support well over 200 lbs of shear load. A TV on a wall mount is primarily a shear load (weight pulling down along the wall surface), not a pull-out load. Two properly installed lag screws in two studs will hold any consumer TV sold today with enormous margin to spare. The weak point is almost always incorrect installation, not stud capacity.
Can I mount a TV on a load-bearing wall?
Yes. Load-bearing walls are structurally the same as non-load-bearing walls from the perspective of mounting a TV – you’re going into studs, which are present in both. The term “load-bearing” refers to vertical load the wall carries from above, not its horizontal surface strength.
My TV is on an exterior wall. Is that a problem?
Exterior walls have insulation in the cavities, which makes running in-wall cables slightly harder (you’ll need a fish tape to push through the insulation). Exterior walls in cold climates can also have condensation issues if cables penetrate the vapor barrier – this is a minor concern in most residential situations but worth noting.
How often should I check the mount?
Once a year is sufficient for most installs. Give the lag screws a quarter-turn snug-down each spring. If you live in an earthquake zone, check after any significant tremor.
What to Do Next
With the TV mounted, the room probably feels different – better, but with some loose ends. The most common next project after a TV mount is upgrading the sound. A soundbar mounts cleanly below or above the TV using the same stud-finding and level skills you just practiced. If you want a more finished look, adding a recessed shelf or media console below creates a full built-in feel.
If this was your first time working with drywall and studs, you now have the foundational skills for a lot of other home projects – picture galleries, shelving, and bathroom accessories all use the same stud-finding and fastening approach.