Project Shopping List
Dovetail joints cut by hand are the benchmark of traditional woodworking skill — they look beautiful, lock together mechanically without need for any fastener, and cannot be pulled apart in the direction of load. Learning to cut them by hand develops your eye, your saw control, and your understanding of wood grain in ways that jig-cut dovetails never do.
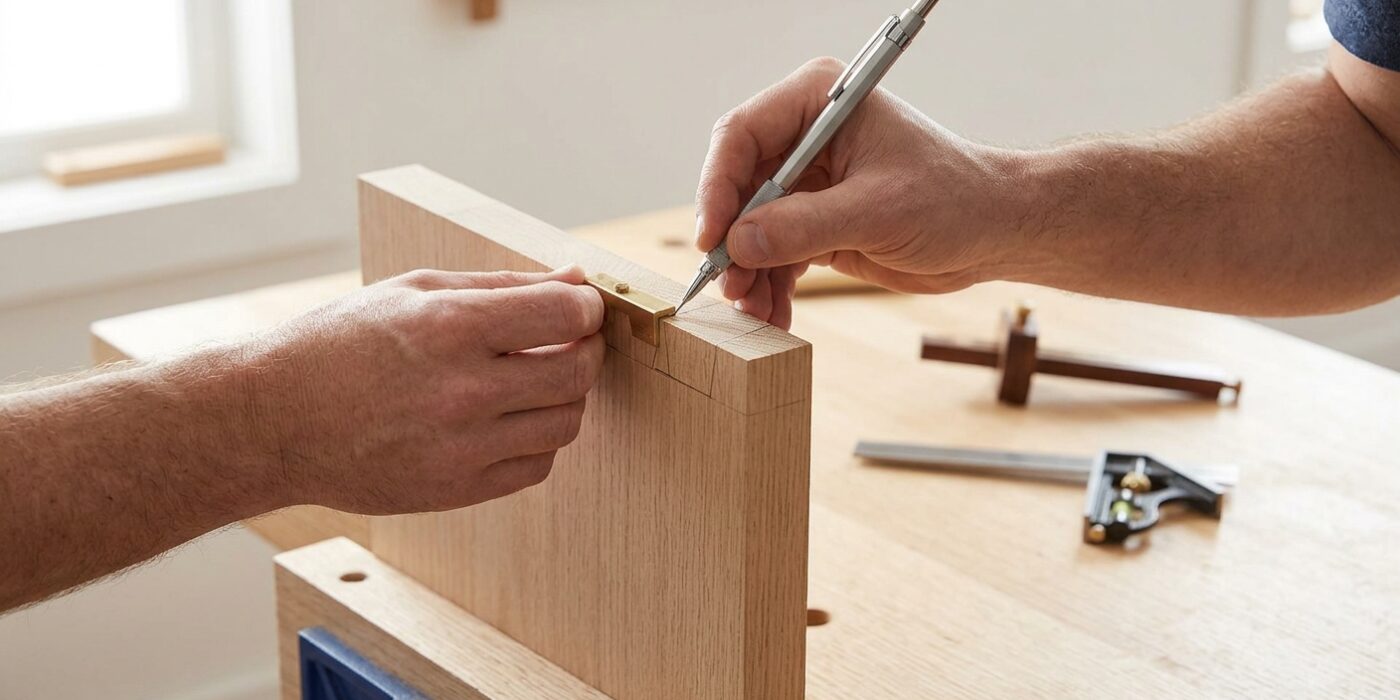
This guide covers the complete process: laying out pins and tails with a marking gauge and dovetail marker, sawing to the line on both halves, chopping the waste with a chisel, and fitting the joint. The first joint will take two hours. By the tenth, you will cut one in twenty minutes. That compression of time is what the practice is for.
What You Need
Tools
- Dovetail saw (thin-kerf, fine-tooth back saw)
- Coping saw (for removing waste between tails)
- Chisels — 1/4, 1/2, and 3/4 inch, sharp
- Marking gauge (wheel type preferred)
- Sliding bevel or dovetail marker set to your ratio
- Mallet
- Bench vise
Materials
- Hardwood stock (oak, cherry, or walnut) — flat, straight-grained, at least 3/4 inch thick
- Pencil and marking knife
- Scrap wood for practice
Steps
Step 1: Understand the Anatomy
A dovetail joint has two parts: the tails (the fan-shaped projections on one board) and the pins (the corresponding narrow projections on the mating board). The tails are always cut first — their shape determines the layout of the pins. The joint is cut in hardwood at a 1:8 ratio for the angle (1 unit of rise for every 8 units of run) and 1:6 for softer woods. A steeper angle looks dramatic but is weaker.
Step 2: Set Your Marking Gauge
Set the marking gauge to exactly the thickness of the tail board. Score a baseline on all four faces at each end of both boards. This baseline is critical — it marks the shoulder of the joint where the wood surfaces meet when assembled. All your chisel work and saw cuts are aimed at stopping precisely at this line.
Step 3: Lay Out the Tails
Mark the tail layout on the end grain of the tail board. Standard spacing: half-pins at each edge, with full tails evenly spaced between. For a 3-inch board, three tails with half-pins at each edge is typical. Mark each tail angle using your sliding bevel. Number the tails and the spaces between them before cutting — it is easy to confuse which waste to remove.
Step 4: Saw the Tails
Clamp the board at a slight angle in the vise so the angled tail lines appear vertical — this lets you cut on a vertical stroke, which is easier to control. Saw on the waste side of each line (just barely touching the line, not erasing it). Cut all the left-leaning lines, then reposition and cut all right-leaning lines. Saw down to but not past the baseline.
Step 5: Remove Waste Between Tails
Use a coping saw to remove the bulk of waste between tails, cutting close to but not at the baseline. Then use a sharp chisel to pare back to the line. Work from both faces toward the center — never chop all the way through from one face, which causes the wood to split and tear on the exit side. Work in multiple light passes rather than trying to chop to the line in one stroke.
Step 6: Mark the Pins from the Tails
This is the most critical step. Hold the completed tail board at exactly 90 degrees above the pin board (the end grain of the pin board faces up). Position the tails precisely at the edge of the pin board face and use a sharp knife to mark around each tail. These marks are the exact pin layout derived from the actual cut tails — no measuring required and no error from transferring dimensions.
Step 7: Saw and Chop the Pins
Square the knife lines down the face of the pin board with a try square. Saw the pin cheeks (the angled faces between pins) on the waste side of each line. Remove waste between pins with a coping saw and chisels, same technique as for the tails. The inside faces of pins and the spaces between them must be perfectly vertical — any lean will prevent the joint from assembling.
Step 8: Test Fit and Adjust
Dry-assemble the joint by pressing tails into pins by hand — do not force it with a mallet yet. It should slide most of the way together with hand pressure before needing a light mallet tap for the final fraction. If it is too tight, identify the binding point by looking for shiny spots on the joint faces (these are the high points). Pare those spots with a chisel until the joint slides. A joint that goes together with hand pressure is a perfect fit.
Pro Tips
- Chisel sharpness is not optional — a sharp chisel makes clean, controlled cuts; a dull chisel tears and wanders, making a tight joint impossible. Sharpen to at least 8000 grit before starting.
- Cut your saw kerfs on the waste side of the line. “Killing the line” (cutting it away) leaves the joint too loose. “Leaving the line” (leaving it visible) leaves it too tight. Aim to split the line with the saw kerf.
- Use a magnifying glass to see the marking knife line clearly — especially on end grain where the lines can be difficult to see in standard lighting.
- Practice on cheap softwood first. Pine is forgiving enough to develop the feel for saw control and chisel paring without wasting expensive hardwood on learning joints.
FAQ
What is the dovetail ratio and why does it matter?
The ratio describes the angle of the dovetail sides. A 1:8 ratio (about 7 degrees) is standard for hardwoods — it provides good mechanical interlocking without the angle being so steep that the short-grain at the tail tips becomes fragile. Steeper ratios (1:5 or 1:6) look more dramatic but are physically weaker and are used in softwoods where the extra material compensates for the lower wood density.
How do I know if my chisel work is square?
Check frequently with a small engineer’s square held against the flat of the chisel and the wood surface. The chisel face must be perpendicular to the board face throughout the chopping process. Any lean left or right creates a pin or tail wall that is not vertical, causing the joint to bind or not seat properly when assembled. Frequent checking during the work is much faster than discovering the problem after.
My dovetail joint is too loose after fitting. Can I fix it?
A joint that is sloppy cannot be tightened by adding material — the only fix is to start over. Prevention is better: saw cautiously and test frequently. If a joint is just barely loose (less than 1/16-inch gap), a thickened glue (with fine sawdust mixed in) will fill small gaps acceptably when the joint is assembled. Larger gaps require remaking the joint.