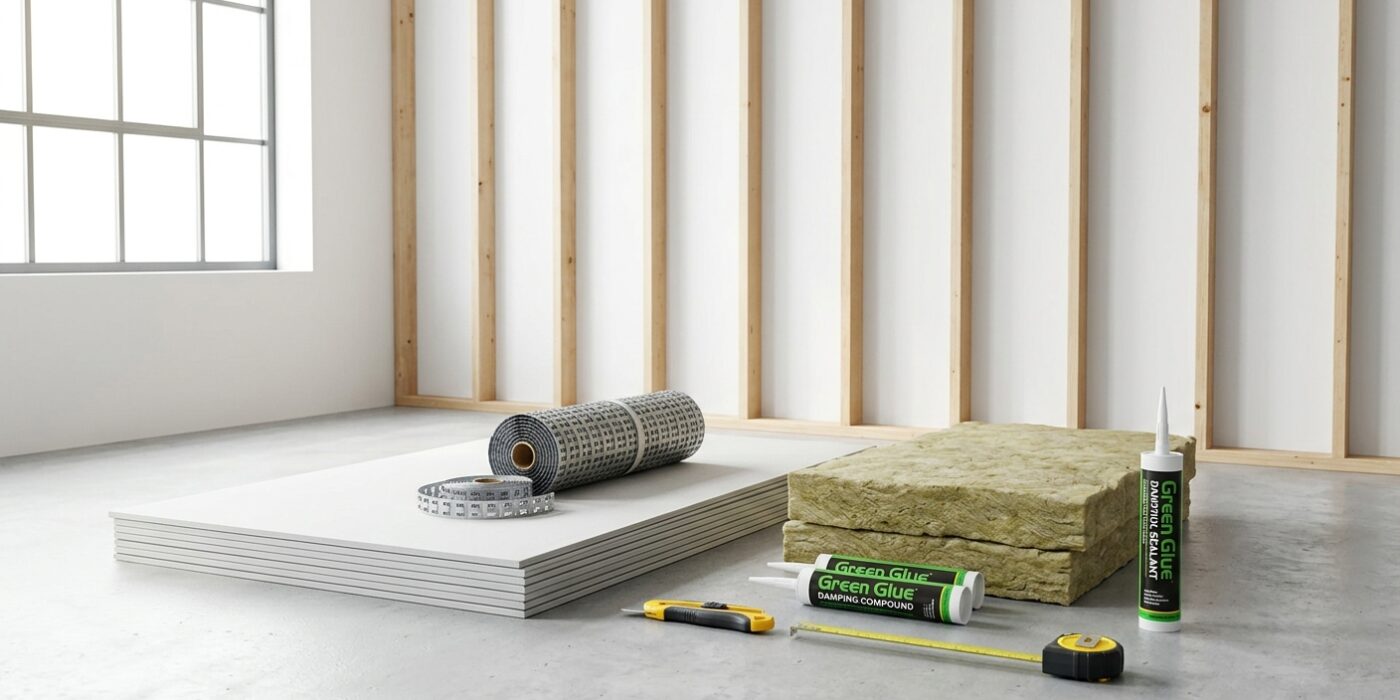
Project Shopping List
Perfect soundproofing is the domain of professional acoustic engineers with construction budgets to match. But meaningful noise reduction in a standard interior wall is absolutely achievable with DIY techniques and materials. Whether you are dealing with a loud HVAC closet, a home theater, a bedroom adjacent to a busy hallway, or a home office that needs quiet, the principles are the same: add mass, decouple the framing, and seal all air paths. Sound travels through walls in two ways – as vibration through the structure (structure-borne) and as airborne sound that leaks through any gap. This guide addresses both.
What You’ll Need
Tools
- Drill and driver
- Utility knife and drywall saw
- Caulk gun
- Staple gun
- Level and stud finder
Materials
- Acoustic caulk (non-hardening sealant)
- Resilient channel (RC-1 or RC-2)
- Sound-dampening compound (such as Green Glue)
- Mass-loaded vinyl (MLV)
- Mineral wool or acoustic insulation (Rockwool or equivalent)
- 5/8-inch Type X or double-layer 1/2-inch drywall
- Electrical box putty pads
Step 1: Address Air Gaps First
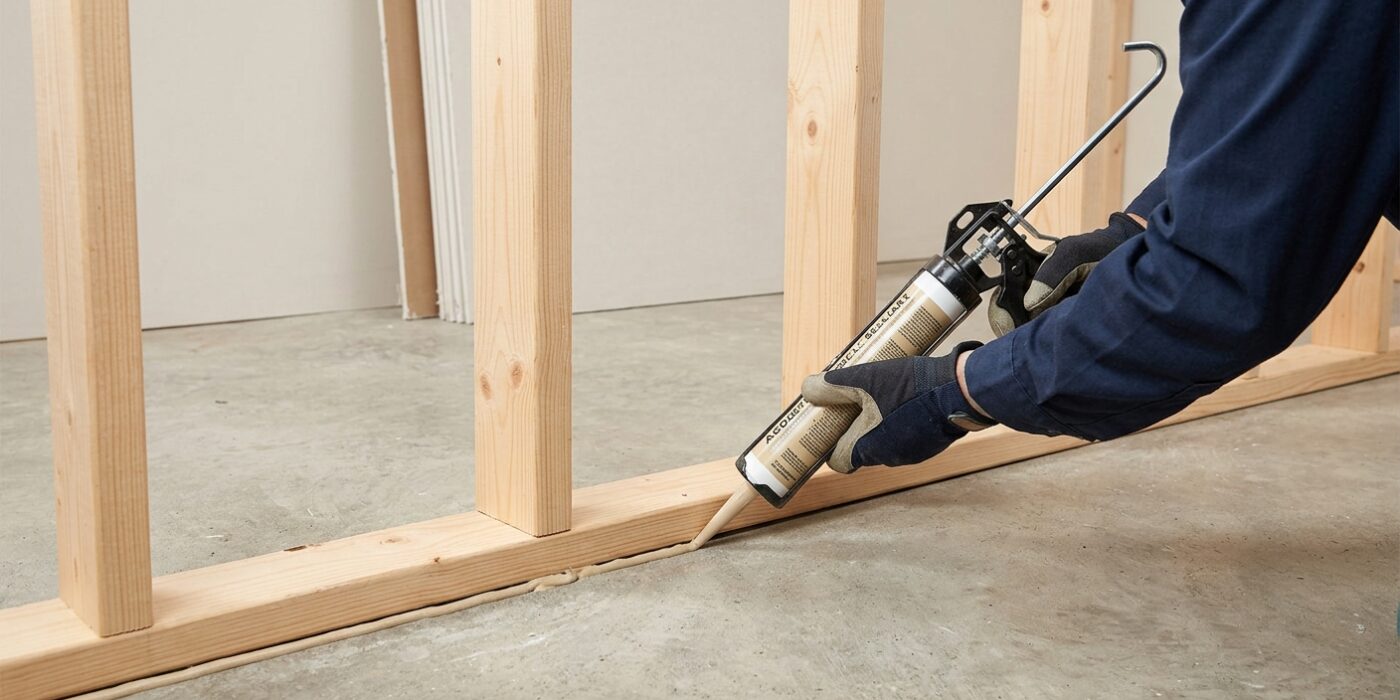
Think of sound like water: if air can get through a gap, sound will follow. Even a tiny opening under a door or around an electrical outlet can ruin your soundproofing efforts because sound waves are experts at leaking through small spaces. Before you spend money on expensive insulation, you must seal these air pathways.
Inspect your room carefully. Use an acoustic caulk, which is specially formulated to stay flexible rather than hardening into a brittle seal that cracks when your home naturally shifts. Apply the caulk in a steady, continuous bead – about 1/4 inch thick – anywhere two materials meet. Pay close attention to the perimeter where walls meet the ceiling and floor, and use fire-rated putty pads on the backside of electrical boxes to block sound from traveling through the wall cavity. If you have pipes entering the room, seal the gaps around them thoroughly to ensure the barrier is completely airtight.
Beginner Tip: Don’t overfill the gaps. Many beginners try to pack as much caulk as possible into a space, which creates a messy, uneven finish that is difficult to paint over. Use a light, consistent pressure on your caulk gun and smooth the bead with a damp finger to create a clean, professional seal.
Pro Tip: Before applying your sealant, clean the area with a vacuum or a dry cloth to remove dust and debris. If the surface is dusty, the caulk won’t adhere properly, which will cause it to peel away over time and defeat the purpose of your hard work.
Step 2: Add Acoustic Insulation
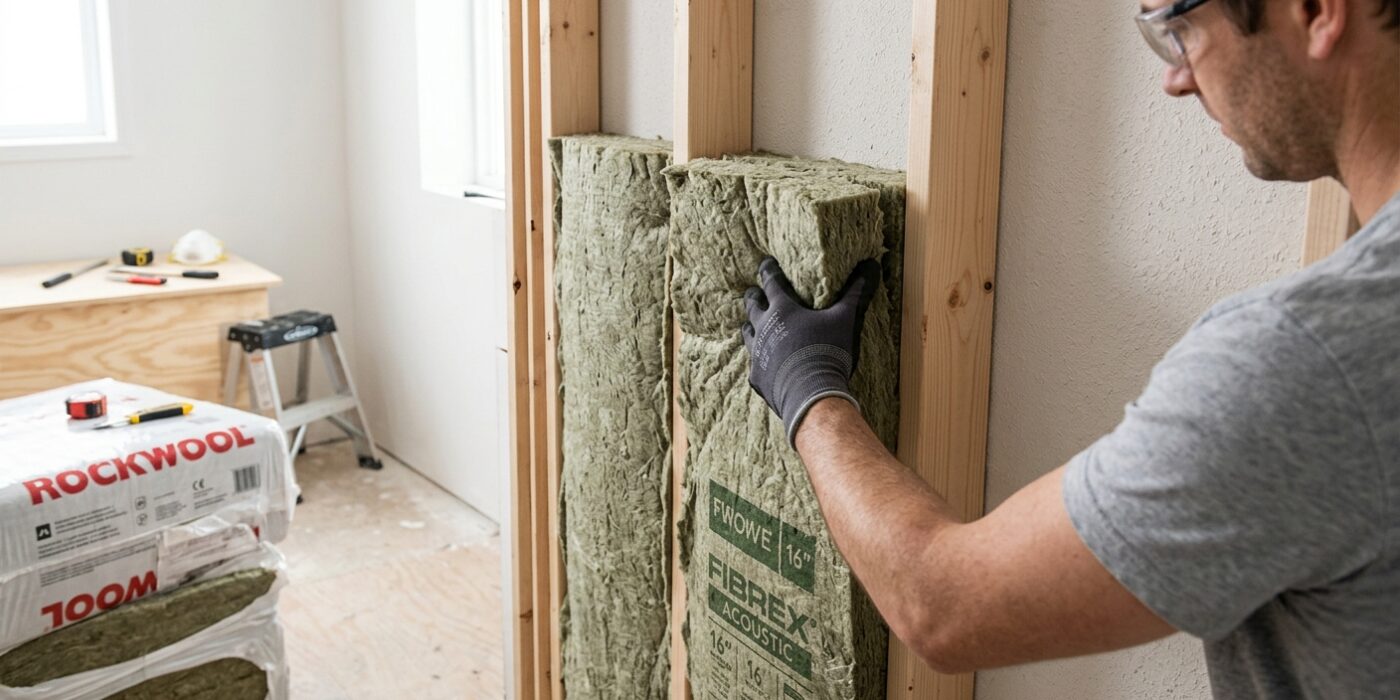
Now that your wall is open, it is time to fill that empty space. Sound waves love to bounce around inside hollow wall cavities, which acts like an amplifier for noise. By filling these gaps with mineral wool insulation, such as Rockwool or Roxul, you are creating a dense barrier that traps sound energy and converts it into tiny amounts of heat. Mineral wool is denser than standard fiberglass, meaning it performs significantly better at blocking the mid-range frequencies found in human voices and television audio.
To begin, measure the width between your wall studs. Most standard studs are spaced 16 or 24 inches apart. Use a sharp utility knife to cut the insulation batts about half an inch wider than the cavity width. This ensures a snug friction-fit, holding the insulation firmly in place without the need for staples or adhesive. Simply push the material into the cavity, ensuring it fits flush against the back of the drywall. Aim for a seamless fit; gaps around the edges are where sound will try to leak through.
Beginner Tip: Avoid compressing or squishing the insulation to make it fit. Insulation works by trapping millions of tiny air pockets within its fibers. When you crush it, you destroy those pockets and significantly reduce its sound-dampening performance. If a piece is too wide, trim it down rather than folding it.
Pro Tip: Use a long, serrated bread knife instead of a standard utility knife to cut the mineral wool. The saw-like teeth glide through the dense fibers effortlessly, giving you a clean, straight edge every time.
Step 3: Decouple the Wall with Resilient Channel
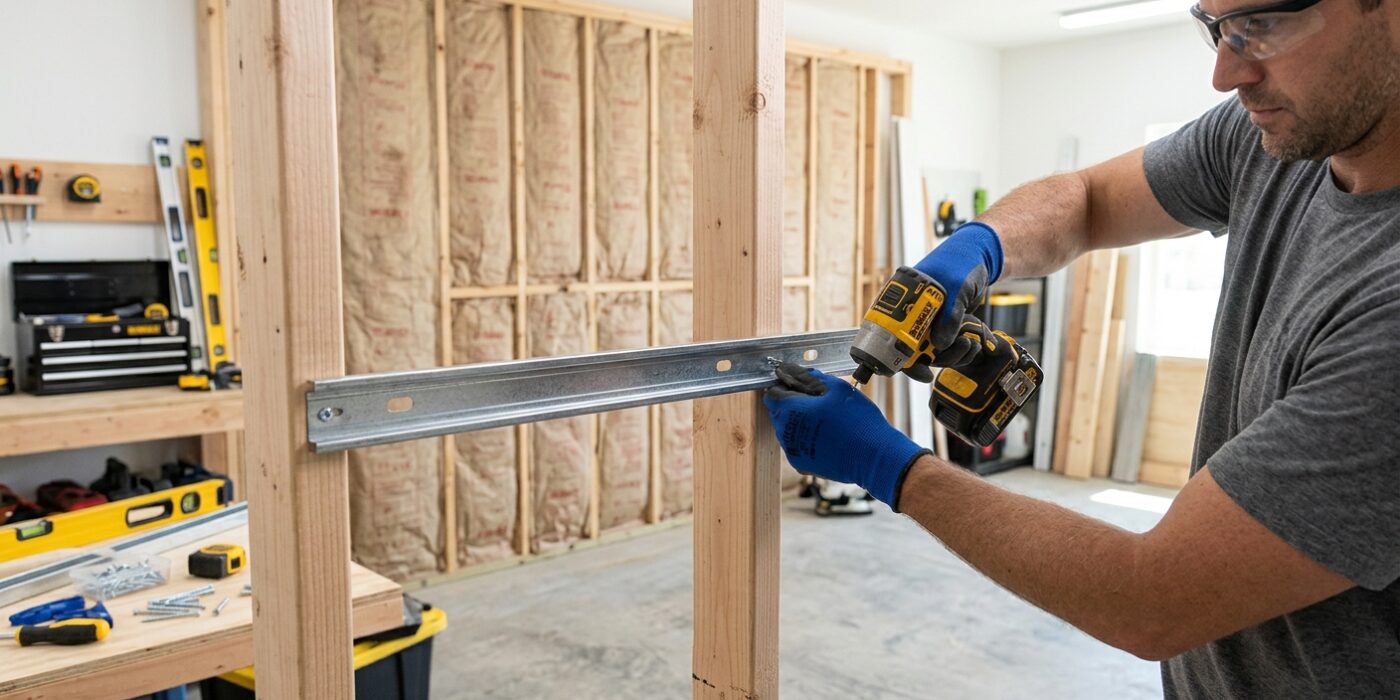
Now that your studs are bare, it is time to install the resilient channel (RC). Think of this as creating a floating layer for your drywall. By attaching these thin metal strips horizontally across your studs at 24-inch intervals, you are preventing sound vibrations from traveling directly through the wood. Instead of screwing your drywall into the hard, rigid studs, you will screw it into these flexible channels. This tiny physical gap acts like a shock absorber for sound, significantly dampening noise.
When installing the channels, ensure the pre-punched flange faces upward. Use 1-1/4 inch drywall screws to secure the flange to each stud, but be incredibly careful here: the screw must only bite into the metal channel and the stud without pressing the channel firmly against the wood. If you tighten it too far, you create a “short circuit” that bridges the vibration, ruining your hard work.
Beginner Tip: The most common mistake is using screws that are too long or over-tightening them. If your screw tip penetrates deep into the stud, it creates a rigid connection that allows sound to bypass the channel entirely. Aim to leave a tiny gap between the screw head and the channel flange to ensure the metal remains flexible.
Pro Tip: To keep your lines perfectly straight, use a laser level to mark your horizontal stud positions before you begin. If you don’t have a laser, measure precisely from the floor at each stud to ensure every channel is perfectly level, as crooked channels will make hanging your heavy drywall sheets much more difficult later on.
Step 4: Add Mass with Double Drywall and Damping Compound
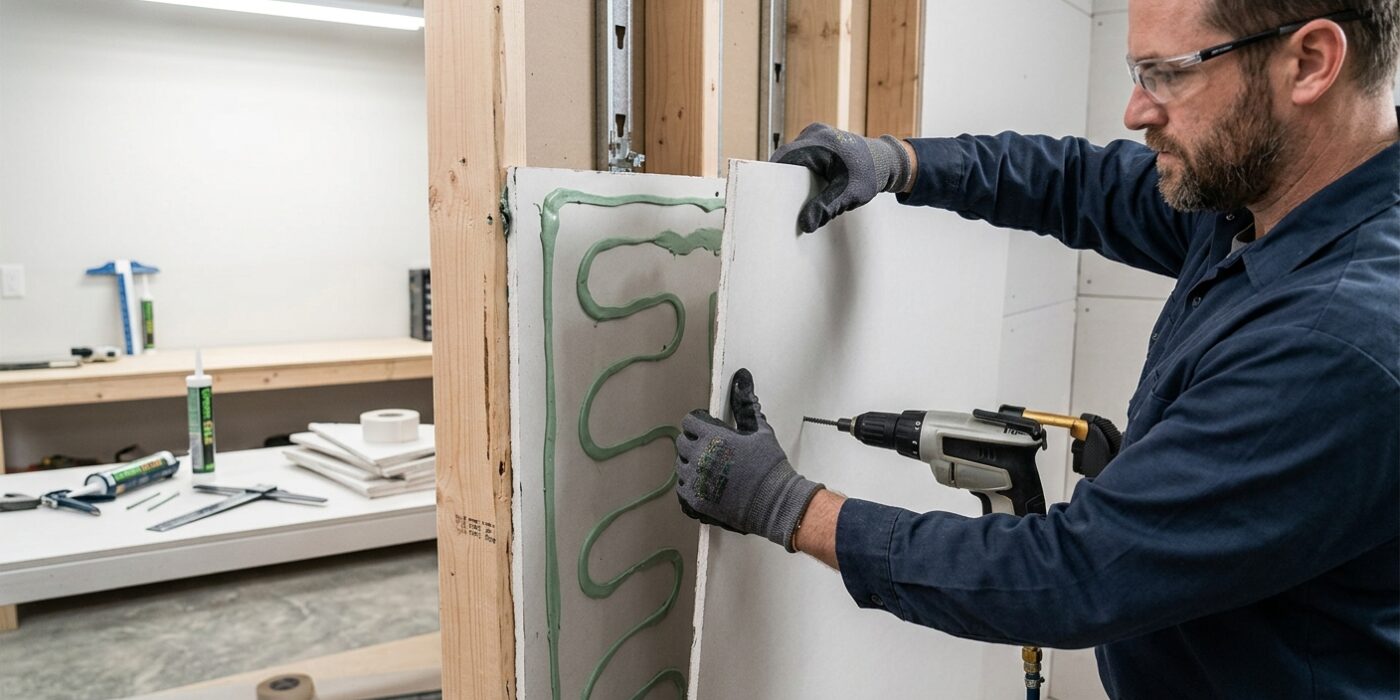
To effectively stop sound, you need to add density to your wall. We do this by installing a second layer of drywall over the existing one, with a special sound-dampening compound (like Green Glue) sandwiched in between. This compound acts like a shock absorber, converting sound waves into tiny amounts of heat as they try to pass through the wall.
Start by cleaning your existing wall surface. Grab your tube of compound and apply it to the back of your new drywall sheet. Use a random, serpentine pattern – think of it as a loose, curvy “S” shape – covering the entire board. You should use approximately two full tubes per 4×8 foot sheet. Once applied, lift the board, press it firmly against the original wall, and screw it into place. Ensure your screws are long enough to penetrate through both layers and securely into the wall studs.
Beginner Tip: A common mistake is using too much compound near the edges. Keep your pattern at least two inches away from the perimeter of the drywall sheet. If you put the compound too close to the edge, it will ooze out when you press the board against the wall, creating a messy cleanup job.
Pro Tip: To make the process much easier, use a caulk gun with a high thrust ratio. These are designed to push thick, viscous materials like sound-dampening compound with much less hand fatigue, allowing you to maintain a consistent bead throughout the entire project.
Step 5: Seal the Finished Wall
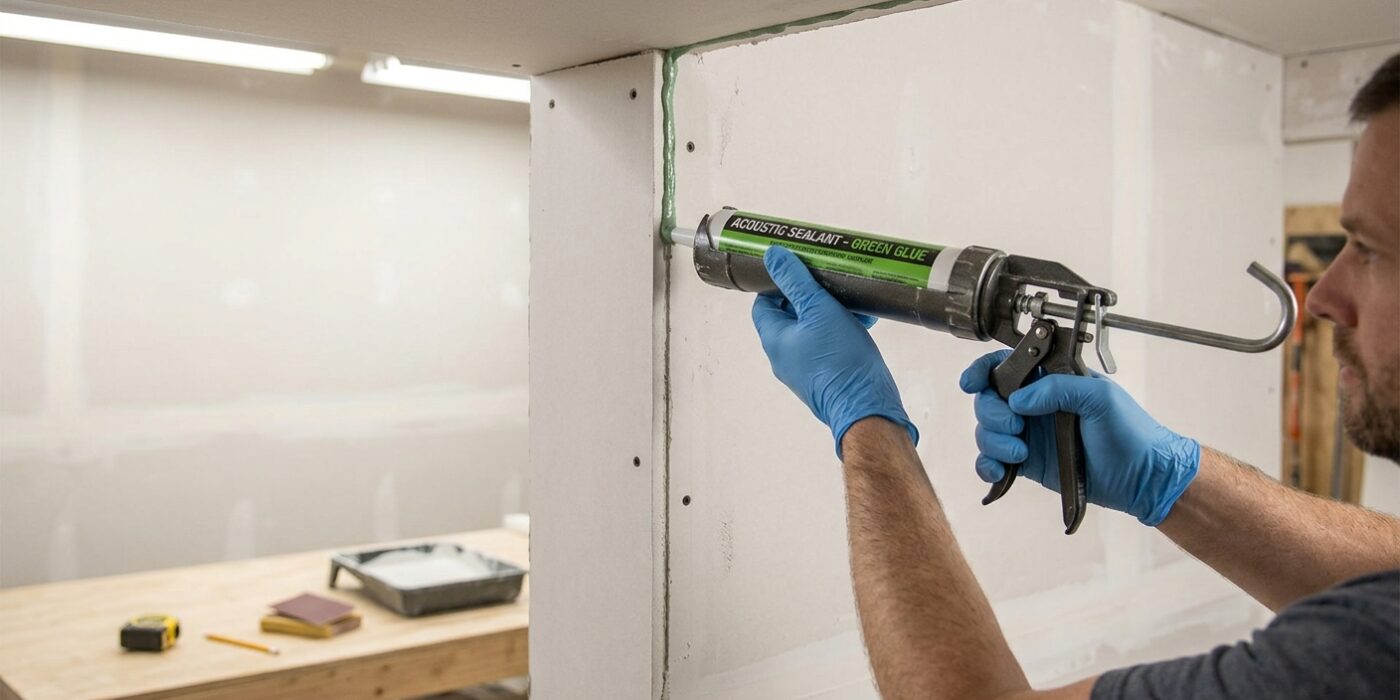
Now that your drywall is up, it is time to seal the gaps. Think of sound like water: if air can pass through a crack, sound can too. You need to use acoustic sealant – a specialized, permanently flexible caulk – to fill every gap around the perimeter of your new wall. Use a caulking gun to apply a generous, continuous bead where the wall meets the ceiling, the corners, and any electrical boxes or pipe penetrations. Do not caulk the gap between the drywall and the floor yet; leave that small space to prevent moisture from wicking into the drywall. You will seal that gap later, once the baseboards are installed.
Beginner Tip: Do not overfill the gaps. Many beginners try to pack the entire hole with caulk, but acoustic sealant is designed to stay flexible. Simply aim for a clean, consistent bead that bridges the gap. If you squeeze out too much, you will just end up with a messy wall that is difficult to paint over later.
Pro Tip: To get a perfectly clean finish, use a light spritz of soapy water on your finger before smoothing the caulk bead. This prevents the sticky sealant from adhering to your skin, allowing you to press it firmly into the crevice for an airtight, professional-looking seal without any mess.
A completed wall with insulation, resilient channels, and sealed perimeters will reduce sound transmission dramatically. You have now created a high-performance barrier that keeps noise exactly where it belongs.