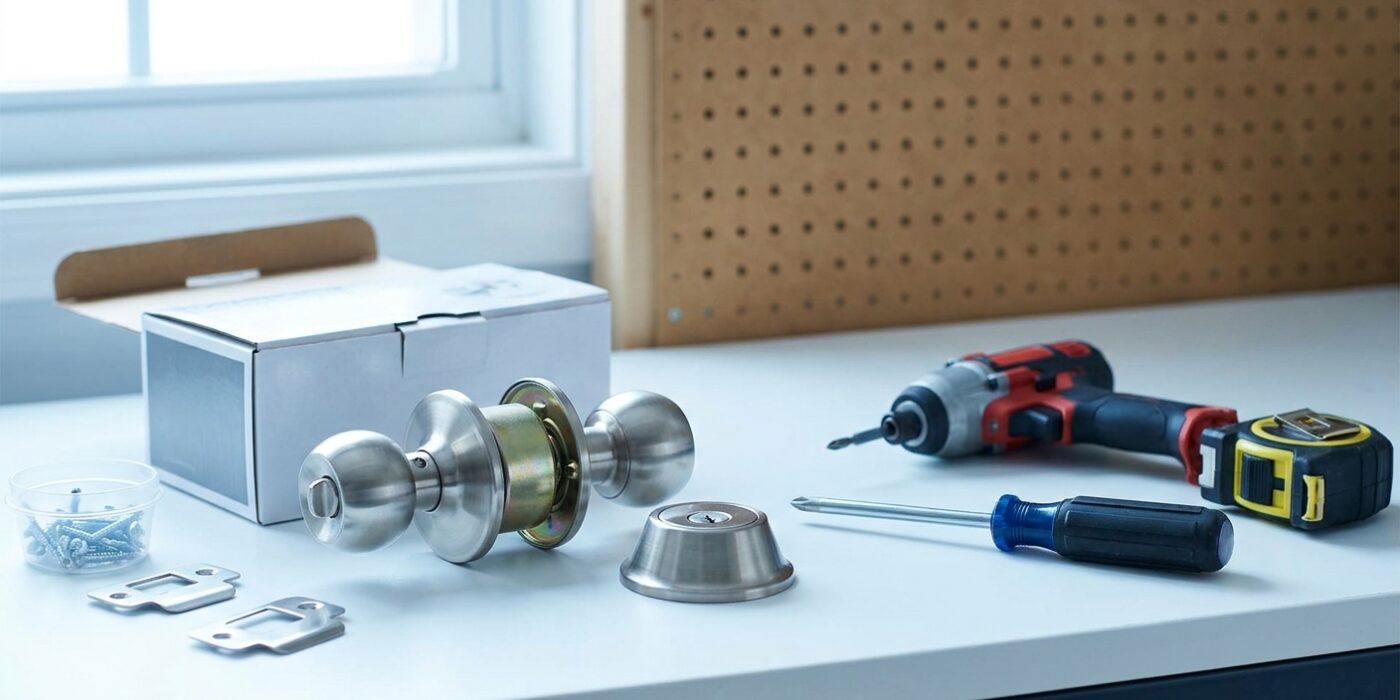
Project Shopping List
Replacing a doorknob and deadbolt set is one of the first real home improvement tasks most people tackle – and it’s a great one because it’s genuinely straightforward, the stakes are low, and the result (better security, updated hardware) is immediately visible. The entire job usually takes 45 minutes, even if you’ve never done it before.
This guide covers removing the old hardware, preparing the door for the new set, installing the latch, knob, and deadbolt, and adjusting for perfect operation. It applies to any standard 2-3/8 or 2-3/4 inch backset door preparation on a 1-3/8 to 1-3/4 inch thick door.
What You’ll Need
Tools
- Phillips and flathead screwdrivers
- Tape measure
- Utility knife
- Chisel (1-inch or 1-1/4 inch)
- Hammer
- Hole saw kit (2-1/8 inch and 1-inch) – only if cutting new holes
- Drill
Materials
- New doorknob set (with latch bolt)
- New deadbolt (single or double cylinder)
- Strike plates (often included with hardware)
- 3-inch security screws (for strike plates – most kits include short screws that don’t reach framing)
- Wood filler (if patching old holes)
Step 1: Measure Your Door Before Buying Hardware
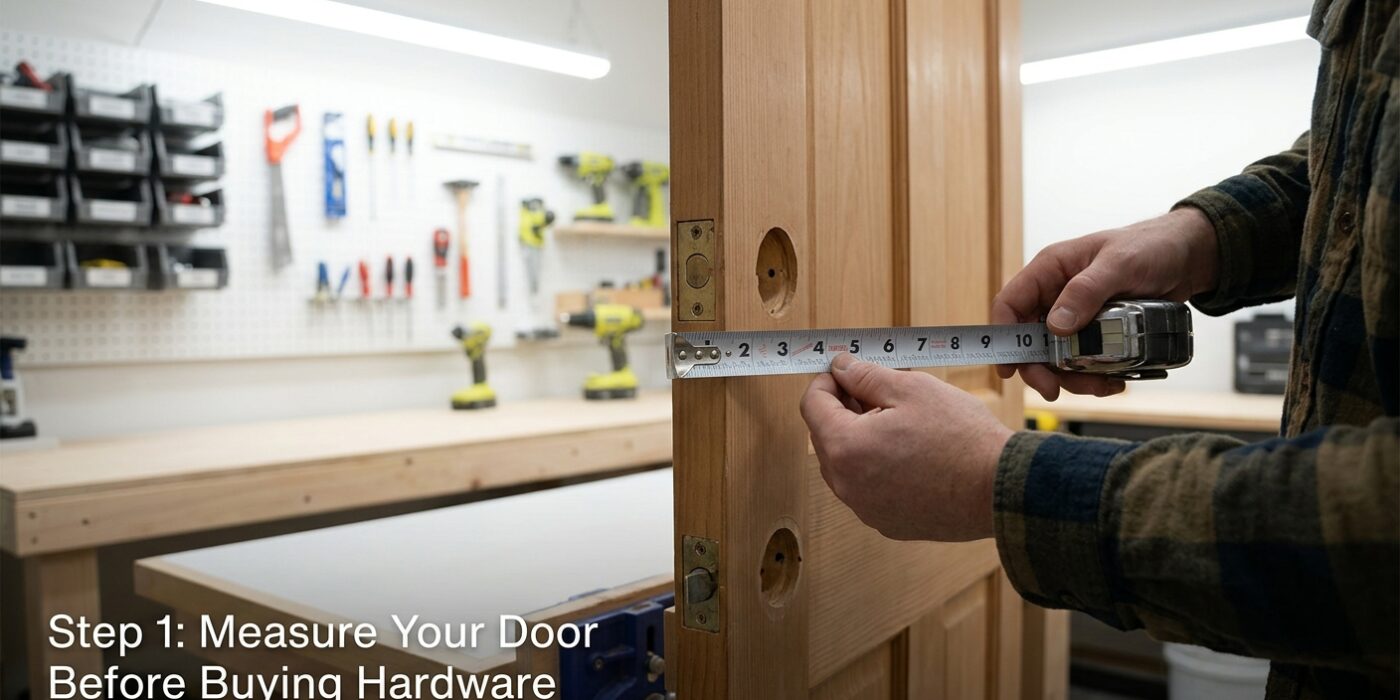
Before you head to the store, take a moment to measure your current door setup. Ensuring your new hardware fits correctly prevents a frustrating mid-project realization that things aren’t lining up. You only need to check two main things: the backset and the door thickness.
First, find the backset. Take your tape measure and measure from the very edge of the door to the exact center of the circular hole where the handle is currently installed. You will likely see one of two standard measurements: 2-3/8 inches or 2-3/4 inches. Next, measure the thickness of the door itself. Most residential doors are either 1-3/8 inches or 1-3/4 inches thick. While most modern, high-quality hardware sets are adjustable to fit these different sizes, checking these numbers ensures you won’t need to make extra trips to the hardware store.
Beginner Tip: Avoid measuring to the edge of the existing handle or the trim; always measure to the center of the borehole. If you eyeball the center rather than finding the exact midpoint, your new latch might not reach the strike plate on the door frame, leaving you unable to close your door properly.
Pro Tip: If you are unsure about your measurements, take a photo of your existing hardware and your measurements on your phone. Most home improvement store associates have seen thousands of these setups and can instantly verify if the boxed set you picked up will work for your specific door.
Step 2: Remove the Old Knob
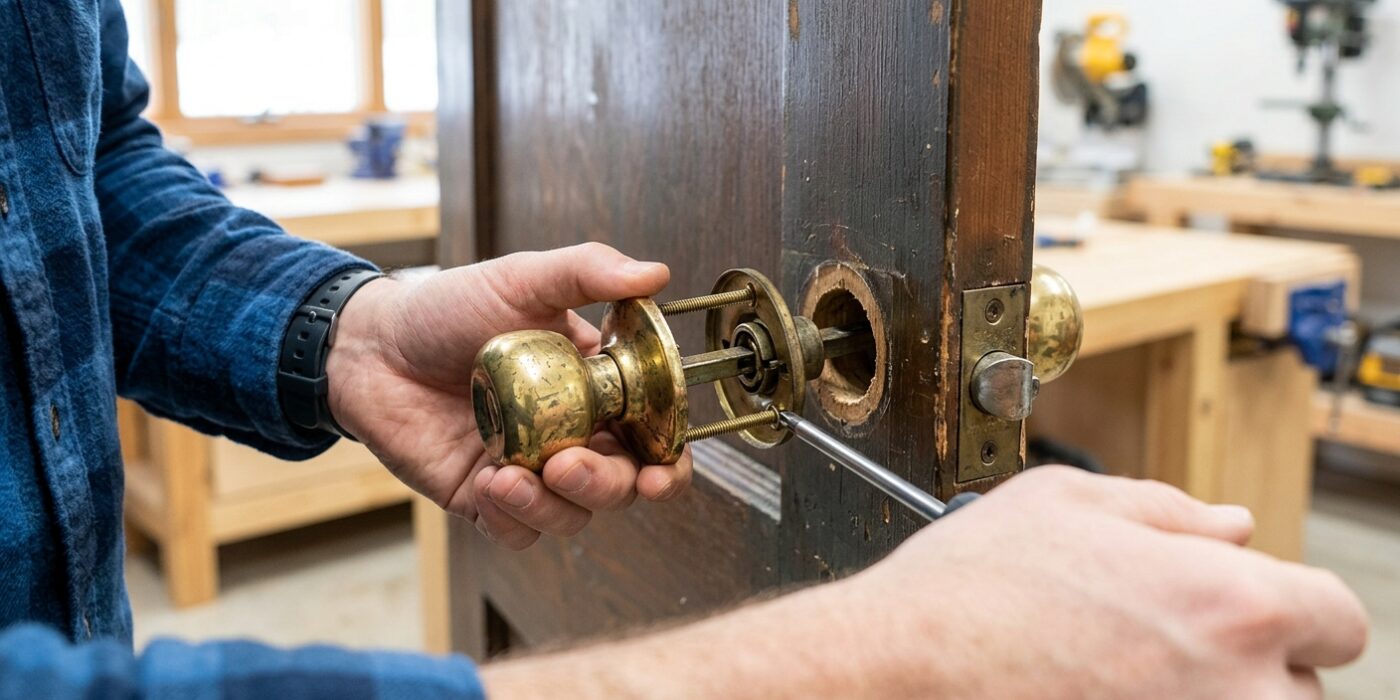
Now it is time to remove your old hardware. First, locate the small slot or tiny hole on the neck of the interior knob. This is a spring-loaded catch that holds the knob in place. Insert your flathead screwdriver or the provided removal tool straight into this hole. Press firmly inward to depress the internal pin, and while maintaining that pressure, gently pull the knob toward you until it slides off the spindle. Removing this first allows you to reach the screws hidden underneath the decorative round plate, known as the rose.
Once the knob is off, inspect the rose. If you see visible screws, use a Phillips-head screwdriver to remove them. If no screws are visible, the plate is likely threaded; grasp it firmly and twist it counterclockwise to unscrew it from the door. Once the plates are loose, the two halves of the knob mechanism should pull apart easily from either side of the door. If the mechanism feels stuck, do not force it – gently wiggle the pieces to help the internal latch mechanism slide free.
Beginner Tip: A common mistake is losing the tiny screws once they are removed. Place all screws and parts into a small bowl or a Ziploc bag as you take them off so they do not roll away on the floor.
Pro Tip: If your decorative rose plate feels painted shut or stubborn, gently slide a thin putty knife behind the edge and lightly tap it to break the seal of old paint or grime without damaging your door’s finish.
Step 3: Remove the Old Latch
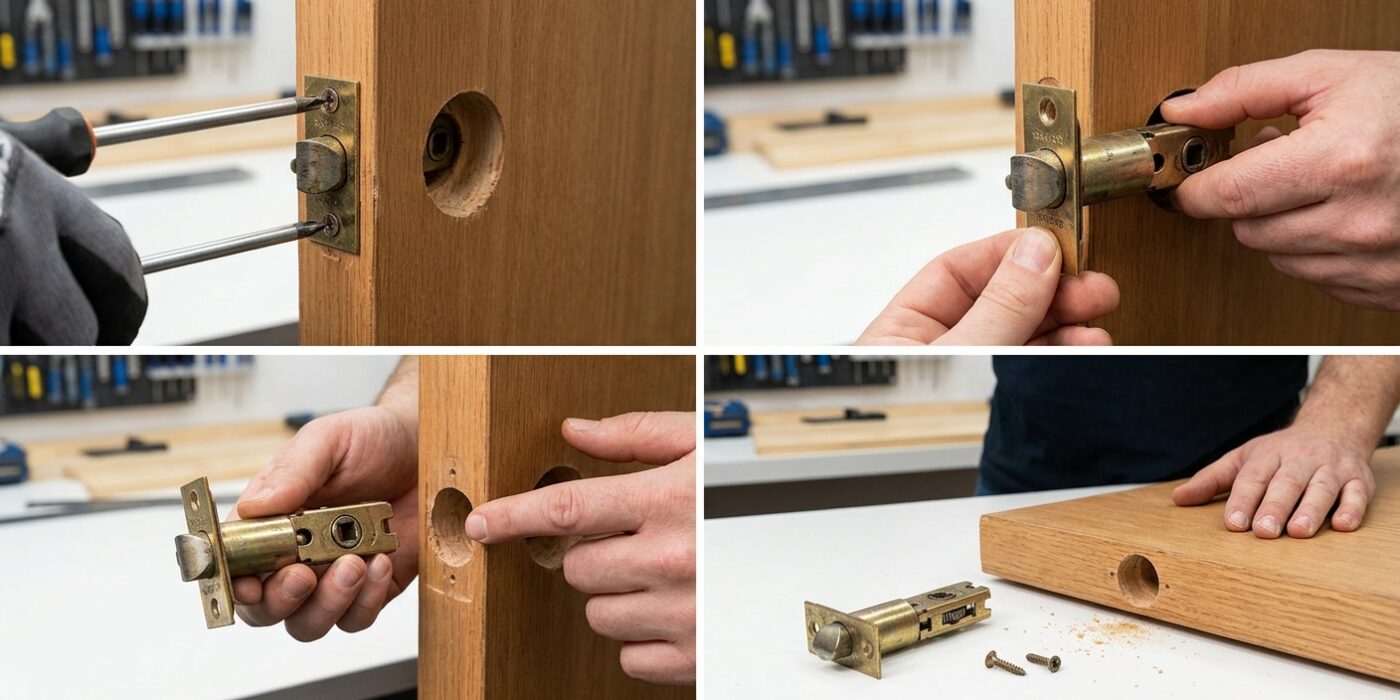
Now that the handles are off, look at the edge of the door where the latch meets the door frame. You will see a small, rectangular metal plate held in place by two screws. Using your Phillips head screwdriver, turn these screws counter-clockwise to remove them. Keep your hand steady so the screwdriver doesn’t slip and scratch the door finish. Once the screws are free, the latch body might be tucked snugly into the wood. Grip the end of the latch with your fingers or a pair of pliers and pull it straight back toward you. If it feels stuck, give it a gentle wiggle or a light tap on the side of the metal plate to break the seal of any old paint or wood tension.
Beginner Tip: A common mistake is losing the screws inside the door cavity. As you remove the final screw, keep a finger pressed firmly against the faceplate so the latch doesn’t drop into the hollow interior of the door, which would make retrieval much more difficult.
Pro Tip: Before you pull the old latch out, take a quick photo of the latch bevel with your smartphone. The slanted side of the latch must face the direction the door closes – if you install the new one backward, the door won’t latch shut, and you will have to take the whole thing apart again to fix it!
Step 4: Remove the Old Deadbolt
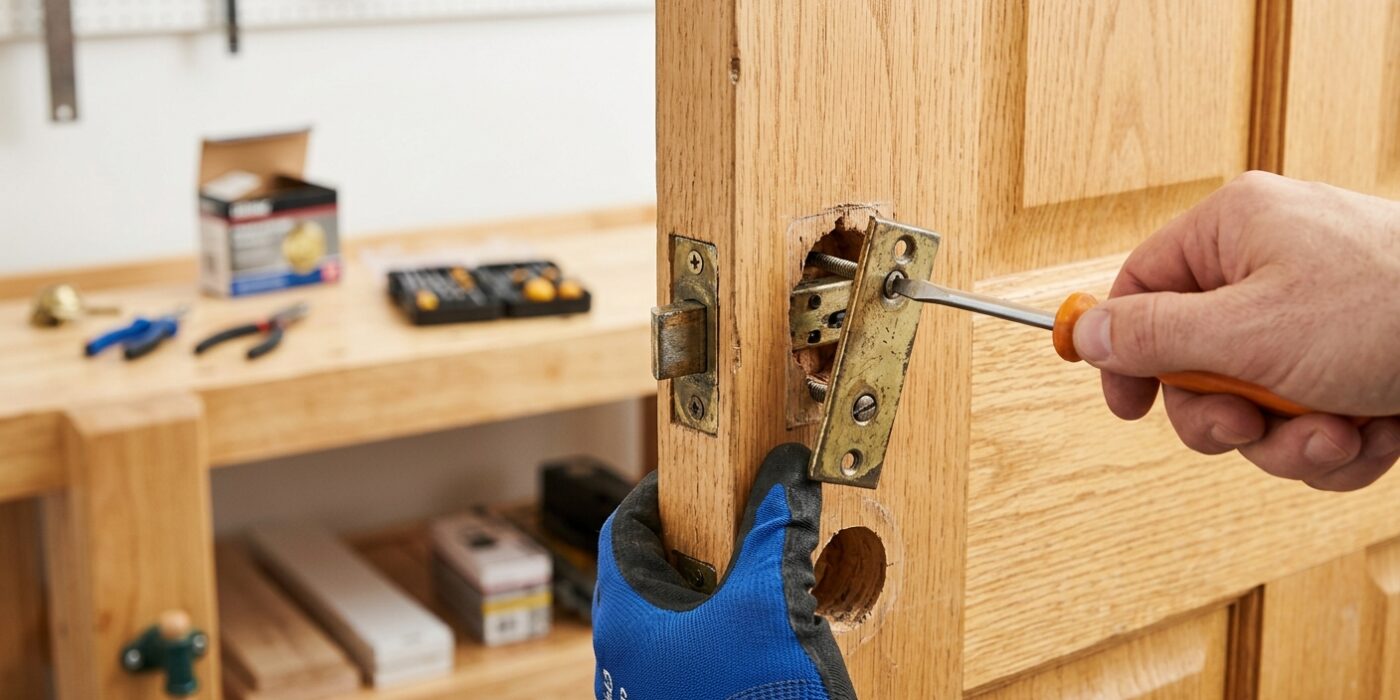
Now that the doorknob is out of the way, it is time to tackle the deadbolt. On the inside of your door, you will see two long screws holding the thumb-turn plate against the wood. Use your Phillips-head screwdriver to turn these counter-clockwise. As you loosen them, keep a hand on the exterior side of the deadbolt so it doesn’t suddenly drop to the floor once the screws are free. Once the screws are out, the interior thumb-turn piece will pull right off, followed by the exterior key cylinder. Finally, look at the edge of the door where the bolt itself is embedded. You will see two small screws holding a metal plate in place; remove these, and the entire bolt mechanism should slide straight out toward you. If it feels stuck, you can gently nudge it from the inside hole with the tip of your screwdriver.
Beginner Tip: A common mistake is using the wrong size screwdriver. If your screwdriver head is too small, it will slip and strip the screw head, making it nearly impossible to turn. Choose a Phillips-head bit that fits snugly into the screw cross; if it wiggles inside the head, grab a larger size.
Pro Tip: Old deadbolts are often painted over, creating a stubborn seal between the metal and the door frame. If the pieces won’t budge, run a utility knife carefully around the edge of the plates to cut through the layers of paint before you start unscrewing. This keeps your door finish looking clean and prevents the metal from pulling away paint when it finally releases.
Step 5: Install the New Latch
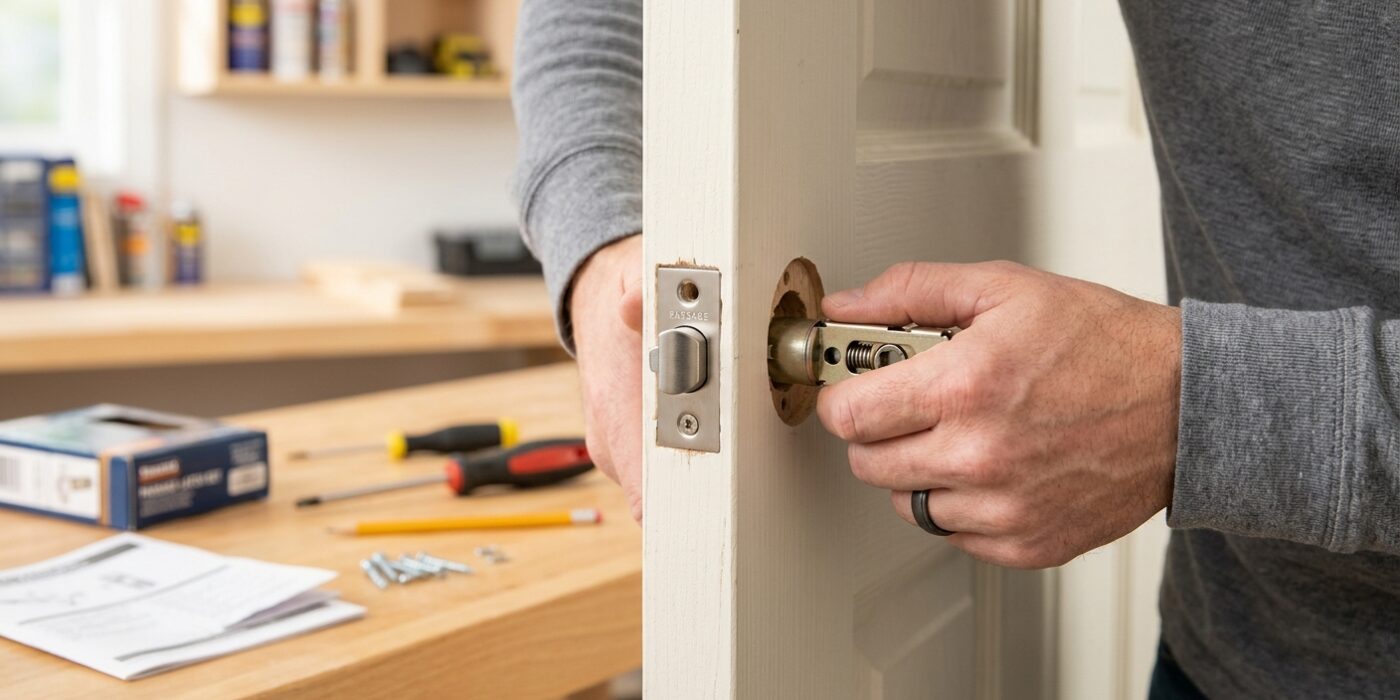
Now it is time to install your new latch. Start by sliding the latch body into the hole on the edge of the door. The most important part here is the orientation: the slanted, beveled side of the latch must face the direction the door closes. If you get this backward, your door will hit the frame and fail to latch shut. Once it is seated flush against the edge of the door, secure it using the two provided screws. Ensure they are driven in straight so the faceplate sits perfectly level.
Beginner Tip: The biggest mistake most first-timers make is forgetting to check the direction of the latch bevel before screwing it in. Take a moment to gently push your door closed while holding the latch in place to verify it clicks into the strike plate correctly before you pick up your screwdriver.
Alternative Method: If your new latch plate is slightly larger or a different shape than the old one, do not panic about perfectly chiseling the wood. You can use a sharp utility knife to carefully score the outline of the new plate into the wood, then use a sturdy flat-head screwdriver as a makeshift chisel to gently scrape away excess material until the plate sits flush.
Pro Tip: If the latch feels tight or rubs against the wood, apply a tiny amount of petroleum jelly or a dry silicone spray to the beveled edge. This simple trick makes the door “click” into place with a smooth, premium feel every time you close it.
Step 7: Install the New Deadbolt
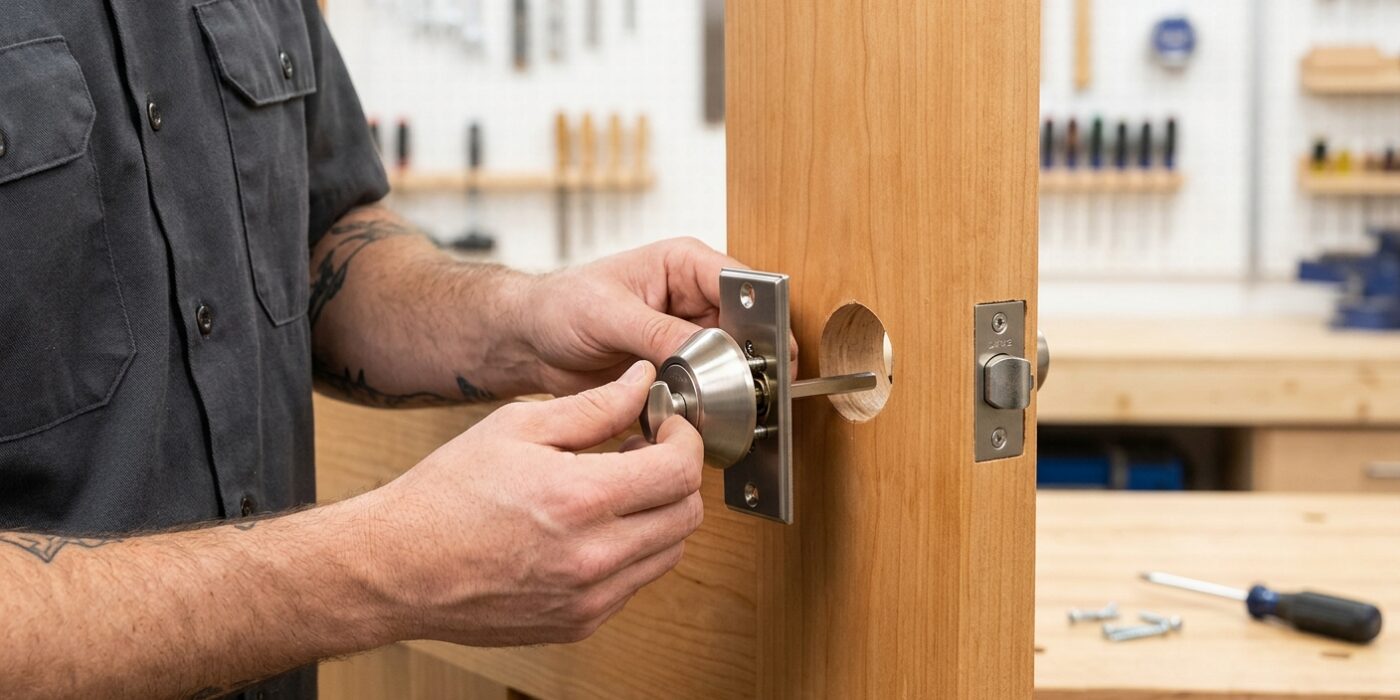
Now that your old hardware is removed, it is time to install the new deadbolt. Start by sliding the bolt body into the hole on the edge of the door. Ensure the word “TOP” (usually stamped on the bolt) is facing upward; if you do not see a label, ensure the beveled, angled side of the bolt faces the door frame. Secure it with the two provided short screws using your screwdriver.
Next, insert the exterior cylinder (the side with the keyhole) into the main door hole, feeding the tailpiece through the slot in the bolt body. From the interior side of the door, align the thumb-turn assembly so its internal holes line up with the exterior piece’s screw posts. Once everything is flush, thread the two long through-bolts by hand before tightening them with your screwdriver. Test the action by turning the key and the thumb-turn; both should move the bolt in and out smoothly without any sticking or grinding.
Beginner Tip: Avoid overtightening the two long through-bolts. If you crank them down as hard as you can, you may warp the internal mechanism, causing the lock to feel stiff or “sticky” when you turn the key. Tighten them until snug, then give them a final quarter-turn.
Pro Tip: Before you finalize the tightening, wiggle the exterior and interior pieces slightly to ensure they are perfectly centered. This simple alignment trick ensures the internal parts aren’t binding, making your lock operate with professional-grade smoothness.
Step 8: Install Strike Plates with Long Screws
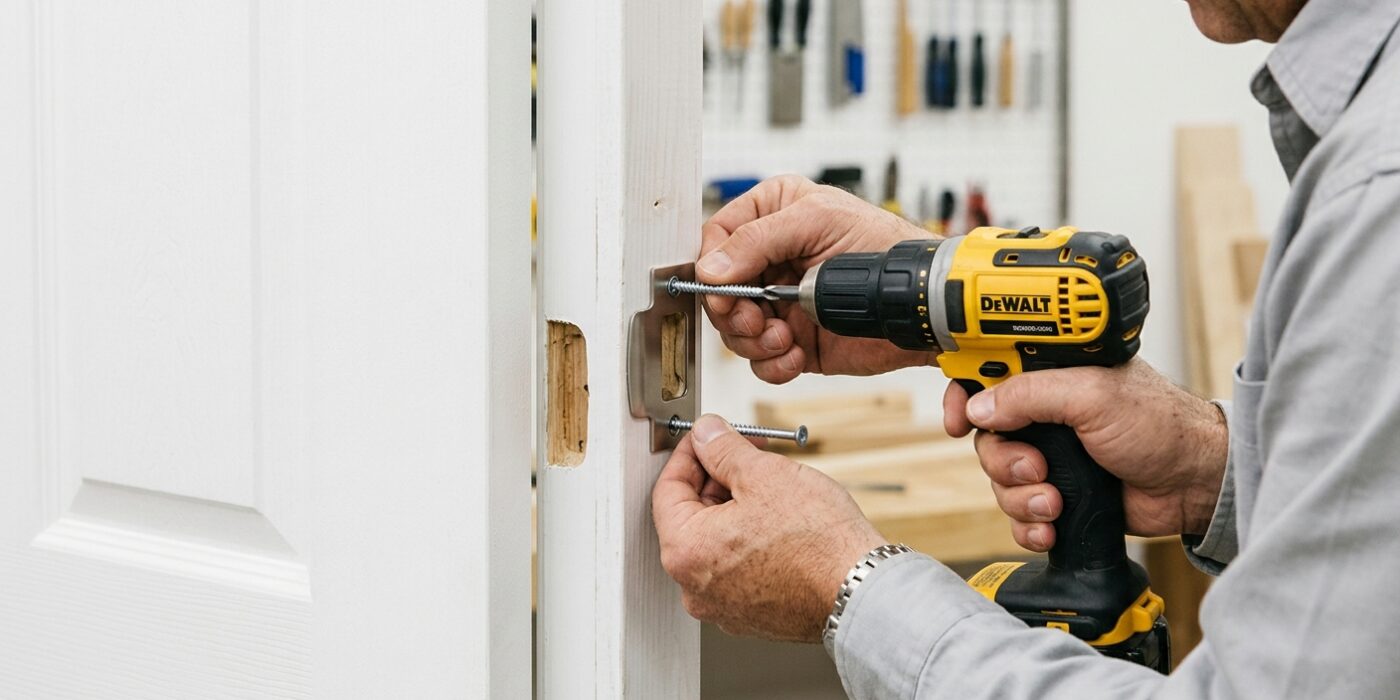
Now that your hardware is attached to the door, it is time to secure the strike plates – the metal pieces that attach to the door frame – to ensure your door is truly secure. Most manufacturers include short, half-inch screws with their kits, but these only anchor into the thin door trim, which provides almost no protection against forced entry. For maximum security, discard the provided screws and use 3-inch #9 wood screws instead. These long screws will pass through the trim and bite deep into the solid wood structural framing of your home, creating a much stronger anchor point.
Place the strike plate over the hole in the door frame and use a drill or screwdriver to secure it with the 3-inch screws. If the metal plate sits proud of the wood, the door will catch or fail to close. If necessary, use a sharp wood chisel to gently carve away small amounts of wood until the plate sits perfectly flush with the surface.
Beginner Tip: Do not use your drill on its highest power setting when driving these long screws. Start slowly to ensure the screw goes in straight. If you feel the drill bit slipping or the screw head stripping, stop immediately; use a manual screwdriver to finish the job so you don’t damage the screw head or the surrounding wood.
Pro Tip: If your door feels “sticky” or the latch bolt seems to grind against the plate, rub a small amount of beeswax or a dry silicone lubricant onto the slanted face of the latch. This reduces friction and allows the door to click shut silently and smoothly every single time.