Project Shopping List
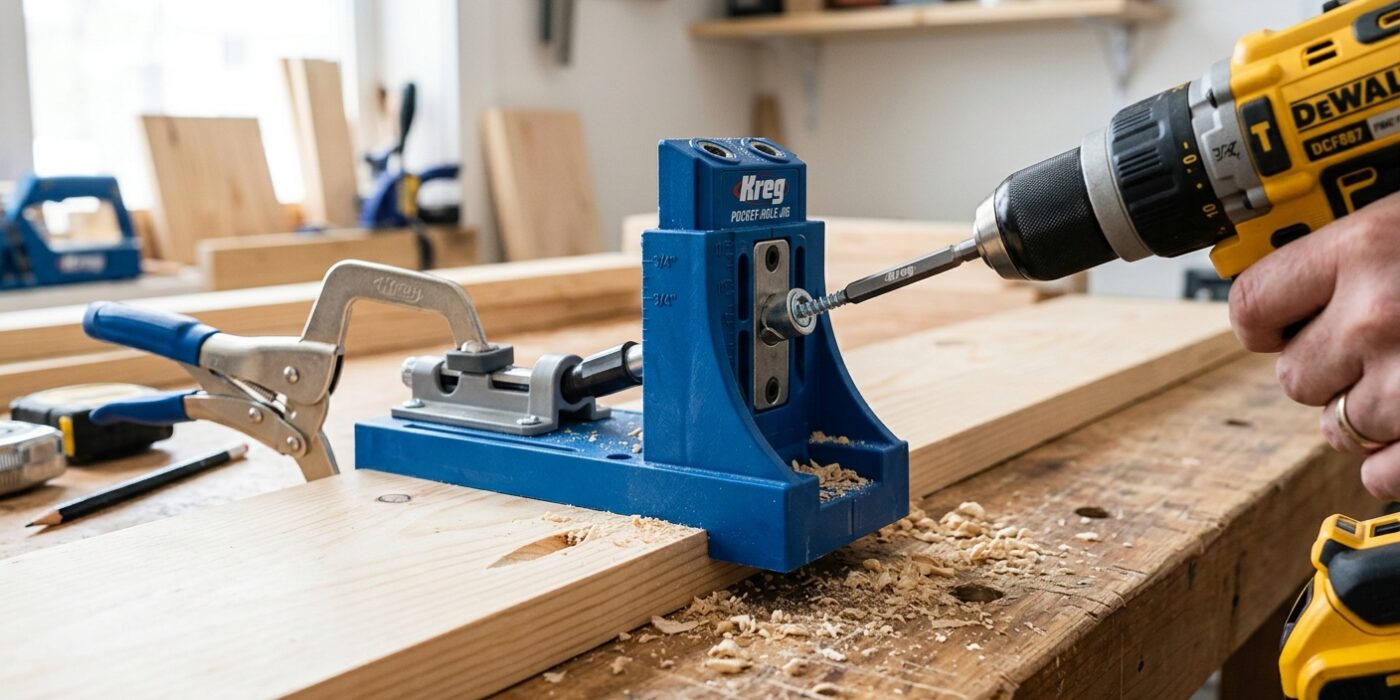
A pocket hole jig is one of the most useful tools a beginning woodworker can own. It drills an angled hole that allows a screw to pull two boards together at a joint, creating a strong connection without visible hardware on the outside face. The Kreg system is the most popular because the jig, drill bit, and screws are all designed to work together for consistent results. Once you understand the setup, pocket holes take less than a minute per joint.
What You Need
- Kreg Jig (R3, 320, 520, or 720 depending on budget)
- Step drill bit (included with Kreg jig)
- Kreg pocket screws (size depends on material thickness)
- Drill with clutch or impact driver
- Clamp (Kreg face clamp or standard clamp)
- Square for checking joints
Understanding the System
How a Pocket Hole Joint Works
The stepped drill bit creates a pocket — a flat-bottomed recess — angled at approximately 15 degrees into the face of the board. A coarse-thread screw runs through this pocket and into the mating board. The screw head seats in the pocket recess (not the surface), so the joint pulls tight without the screw head being visible from the outside. The result is fast, strong, and requires no clamps during curing — the screw holds the joint while the glue dries.
Setting the Jig for Material Thickness
This is the most important step. The jig has a collar on the drill bit and a setting on the jig body that must both be set to match the thickness of the board you are drilling. Kreg jigs have a label or chart showing which settings to use. Common settings: 3/4-inch material uses the 3/4 mark (most furniture and cabinet work); 1/2-inch material uses the 1/2 mark (drawer boxes, thin panels). Setting the jig incorrectly causes the screw to exit through the face of the mating board or not engage fully.
Step-by-Step Instructions
Step 1: Set the Drill Bit Collar
Loosen the collar on the step drill bit and set it to the position marked for your material thickness on the collar depth guide card that comes with the Kreg jig. The collar controls how deep the bit drills — too shallow and the screw pocket is not complete; too deep and you drill through the board. Tighten the collar securely.
Step 2: Set the Jig Body
Set the jig body’s thickness selector to match your material. On the Kreg R3 and 320, this is a sliding stop on the side of the jig. On the 520 and 720, there are guide holes at different positions for different thicknesses. Refer to the included guide card for the exact setting.
Step 3: Clamp the Jig to the Board
Place the jig on the end or face of the board where you want the pocket hole. The jig’s guide holes should be on the side that will face inward at the joint — not the visible face. Clamp the jig firmly to the board so it cannot shift during drilling. Some Kreg models have a built-in clamp; for others, use a standard F-clamp.
Step 4: Drill the Pocket Hole
Using a drill at high speed, drive the step bit through the guide hole until the collar stops against the jig. The bit creates a stepped hole: a narrow pilot hole through which the screw passes, and a wider flat-bottomed pocket that seats the screw head. Drill all pocket holes for a joint before moving the jig. Most joints need two pocket holes per connection for adequate strength.
Step 5: Apply Glue and Drive the Screw
Apply wood glue to the mating surfaces. Hold or clamp the boards in their final position — alignment is critical because the screw pulls the joint together as you drive it and will lock in any misalignment. Drive the pocket screw at a slow speed with the clutch set low — driving too fast strips the pocket or splits the mating board. Stop when the joint is tight and the screw head is seated in the pocket.
Step 6: Check for Alignment and Flush Surfaces
Check that the faces of the boards are flush at the joint before the glue cures. Pocket hole joints can sometimes pull one board slightly above or below the other — this is called a step. If you see a step, clamp across the joint or drive a second screw at the opposite end of the board to pull it flat. A Kreg face clamp holds both boards flush while you drive the screw.
Pro Tips
- Use coarse-thread screws for softwood and plywood; fine-thread screws for hardwood. The thread type is printed on Kreg screw packaging and matters — coarse threads in hardwood split the fibers.
- For face frames on cabinets, use 1-1/4-inch screws in 3/4-inch stock. For joining 1-1/2-inch thick material (2x lumber), use 2-1/2-inch screws.
- Plug pocket holes on visible faces with Kreg wooden plugs — they are available in multiple wood species and sand flush with the face for a clean appearance.
Frequently Asked Questions
How strong are pocket hole joints?
Pocket hole joints with glue are strong enough for face frames, cabinet boxes, furniture carcasses, and light structural work. They are not appropriate for highly stressed joints like chair legs under side load or workbench tops — traditional mortise-and-tenon or dowel joints are stronger in those applications. For most furniture and cabinetry, pocket holes are fully adequate.
Do I need glue with pocket screws?
The screw alone holds the joint mechanically, but glue dramatically increases long-term strength and prevents the joint from loosening over time due to wood movement. Always use glue for permanent furniture. Skip the glue only for temporary assemblies or where you need the ability to disassemble later.