Project Shopping List
Peeling paint on walls and ceilings is a symptom, not just a surface problem. Paint peels because something caused adhesion failure – moisture infiltration, incompatible paint layers, painting over a contaminated surface, or painting in wrong conditions. Simply scraping and repainting without addressing the underlying cause produces a repeat failure within months.
What You’ll Need
Tools
- Putty knife and paint scraper
- Random orbital sander
- 80-grit and 120-grit sandpaper
- Paintbrush and roller
- Flashlight for inspecting for moisture
Materials
- Stain-blocking primer (Zinsser BIN or oil-based)
- Joint compound or spackling
- Matching paint
- Paint conditioner (Floetrol for latex)
Step 1: Find the Cause Before Touching the Peeling Paint
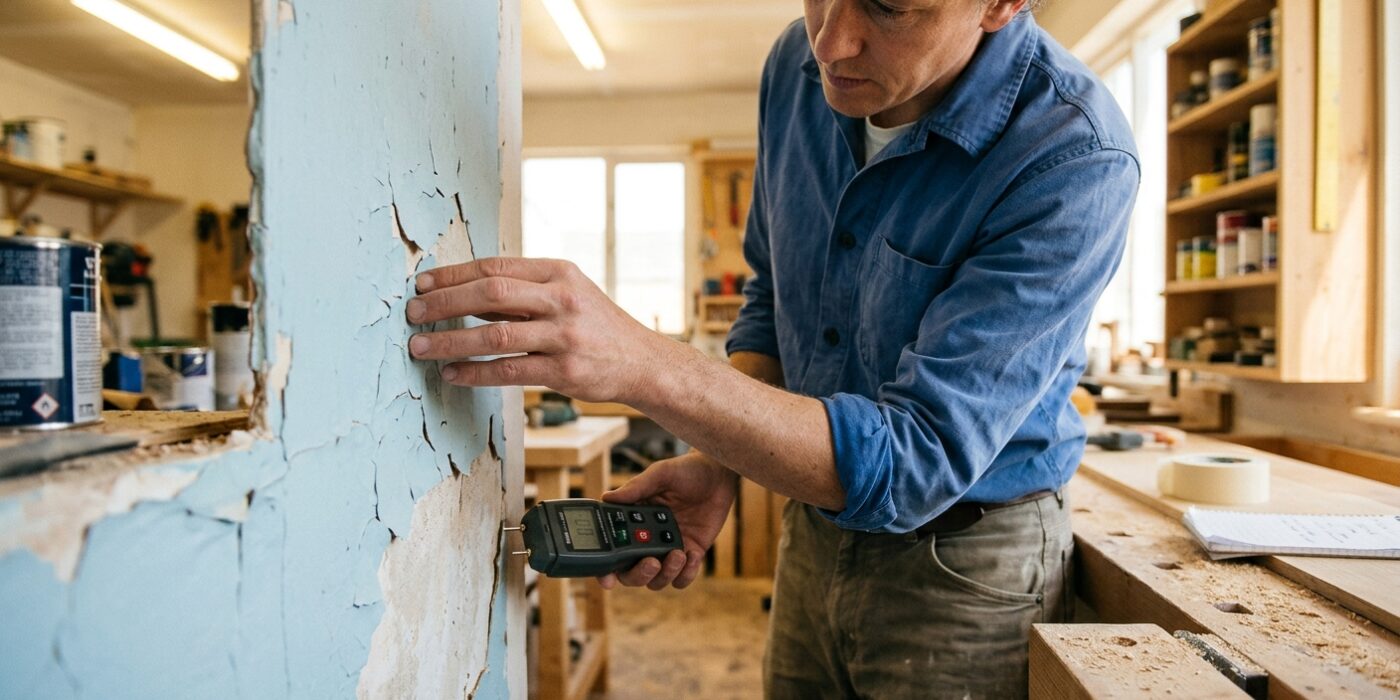
Before you pick up a scraper, you need to play detective. Peeling paint is almost always a symptom of an underlying issue, not the problem itself. If you cover it up without fixing the root cause, the new paint will simply bubble and peel again within months. Grab a flashlight and hold it against the surface at an extreme angle – roughly 10 to 20 degrees – to shine the light across the wall, which is known as “raking light.” This highlights bumps, shadows, and texture irregularities you might otherwise miss.
Look for patterns: moisture intrusion near windows often stems from leaking seals or exterior cracks. Humidity-related peeling in bathrooms or kitchens typically signals a need for better ventilation or a switch to moisture-resistant paint. If the peeling is scattered in random patches on an older wall, you are likely dealing with incompatible paint layers, such as oil-based paint applied over latex. Solving the moisture or ventilation issue first is the most important step in ensuring your hard work lasts for years.
Beginner Tip: Do not skip this step thinking you can just sand it down and repaint. The biggest mistake is assuming all peeling is just “old paint.” If you see active water stains, damp drywall, or mold, stop immediately and address the leak or structural moisture before proceeding.
Pro Tip: If you are struggling to identify moisture sources, use an inexpensive non-contact moisture meter from a local hardware store. Pressing it against the wall near the peeling area can instantly confirm if water is hiding behind the surface, saving you from a cycle of endless repairs.
Step 2: Fix Moisture Problems First
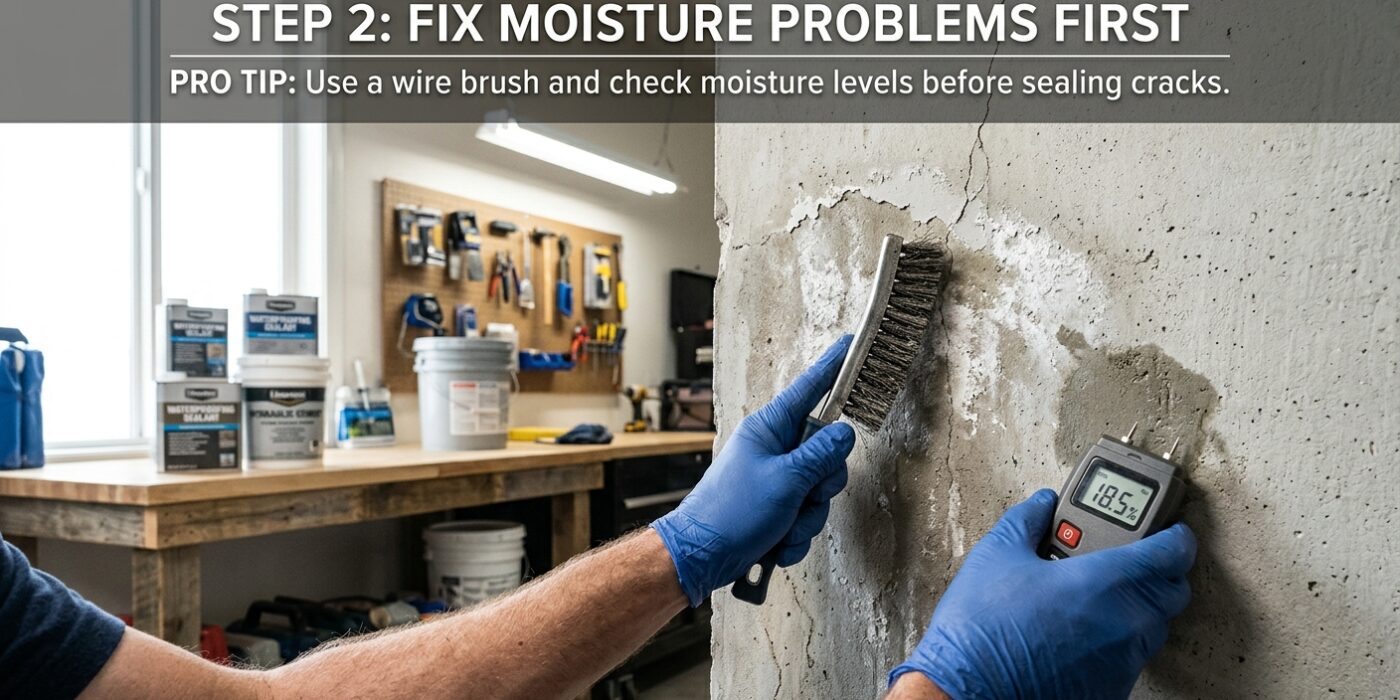
Before you even think about picking up a paintbrush, you must address the root cause of your peeling paint. If you paint over a surface that is still damp or prone to moisture, the new paint will bubble and peel off within a year, wasting all your hard work. Think of this as the foundation of your project; if the foundation is wet, the house won’t stand.
First, inspect the area carefully. If the peeling is on the ceiling, look for signs of roof leaks, plumbing issues from the floor above, or excessive steam from a bathroom shower. For wall peeling, check your window frames for cracked caulk or look for signs of poor ventilation. If you discover a leak, repair it immediately. Once the leak is stopped, the most critical step is patience: you must let the area dry out completely for at least one to two full weeks. Moisture can hide deep inside drywall, and painting too soon will trap that water, leading to mold or more peeling.
Beginner Tip: Do not be tempted to use a space heater to speed up the drying process. Rapid, forced drying can cause drywall tape to shrink and crack, leading to even more repairs later. Let the area air-dry naturally with good airflow.
Pro Tip: If you aren’t sure if a spot is truly dry, use a moisture meter – an inexpensive tool available at any hardware store. It gives you an instant, accurate reading, taking the guesswork out of your timeline and ensuring your surface is perfectly ready for a fresh coat.
Step 3: Scrape All Loose Paint
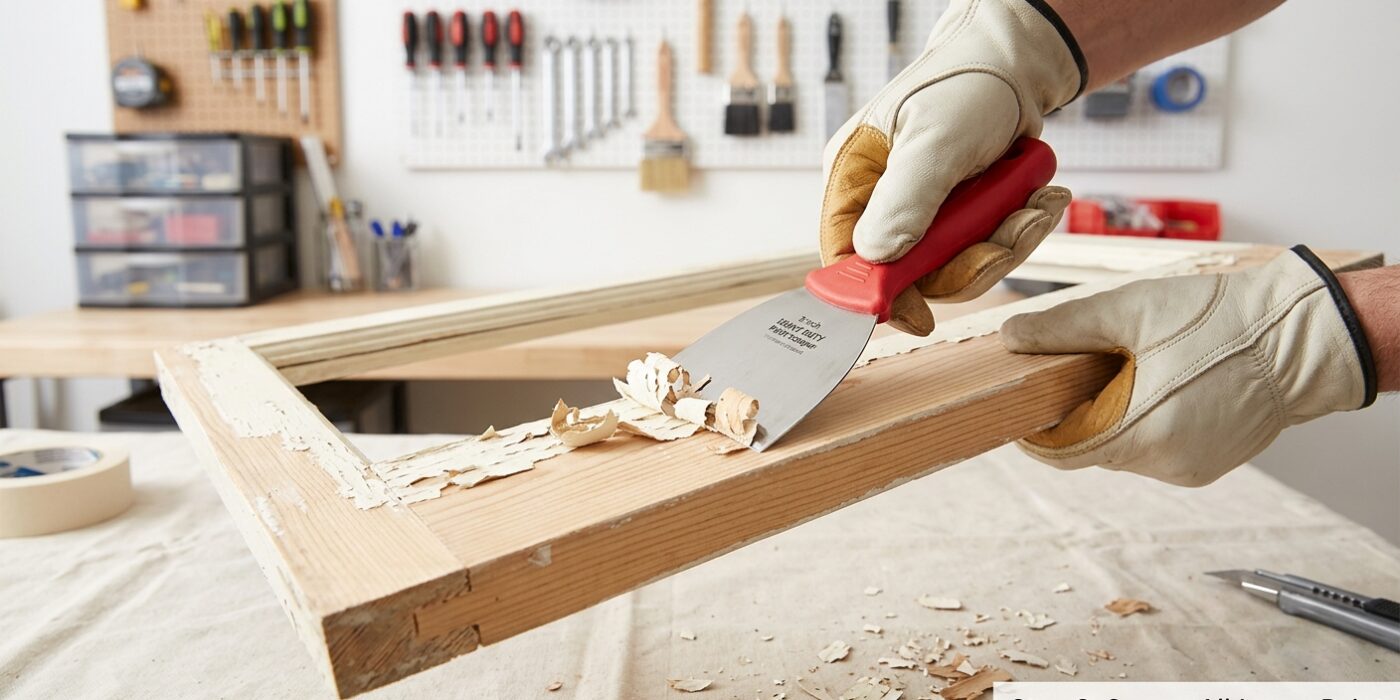
Now it is time to clear away the old, damaged surface so your new paint has a fresh start. Take your stiff putty knife or paint scraper and hold the blade at a shallow, 30-degree angle against the surface. Gently work the edge under any peeling, flaking, or bubbling paint to lift it away. The goal is to reach a solid base where the paint is firmly bonded to the material underneath. If the paint lifts or crumbles when you apply light pressure, it needs to go. Be sure to work systematically across the entire area, extending your scraping about three to four inches into the surrounding stable paint. This ensures you do not leave any weak edges that might peel later.
Beginner Tip: Avoid digging the sharp corner of the scraper into the surface, as this can create deep gouges that are difficult to repair. Keep your pressure consistent and flat, allowing the edge of the tool to do the work rather than using it like a chisel.
Alternative Method: If you find a spot that is particularly stubborn, you can use a coarse-grit sanding block instead of a metal scraper. Simply rub the block back and forth over the edges of the peeling paint to feather them out until they are smooth and no longer loose.
Pro Tip: After you finish scraping, run your hand over the area while wearing a glove. Your fingertips will easily detect hidden loose flakes or sharp ridges that your eyes might miss, helping you achieve a perfectly smooth finish.
Step 4: Sand the Edges and Surface
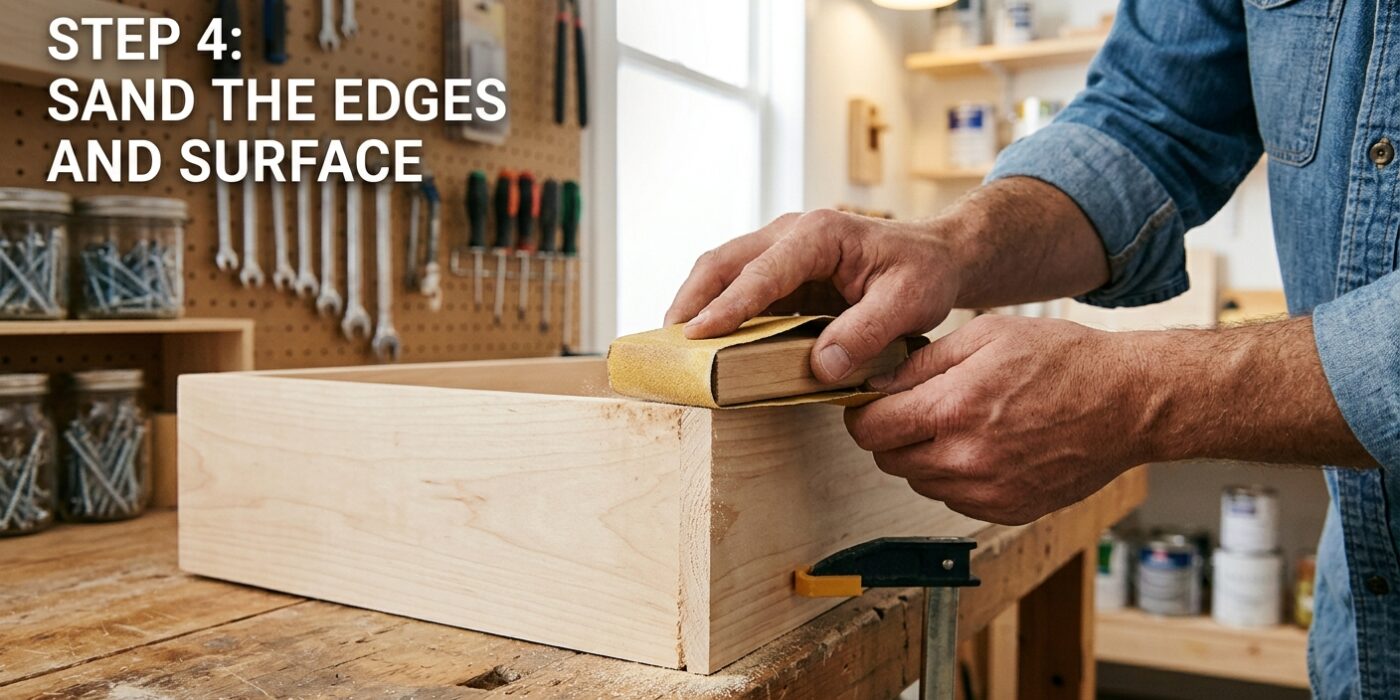
Now it is time to smooth things out. When you scraped away the old paint, you likely created a sharp ridge where the paint meets the bare wood. To ensure your new coat looks professional and invisible, you need to “feather” this edge. Take a piece of 80-grit sandpaper and rub it over that raised ridge using long, overlapping strokes. You want to sand until the transition is so smooth that if you run your fingernail across it, you cannot feel a bump. Once the edge is flat, switch to a piece of 120-grit sandpaper and lightly buff the entire patch. This step is crucial because it “scuffs” the surface, creating tiny scratches that help your new paint or primer grip onto the wood rather than peeling off later. Finally, use a vacuum with a brush attachment to remove all the fine dust; any lingering particles will create unsightly bumps in your finished project.
Beginner Tip: Avoid sanding in small, circular motions in one concentrated spot, as this can create a shallow dip or divot in your wood. Instead, use long, gentle strokes that extend well beyond the patch to blend the area evenly.
Pro Tip: Wrap your sandpaper around a small, flat block of wood or a dedicated sanding sponge. This keeps the pressure even across the entire surface, preventing your fingers from creating uneven pressure points that lead to an inconsistent finish.
Step 5: Apply Stain-Blocking Primer
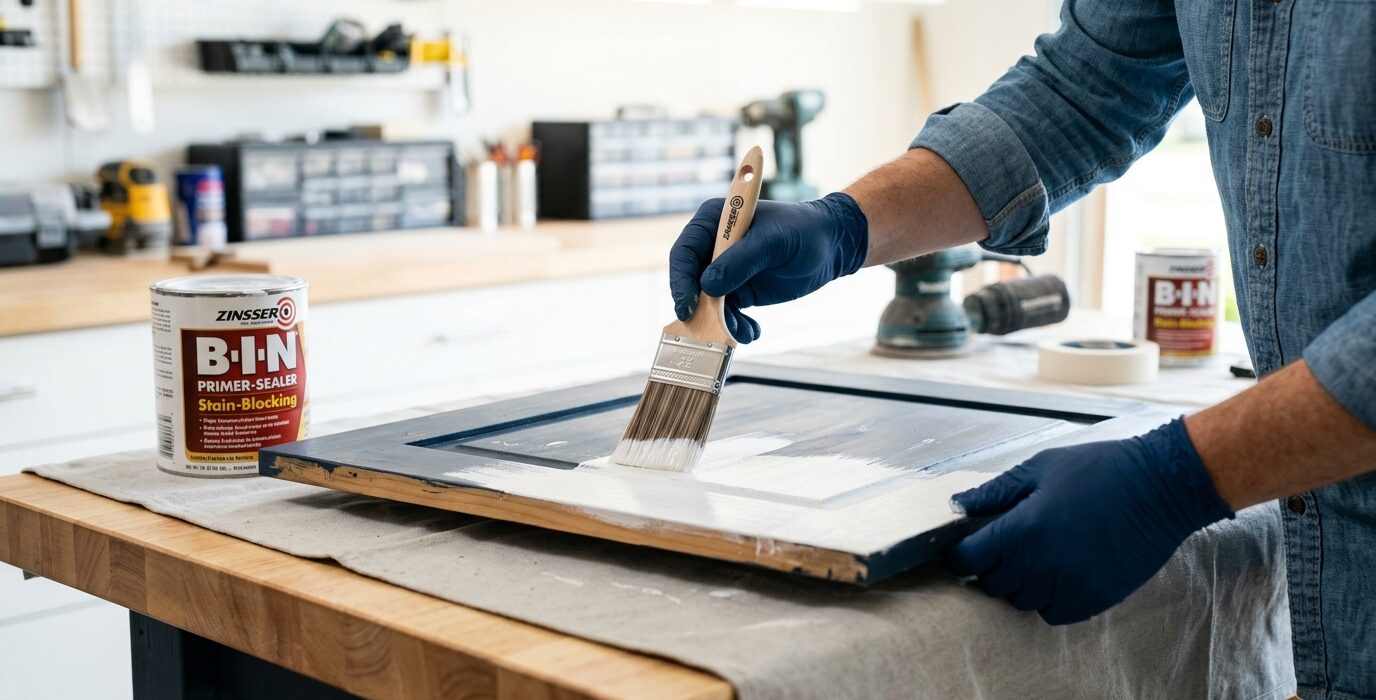
Before you begin painting, you need to seal any areas affected by water damage, smoke, or grease. If you skip this step, those stubborn stains will bleed right through your fresh topcoat, no matter how many layers you apply. Think of stain-blocking primer as a permanent “lock” for those imperfections.
Use a small, high-quality brush – about two inches wide is perfect for control. Dip your brush into your chosen primer (Zinsser BIN or Cover Stain) about one-third of the way up the bristles. Gently tap the sides of the brush against the inside of the can to remove excess drips rather than wiping it against the rim. Apply the primer using light, overlapping strokes, extending about two inches beyond the edge of the visible stain to ensure complete coverage. Let the primer dry completely according to the label instructions – usually about 45 to 60 minutes – before moving on to patching or painting.
Beginner Tip: Avoid the urge to scrub the primer into the surface. Instead, use long, smooth strokes to lay the product down. Pushing too hard or over-brushing while the primer is becoming tacky will create unsightly streaks and texture that will show through your final paint job.
Pro Tip: Keep a clean, damp rag nearby for immediate cleanup, but remember that these specific primers are solvent-based, not water-based. If you get a drop on the floor or your hands, you will need a small amount of denatured alcohol or mineral spirits to remove it effectively, so keep a little on hand.
Step 6: Patch and Re-Prime
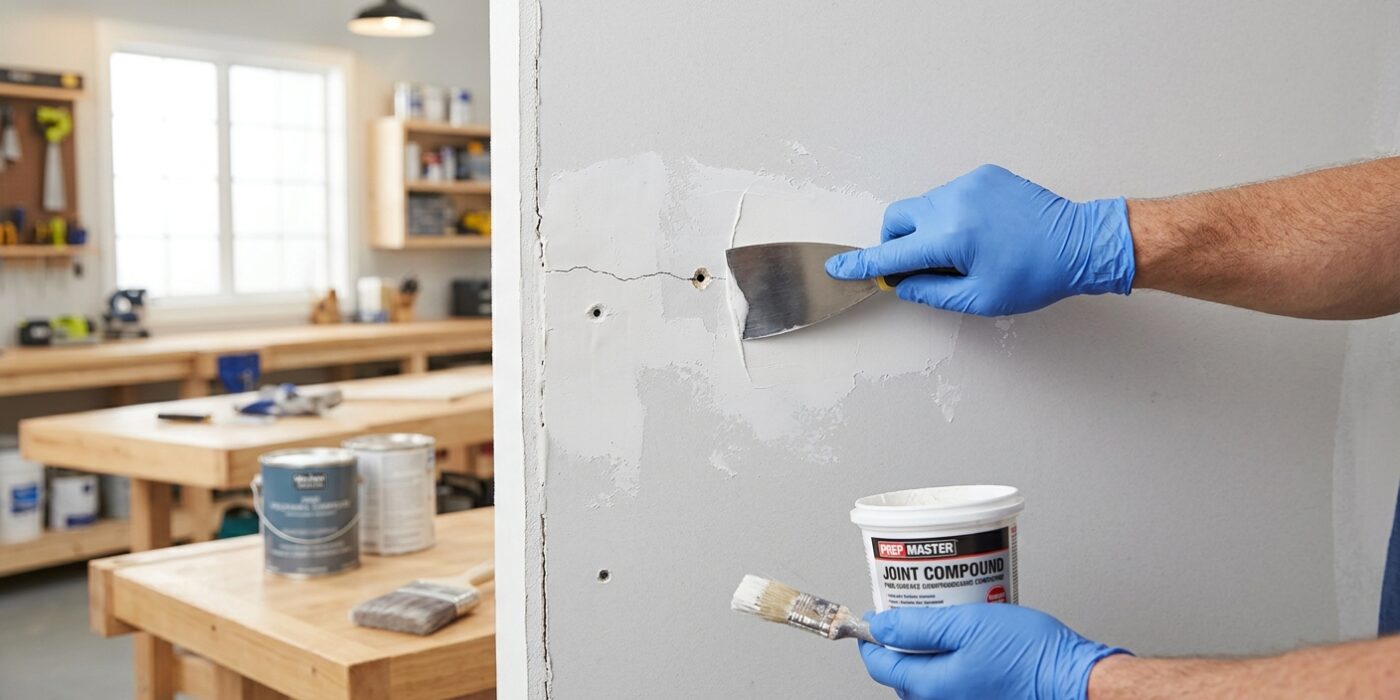
Now that your surface is prepped, it is time to make those imperfections disappear. Using a small putty knife, scoop a pea-sized amount of joint compound and press it firmly into any holes or rough spots. The goal is to fill the void completely, but try to keep the compound level with the surrounding wall. To “feather” the edges, hold your putty knife at a shallow 30-degree angle and gently scrape away the excess, moving from the center of the patch toward the clean wall; this creates a smooth transition that won’t show through your paint later.
Once the compound is bone-dry – it will turn from gray or pink to a bright, solid white – lightly sand the area with a 120-grit sanding block until it feels perfectly flush with the wall. Finally, dab a small amount of primer over the dried patches. This “seals” the repair, preventing the porous compound from soaking up your topcoat and leaving you with a dull, matte spot.
Beginner Tip: Don’t try to fill deep holes in one heavy swipe. If the hole is deep, it is better to do two thin coats, letting the first one dry fully, rather than one thick glob that will crack or shrink as it dries.
Pro Tip: Before you prime, wipe the sanded area with a slightly damp microfiber cloth to remove all fine dust. Any lingering powder will prevent the primer from sticking properly, leading to a patchy, peeling finish.