Project Shopping List
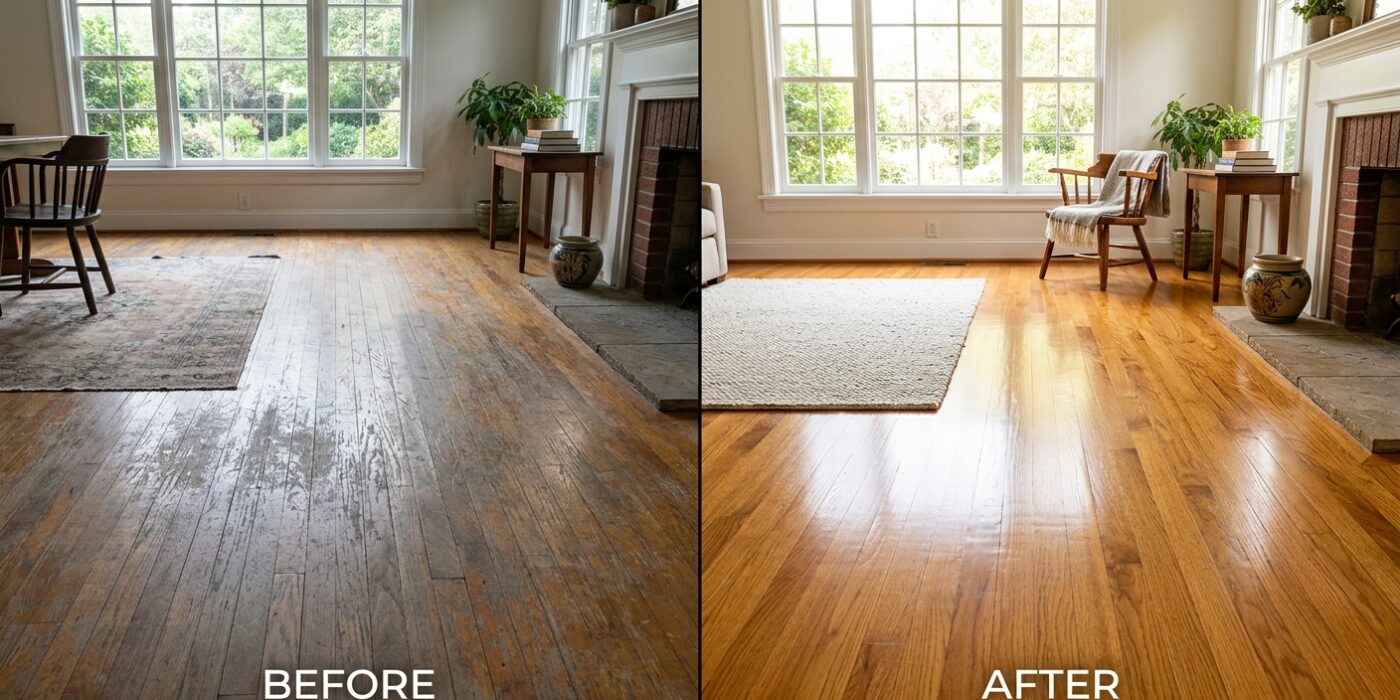
Refinishing hardwood floors transforms worn, scratched, dull flooring into beautiful, like-new surfaces — and it is one of the most dramatically satisfying DIY projects a homeowner can undertake. The job requires rented equipment and patience, but the technique is straightforward once you understand the sanding progression and finishing steps. Budget $200 to $500 in equipment rental and materials for an average room.
Is Your Floor Refinishable?
Solid hardwood floors (typically 3/4-inch thick) can be sanded and refinished 5 to 8 times over their lifetime. Before starting, check whether the floor has been refinished before and how much wood remains above the tongue (the bottom groove). If you can see the top of the tongue from above, there is not enough wood left to sand again. Engineered hardwood has a thin veneer (1/8 to 3/16 inch) — most can be lightly screened and recoated once or twice but cannot be drum-sanded without going through the veneer.
What You Will Need
Equipment (Rented)
- Drum sander (for the main field of the floor)
- Edge sander (for the perimeter within 3-4 inches of walls)
- Floor buffer with screen pad (for final smoothing before finish)
Tools
- Hand scraper (for corners the edge sander cannot reach)
- Shop vacuum with HEPA filter
- Lambswool applicator or T-bar applicator for finish
Materials
- Sandpaper in 36, 60, 80, and 100 grit for drum sander
- Edge sander discs in matching grits
- Floor stain (optional — if changing the color)
- Oil-modified polyurethane or water-based polyurethane finish
- Tack cloth or damp mop for dust removal between coats
Step 1: Prepare the Room
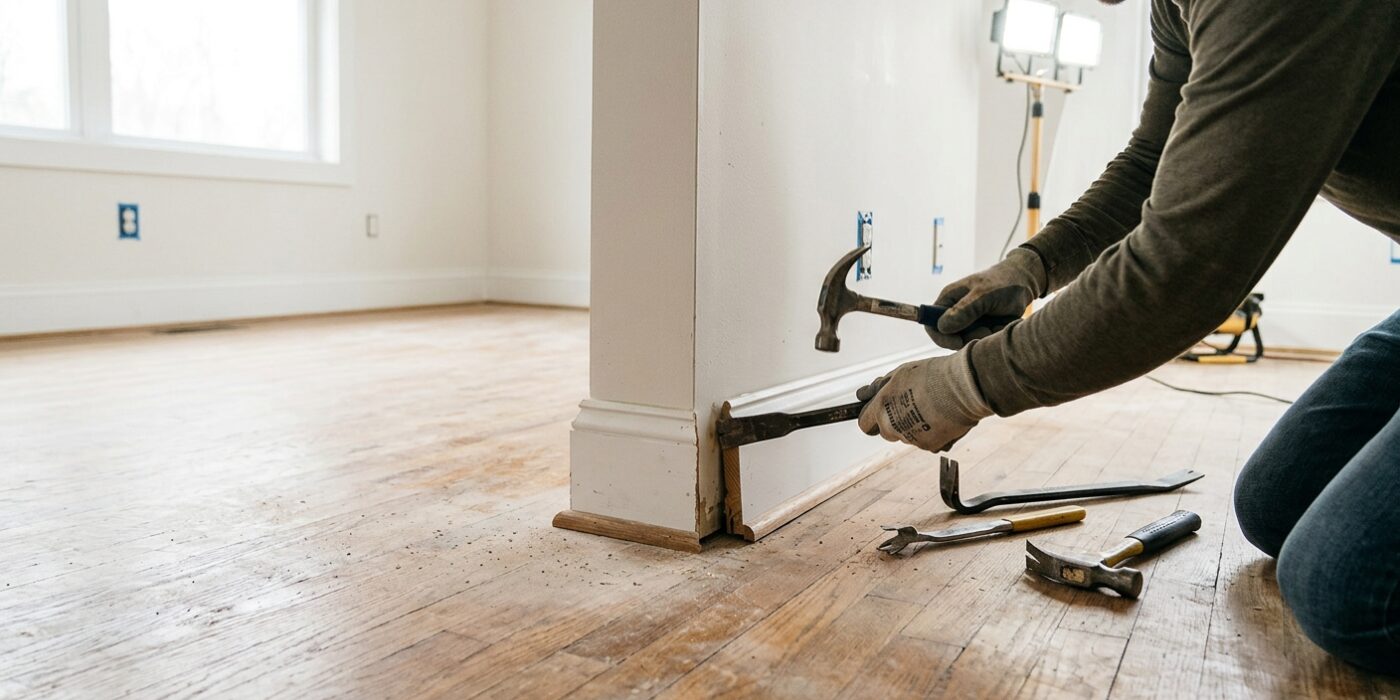
Before you begin sanding, your room must be completely clear. Start by removing all furniture, area rugs, and wall hangings. Take off the floor registers (the metal vent covers) using a screwdriver, and store the screws in a labeled baggie so you don’t lose them. Sanding creates a massive amount of incredibly fine dust that travels through the air like smoke; use painter’s tape and 4-mil plastic sheeting to seal off doorways, cabinets, and light fixtures. This keeps your home clean and protects your electronics.
Next, inspect the floor for hardware and gaps. If you see a nail head sticking up, place a nail set on top of it and tap it firmly with a hammer until the head is slightly below the wood surface. This prevents the sander from catching on the metal and ruining your sandpaper or gouging your floor. Finally, apply a wood filler that matches your floor’s color to any gaps wider than a credit card. Press the filler in with a putty knife, let it dry according to the package instructions, and lightly sand it flush.
Beginner Tip: Do not skip the plastic sheeting. Even if you think you can just clean up later, sanding dust is so fine it will infiltrate your clothes, bedding, and closets. Sealing the room properly saves you hours of post-project cleaning.
Pro Tip: Use a bright LED work light held at a low angle across the floor. This “raking light” will cast long shadows, making it significantly easier to spot protruding nails or uneven filler spots that you would otherwise miss.
Step 2: Sand the Field with the Drum Sander
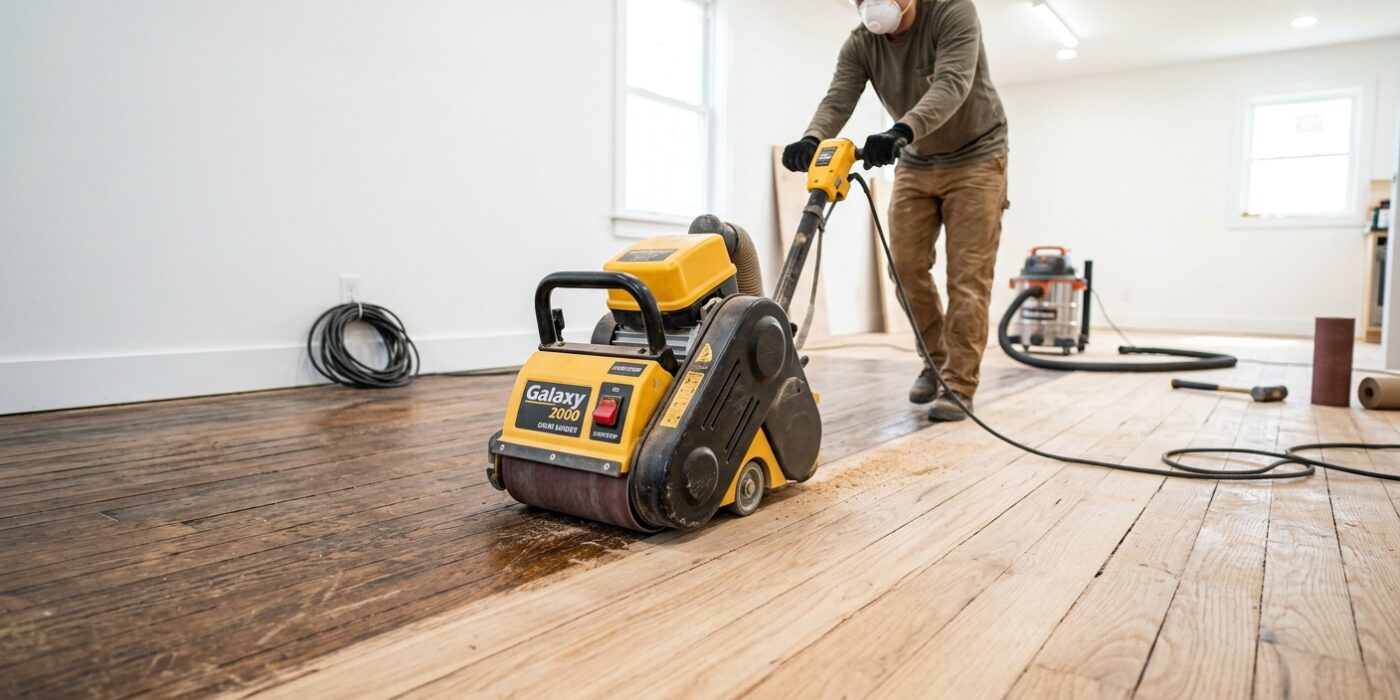
Now it is time to tackle the main surface area, known as the “field.” Think of this as erasing old, tired layers to reveal the fresh wood beneath. Start by loading your drum sander with 36-grit paper if your floor is severely scratched, or 60-grit for general wear. If the floor boards look wavy or uneven, make your first pass diagonally at a 45-degree angle to the wood grain to level the surface. Once leveled, switch to sanding parallel with the wood grain, overlapping each pass by about 4 inches to ensure a uniform finish.
Beginner Tip: Never let the sander sit still while the drum is lowered to the floor. Even a split-second pause will dig a deep, unsightly groove into your boards that is incredibly difficult to fix. Keep the machine moving at a steady, consistent pace – if you need to stop, be sure to lift the lever to disengage the drum first.
Pro Tip: To get the best results, use a systematic progression of sandpaper grits. Move from 60-grit to 80-grit, and finish with 100-grit. Think of each stage as refining the surface; the coarser paper removes the old finish, while each subsequent, finer grit polishes the wood, removing the scratch marks left by the previous pass, leaving you with a surface that is silky smooth to the touch.
After finishing the main field, remember that you will still need to use an edger tool to reach the baseboards, as the large drum sander cannot reach the very edges of the room.
Step 3: Sand the Perimeter with the Edge Sander
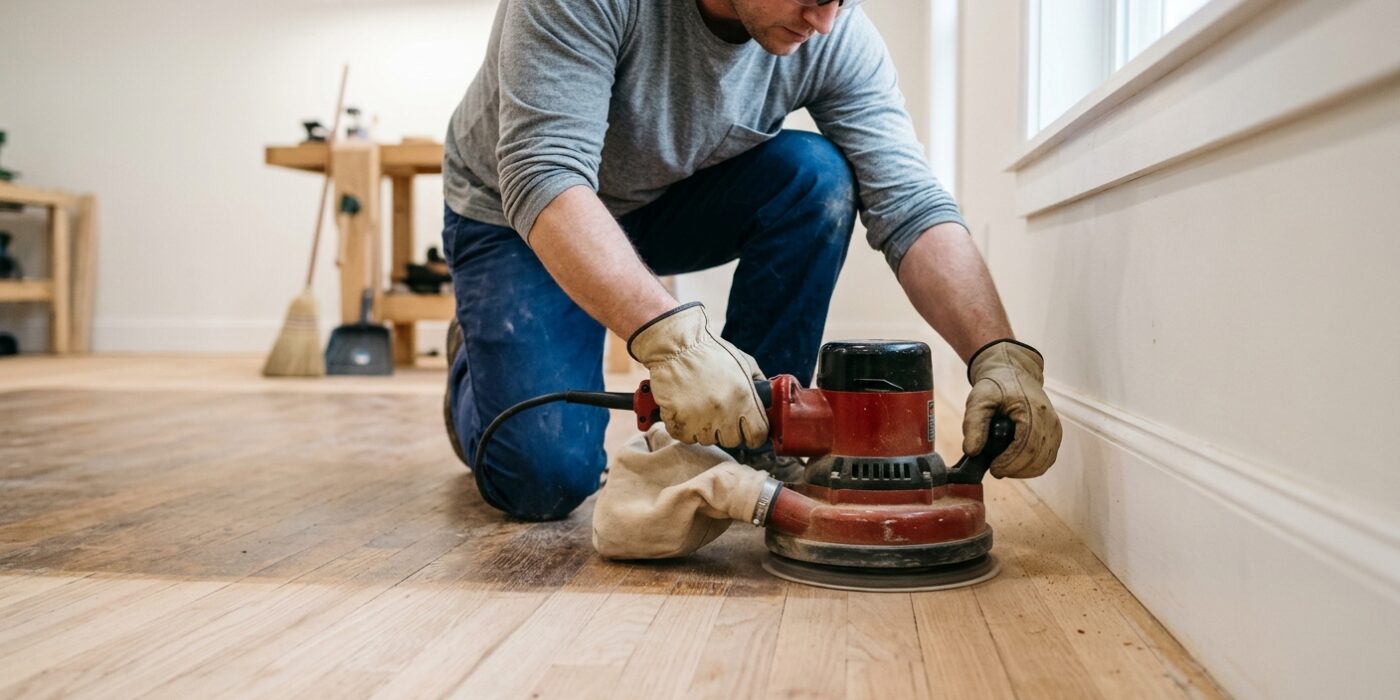
Now that the main floor is sanded, it is time to tackle the perimeter. An edge sander is a smaller, handheld tool designed to reach the tight spaces along the baseboards where your large drum sander couldn’t fit. You will follow the exact same grit progression you used previously, starting with coarse sandpaper and working your way up to fine. To ensure a smooth look, keep the edge sander flat against the floor, moving it in a smooth, continuous circular motion for the rougher grits. For the final, finest grit, switch to a steady back-and-forth motion parallel to the wall to erase any swirl marks and ensure the perimeter blends seamlessly into the center of the room.
Beginner Tip: The most common mistake is tilting the edge sander, which can cause it to “dig” into the wood and create deep, unsightly gouges. Keep the disc completely flat against the floor at all times. If you feel the machine wanting to pull away from you, use a firm, two-handed grip to maintain control and keep it level.
Alternative Method: If renting an edge sander feels intimidating, you can use a high-quality orbital palm sander instead. While it will take significantly longer to remove the old finish, it is much easier to control and far less likely to leave permanent damage on your floorboards.
Pro Tip: To blend the transition area where the center and perimeter meet, use a hand scraper to gently feather the edges. This removes any leftover circular sander marks and creates a perfectly smooth surface that will accept your stain evenly.
Step 4: Hand Scrape Corners
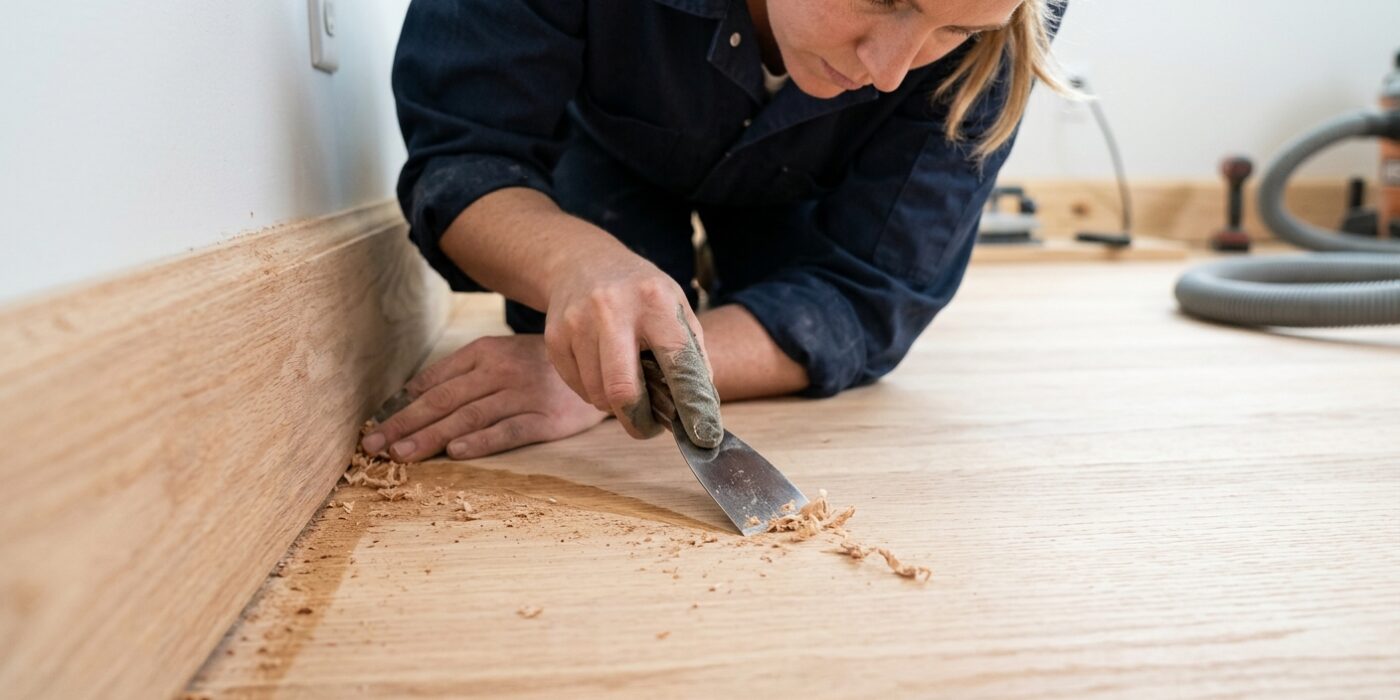
Even the best edge sanders are too bulky to reach deep into room corners. If you skip this step, those stubborn patches of old finish will stick out like a sore thumb once you apply your new stain. To fix this, use a sharp hand scraper to carefully remove the remaining finish until you reveal raw, bare wood.
Grip the scraper firmly with both hands, placing the blade flat against the floor. Apply firm, steady pressure and pull the scraper toward you, always moving in the direction of the wood grain. If you scrape against the grain, you risk creating deep, unsightly scratches that are very difficult to sand out later. Aim to remove the old finish in smooth, overlapping strokes, working carefully to match the height of the wood you sanded with your machine.
Beginner Tip: A common mistake is tilting the scraper too high, which causes the sharp corners of the metal blade to “dig” into the wood. Keep the blade as flat as possible against the floor surface to ensure an even removal without creating divots.
Alternative Method: If a hand scraper feels intimidating, you can use a high-grit sanding block (80-grit is a great starting point). Simply wrap the sandpaper tightly around a small, rectangular block of wood. It requires more manual effort than a scraper, but it is much harder to accidentally gouge the floor with this method.
Pro Tip: Keep a metal file handy. Hand scrapers lose their edge quickly; a quick swipe of the file across the blade every few minutes will ensure the tool glides through old finish like butter rather than tearing at the wood.
Step 5: Apply Stain (Optional)
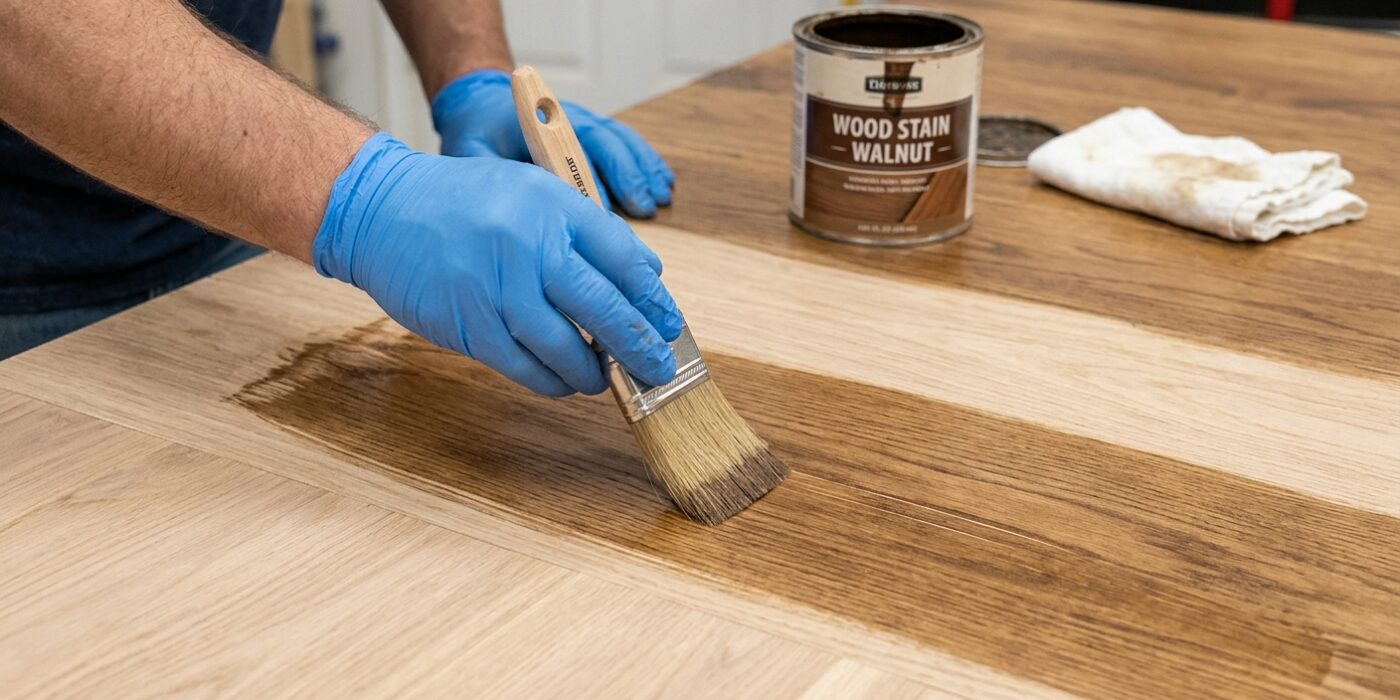
If you want to change the color of your wood, staining is where your floors truly transform. Before tackling the whole room, always test your stain on a scrap piece of the same wood species or in a hidden corner, like inside a closet. Different woods absorb stain at different rates, and seeing the color in your specific lighting is essential.
To begin, stir your oil-based stain thoroughly with a stir stick to ensure the pigments are evenly mixed. Dip your lambswool applicator or a clean, lint-free rag into the stain and apply it in long, smooth strokes that follow the direction of the wood grain. Work in small, manageable sections to keep a “wet edge.” After 3 to 5 minutes, use a fresh, dry rag to wipe away any excess stain. If you leave too much behind, it will become gummy and fail to dry properly. If you want a deeper, richer color, wait for the first coat to dry completely – usually 8 to 24 hours – before applying a second.
Beginner Tip: Avoid the mistake of “lap marks.” These dark, overlapping streaks occur when the stain on one section dries before you finish the adjacent section. To prevent this, always complete a full board length from wall to wall before starting the next one.
Pro Tip: Wrap your lambswool applicator in plastic wrap or place it in a sealed bag between coats to keep it from drying out, saving you from a messy cleanup or the cost of buying a new one.
Step 6: Apply the Finish Coats
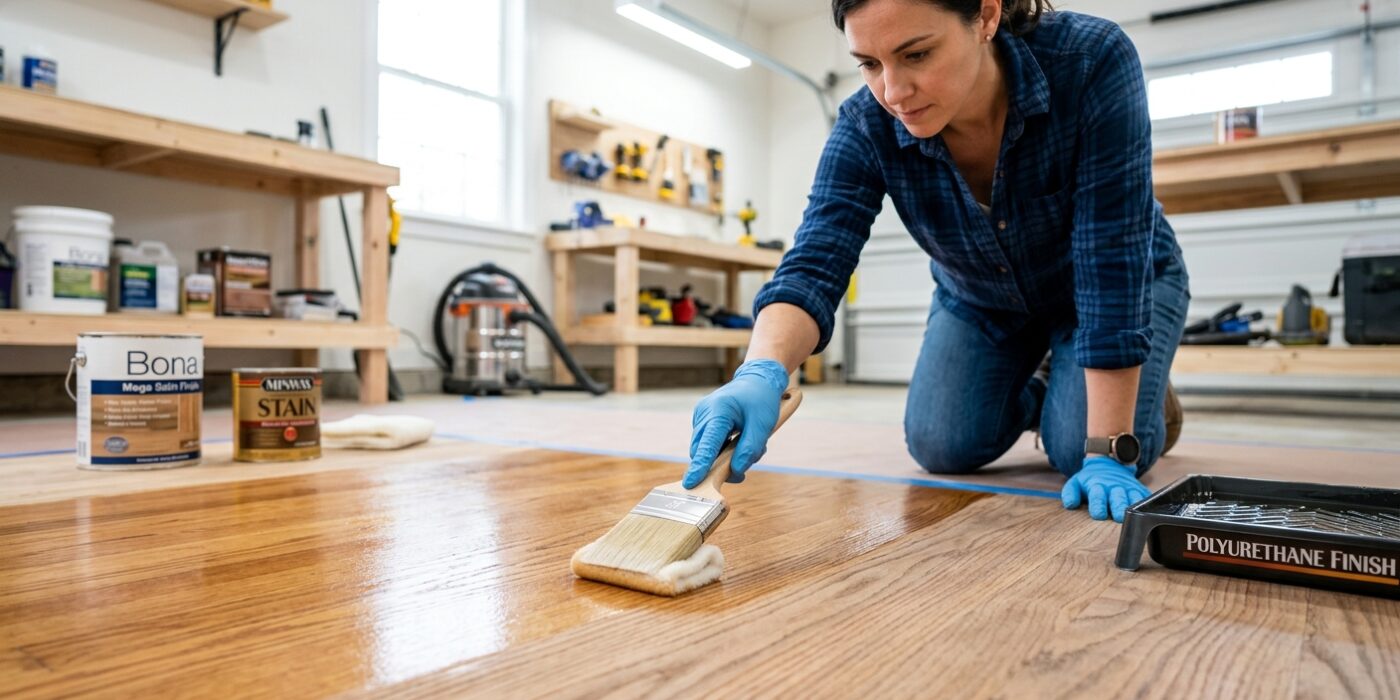
Now that your floor is clean and prepped, it is time to seal that beautiful wood. Using a lambswool applicator, pour a thin line of finish onto the floor and spread it using smooth, long strokes that run parallel to the grain of your boards. Working with the grain prevents unsightly streaks. Allow the first coat to dry according to your product label, typically four to eight hours. Once dry, lightly “screen” the floor with a buffer and a 100-grit mesh pad to knock down any raised wood fibers, then vacuum and tack it clean with a microfiber cloth before applying your next coat. You will need at least three coats for lasting durability. Be patient with the final coat – wait at least 24 hours before walking in socks and up to a week before dragging furniture back into the room.
Beginner Tip: Avoid the urge to “overwork” the finish. If you notice a bubble or a missed spot, leave it alone. The finish will self-level as it dries; messing with a tacky coat usually leaves brush marks or ridges that are difficult to fix later.
Pro Tip: To keep your finish application buttery smooth, pour your finish through a fine-mesh paint strainer into your applicator pan. This catches any dried “skin” or debris from the can, ensuring that not a single piece of grit gets trapped under your pristine, glossy new coat.