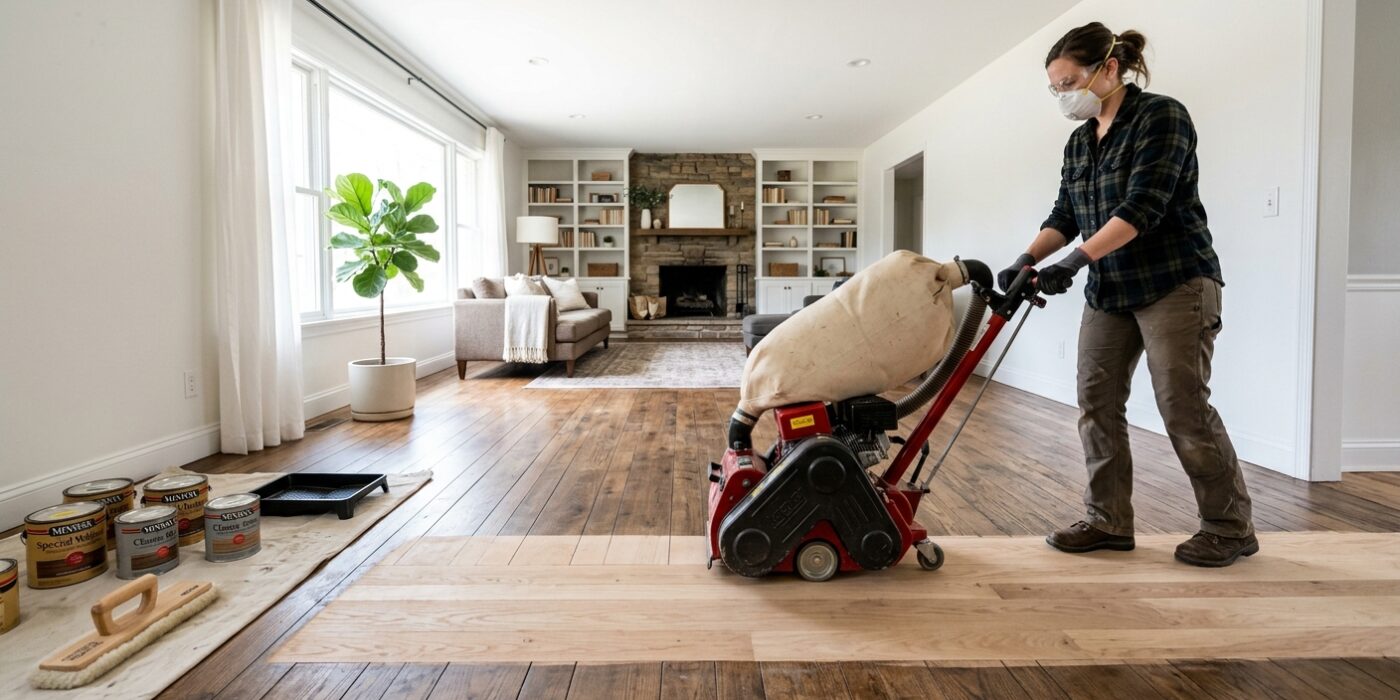
Project Shopping List
Refinishing hardwood floors is the single highest-ROI project in residential renovation – before-and-after results are dramatic, the cost compared to replacement is a fraction, and a properly refinished floor can last another 20 to 30 years. The process involves sanding all the old finish completely away, sometimes staining to a new color, and applying multiple coats of polyurethane or other topcoat. It’s a full-weekend project that produces serious dust and requires your home to be empty for 2 to 3 days.
This guide covers the complete process: rental equipment, drum sander technique, edge sanding, staining decisions, and polyurethane application. Done correctly, your floors will look professionally refinished.
What You’ll Need
Tools
- Drum floor sander (rental, $60 to $90 per day)
- Edge sander (orbital edge sander, rental, $30 to $50 per day)
- Buffer / floor polisher with sanding screen for final sand
- Shop vacuum with HEPA filter
- Lamb’s wool applicator or brush for finish application
- Hammer and nail set to sink all nails flush
- Painters tape for door seals
Materials
- Drum sander paper: 36-grit (heavy removal if finish is thick), 60-grit, 80-grit
- Edge sander discs: 60-grit and 80-grit
- Wood stain if changing color (oil-based stain penetrates better)
- Polyurethane (oil-based for maximum durability, water-based for low odor and faster dry)
- Tack cloths
- Mineral spirits for oil-based cleanup
Step-by-Step Instructions
Step 1: Prepare the Room
Remove all furniture, rugs, and everything from the floor. Remove shoe molding and baseboards if possible – this allows sanding right to the wall and a cleaner final edge. Sink all nail heads below the surface with a hammer and nail set – raised nails will tear drum sander belts immediately. Seal doorways with plastic sheeting and painter’s tape to contain dust. Sand paper generates enormous amounts of fine dust that settles on everything in the house if rooms aren’t sealed. Turn off the HVAC to prevent dust from circulating.
Step 2: Choose Starting Grit
If the existing finish is thick (multiple layers of polyurethane, or old wax finish), start with 36-grit sandpaper on the drum sander. For floors with thin or worn finish, start with 60-grit. Never start with anything coarser than 36-grit – it removes too much wood too quickly. Always progress through the grits: 36, then 60, then 80. Each grit removes the scratches left by the previous coarser grit. Skipping grits leaves visible scratches in the final surface that are difficult to remove without re-sanding.
Step 3: Sand With the Drum Sander
The drum sander is a powerful, unforgiving machine. Always keep it moving when the drum is in contact with the floor – stopping while the drum is down digs a visible depression. Sand with the grain (parallel to the wood planks), not across it. Start at one wall, lower the drum as you walk forward, raise it before you stop at the far wall, and return alongside the first pass overlapping by 3 to 4 inches. Maintain consistent speed – slow walking creates more aggressive sanding than fast walking. Change paper when it shows glazing or when cutting slows noticeably.
Step 4: Sand the Edges with the Edge Sander
The drum sander can’t reach the 6 to 8 inches adjacent to walls. The edge sander (a circular orbital sander) handles this zone. The challenge is that edge sanders move in circles and can create swirl marks – work in overlapping passes, keeping the sander moving constantly in a small arc pattern. The edge-sanded zone should seamlessly match the drum-sanded zone in cut depth. Blend the transition zone with hand sanding if needed.
Step 5: Final Screen Sand
After the 80-grit drum and edge pass, attach a 100-grit sanding screen to the buffer/polisher and do one final pass over the entire floor. This screen sanding removes any remaining swirl marks, levels any slight differences between the drum-sanded and edge-sanded zones, and provides a consistent fine profile for the stain or topcoat to bond to. Screen sanding is the step that separates a flat, even finished surface from a slightly rough one.
Step 6: Apply Stain (Optional)
If you’re changing the floor color, apply oil-based floor stain now with a cloth applicator, working it into the grain. Wipe off excess before it dries following the product’s timing instructions. Let stain dry fully per the manufacturer’s spec (24 to 48 hours for oil-based floor stain) before applying topcoat. Check stain color on a sample board or in a closet first – stain colors look significantly different on different wood species and can’t be removed without re-sanding the floor.
Step 7: Apply Polyurethane – Multiple Coats
Apply the first coat of oil-based polyurethane with a lamb’s wool applicator, working with the grain and maintaining a wet edge. Three thin coats total is the standard – the first coat is a sealer (sometimes diluted 10% with mineral spirits), the second builds thickness, and the third is the surface coat. Lightly screen-sand between coats with 120-grit or a fine sanding screen (not enough to remove the coat, just to knock off dust nibs) and tack cloth before each subsequent coat. Water-based polyurethane goes on milky and dries clear – use white or light gray tack cloths with water-based products.
Step 8: Final Cure
Oil-based polyurethane requires 24 hours minimum between coats and 72 hours before furniture is moved back. Full cure takes 30 days. Use furniture pads and avoid rugs during the cure period – rugs trap solvents and slow cure, sometimes causing a permanent soft spot in the finish. For water-based polyurethane, between-coat times are shorter (2 to 4 hours), but full cure still takes 2 weeks.
Pro Tips
- Rent both the drum sander and edge sander for the same day – doing both at once is dramatically more efficient than returning the drum sander and renting the edge sander separately.
- On very old floors with deep scratches or significant cupping between boards, diagonal sanding (at 45 degrees) on the first coarse pass levels the boards more effectively than with-grain sanding. Always finish with with-grain passes to remove the diagonal marks.
- Pre-condition oil-based polyurethane by letting the opened can sit 10 minutes before using – the solvents off-gas slightly and the remaining product flows better with fewer bubbles.
- Apply polyurethane when the room temperature is between 65°F and 75°F – cold finish is thick and drags; hot conditions cause it to dry too fast and leave brush marks.
- Open all windows after the final coat and run fans to exhaust fumes – oil-based polyurethane fumes are strong and the room should not be occupied during application and drying.
Frequently Asked Questions
How do I know if my floor can be refinished?
Check the floor thickness – solid hardwood floors can be refinished multiple times because they’re 3/4 inch thick and there’s plenty of wood above the tongue. Engineered hardwood has a thin veneer layer (typically 1/16 to 1/8 inch) and can be refinished only once or twice before the veneer wears through. Check your manufacturer’s data or the wear layer thickness on the end grain of a removed board.
Can I refinish without renting a drum sander?
For a light refinish of floors with thin, worn finish, you can “screen and recoat” – screen sand with a buffer to scuff the existing finish, clean well, and apply new polyurethane coats without full sanding. This works when the existing finish has no deep scratches, discoloration, or staining issues. For a full refinish that changes color or removes deep scratches, a drum sander is the only practical tool.
Why does my refinished floor have bubbles in the finish?
Bubbles in polyurethane are caused by three things: shaking the can (never shake – stir), applying too thickly (thin coats dry flatter), or working in hot conditions that set the surface before bubbles pop. If bubbles appear, let the coat dry completely, sand with 120-grit screen to remove the bubbles, tack cloth, and apply another thin coat in better conditions.