Project Shopping List
Herringbone tile is one of the most visually striking floor patterns – the 45-degree interlocking zigzag transforms ordinary rectangular tile into something that looks custom and complex. But the difficulty isn’t really in the tiling; it’s in the layout. Get the layout right and the actual setting process is straightforward. Get it wrong and you’ll spend hours cutting tiles and fighting the pattern to the walls.
This guide focuses on true herringbone (tiles set at 45 degrees to the room) using standard rectangular tile – the most common application for bathroom and kitchen floors. By the end, you’ll know how to establish your center line, make the critical first tile placement, and execute the diagonal cuts at the perimeter.
What You’ll Need
Tools
- Wet tile saw (essential for angled cuts)
- Chalk line
- Laser level or long straightedge
- Notched trowel (1/4-inch square notch for most tile under 12 inches)
- Tile spacers or wedge spacers
- Grout float
- Rubber mallet
- Large sponge and buckets
Materials
- Tile – rectangular format (3×6, 4×8, or 2×4 work best for herringbone)
- Modified thinset mortar
- Grout (size and type per joint width)
- Grout sealer
- Tile backer board (if not already installed)
Step-by-Step Instructions
Step 1: Choose Your Tile Size
For herringbone, tile proportions matter. A 2:1 ratio (e.g., 2×4, 3×6, 4×8 inches) creates the classic herringbone where each tile aligns perfectly with its neighbor in the pattern. Square tile in herringbone becomes a diagonal basket weave, which is a different (also beautiful) pattern. Decide which visual you want before ordering – this is not interchangeable.
Step 2: Find the Room Center and Establish a Baseline
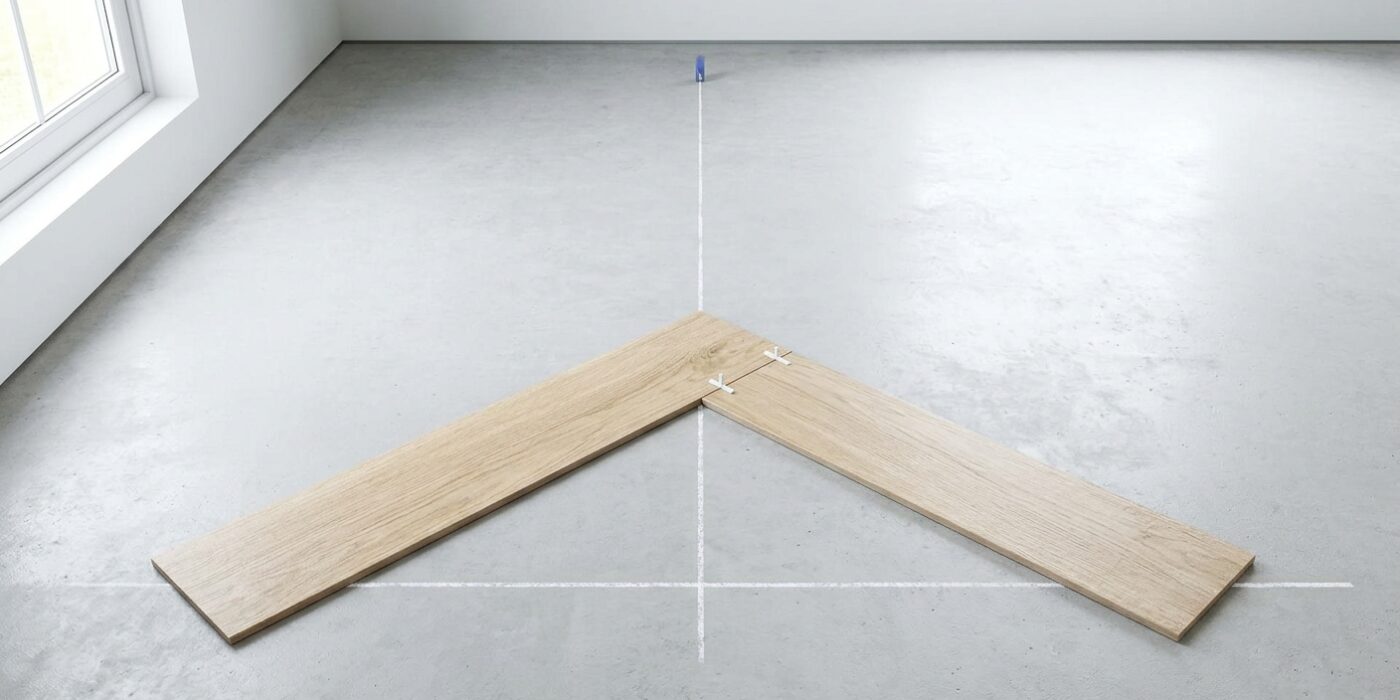
Snap chalk lines connecting the midpoints of opposite walls to find the room’s center point. From this center, snap a diagonal line at 45 degrees to the room – this becomes your primary layout line. All tiles align either parallel or perpendicular to this 45-degree line, meaning no tile aligns with the room walls. This is key: the pattern flows diagonally across the room, not wall-to-wall.
Step 3: Dry-Lay the Pattern to Verify
Before mixing a drop of mortar, dry-lay 20–30 tiles in your planned herringbone pattern starting from the center. This reveals where the pattern lands at the walls – specifically, how much cut tile will appear at each wall. If you’re getting tiny slivers at one wall (less than 1/3 of a tile), shift your starting point slightly to center up the cuts. Balanced border cuts are what separate professional-looking herringbone from amateur work.
Step 4: Set the First Tile Precisely
The first tile placement determines the entire pattern. Place it with its long axis along your 45-degree baseline and its corner at the center point. Use a laser level to confirm alignment. This tile cannot move – everything in the room is laid from it. Apply mortar with a square-notch trowel and use back-buttering on the tile as well for full coverage.
Step 5: Lay the Pattern in a Diamond Shape
Work outward from the first tile in a diamond shape, not in rows. Set one tile to the right of the first at 90 degrees to it (creating the V shape of the herringbone), then the next continuing the direction, alternating each tile’s orientation. Think of it as building a diamond out from the center – this keeps your reference point accessible as you work and lets you check alignment constantly.
Step 6: Check Alignment Every 10 Tiles
Lay a long straightedge across the tops of tiles in the direction of the pattern every 10 tiles or so. Any one tile that’s high or rotated slightly will compound into a visible wave in the pattern. The herringbone pattern amplifies alignment errors more than straight-set tile because the eye follows the zigzag line and any deviation is immediately obvious.
Step 7: Make the Perimeter Cuts
The border tiles require diagonal cuts – one cut per tile at the wall line. Measure each border position individually (don’t assume consistency), mark the cut line, and make the cut on a wet saw. At inside corners, you’ll need two cuts per tile. Keep a consistent grout joint width at the wall – don’t let cuts get sloppy just because they’re near the wall.
Step 8: Grout After Full Cure
Allow thinset to cure at least 24 hours before grouting. Mix grout to a peanut butter consistency and work it diagonally across the tile with a float – working diagonally (not along the grout lines) fills all joints more evenly in a herringbone pattern. Clean with a barely damp sponge in two passes, then buff dry to remove haze. Seal grout after 72 hours.
Pro Tips
- Rectified tile (precisely cut to exact dimensions) is essential for tight herringbone joints – non-rectified tile has enough size variation that tight joints in herringbone make the alignment issues impossible to hide.
- Use a smaller grout joint for herringbone than you would for the same tile in straight-set – 1/16 inch looks best with 3×6 tile; wider joints break up the crisp zigzag visual.
- The waste factor for herringbone is higher than straight-set tile – plan for 15–20% extra material for the diagonal border cuts, which waste half a tile for each border position.
- Consistent back-buttering (applying thinset to the tile back as well as the floor) is more important in herringbone because of the many tile ends that need full coverage right to the edge.
Frequently Asked Questions
What’s the difference between herringbone and chevron?
In herringbone, each tile is a rectangle with squared ends, and they interlock by butting end-to-side. In chevron, tiles are cut with angled ends (parallelogram shapes) so the joints meet in a continuous V-point. True chevron requires custom-cut tiles; herringbone works with standard rectangular tile. The visual effect is similar, but chevron has a sharper, more continuous arrow look.
Can I lay herringbone tile on a floor with slight slope (like a shower floor)?
Yes, but it requires extra care. The herringbone pattern makes slope perception more complex – the eye follows the zigzag rather than reading flat surfaces intuitively. Ensure your slope is consistent (1/4 inch per foot toward the drain) and set the first tile at the drain point, working outward. Avoid herringbone in very small showers where the border cuts become too complex.
How do I handle the pattern at a doorway?
The herringbone pattern runs through the doorway and continues into the adjacent room (if it’s the same material) or terminates at a transition strip. For a transition, cut the border tiles at the doorway line just as you would at a wall. The key is not to force the pattern to realign to a straight line – the diagonal cuts at the doorway are part of what makes herringbone look intentional and refined.