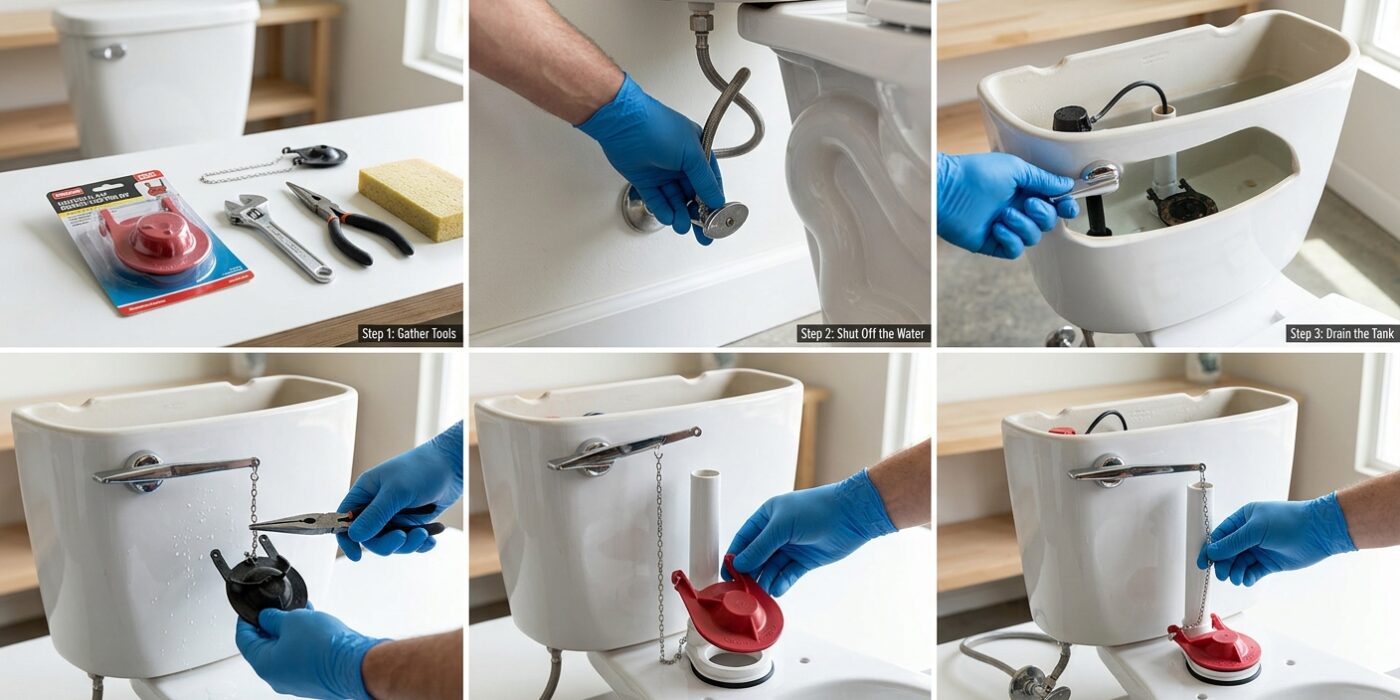
Project Shopping List
The toilet flapper is the rubber seal at the bottom of the tank that opens when you flush and closes to hold water for the next flush. When it fails – which it does every 3–5 years from rubber degradation – the result is a toilet that runs continuously or phantom-flushes every 30–60 minutes. Replacing it is the simplest and most common plumbing repair there is: under $10 in parts, about 10 minutes of work.
This guide covers identifying the right replacement flapper, removing the old one, and installing the new one so it seals correctly and stops the phantom flush for good.
What You’ll Need
Tools
- None required (may use pliers for stuck chain clip)
- Gloves (optional)
Materials
- Replacement flapper – universal or brand-specific (see Step 1)
- Food coloring (for verification test)
Step 1: Identify the Right Flapper
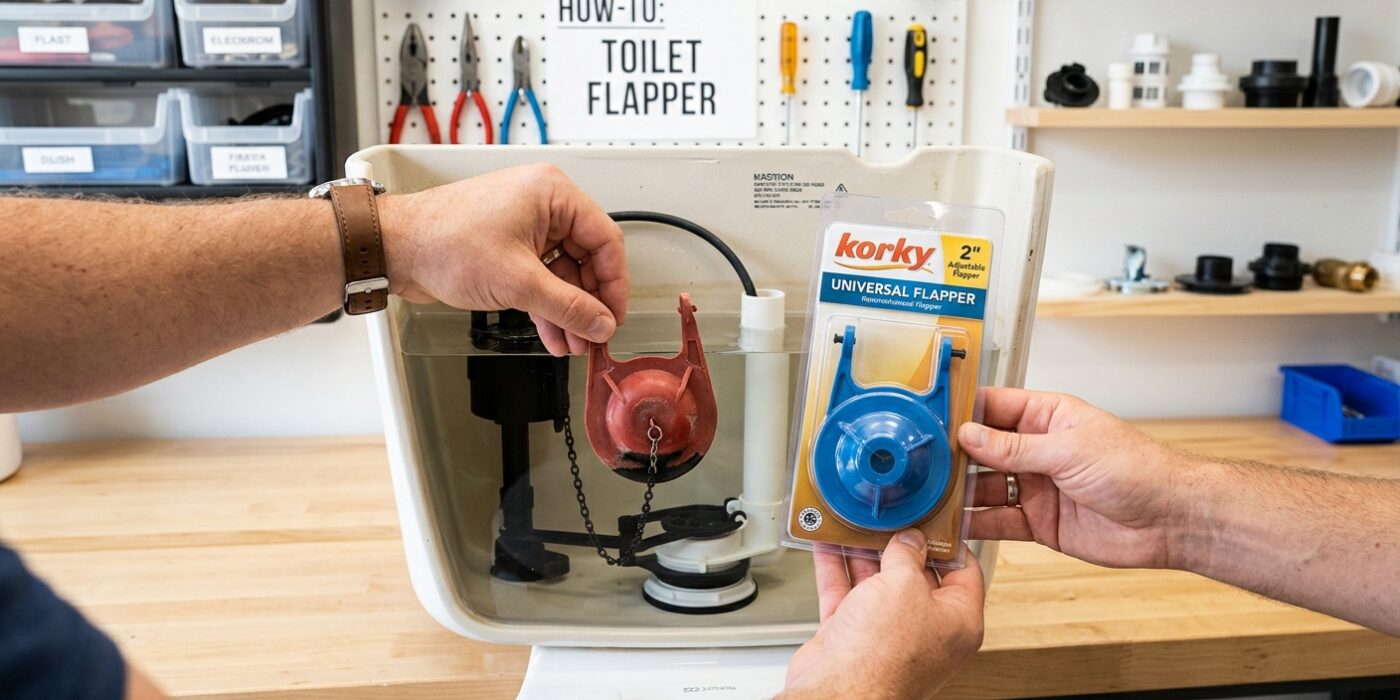
Before you rush to the store, it is vital to know that not all toilet parts are created equal. The flapper is the rubber seal at the bottom of your tank that lifts to let water flush. While most toilets use a standard 2-inch or 3-inch universal flapper, some brands like Kohler, Toto, American Standard, and Mansfield utilize proprietary flush valves that only accept their own specific replacement parts. Installing a generic flapper on these units will result in an imperfect seal, meaning your toilet will continue to run or “phantom flush” despite your hard work.
Beginner Tip: Do not guess the size by looking at it. Even if a flapper looks standard, a difference of just half an inch in diameter or a slightly different hinge style will cause a leak. Always remove the old one first, pop it into a clean plastic bag, and bring it with you to the hardware store to compare it side-by-side with your new purchase. A physical match is the gold standard for success.
Pro Tip: If you cannot find a model number stamped on the back wall of the tank, use your smartphone to take a clear, well-lit photo of the interior tank setup, including the flush valve and the old flapper. Hardware store associates see these plumbing setups every day; showing them a photo is often more helpful than trying to explain the shape or size from memory.
Step 2: Shut Off Water and Flush
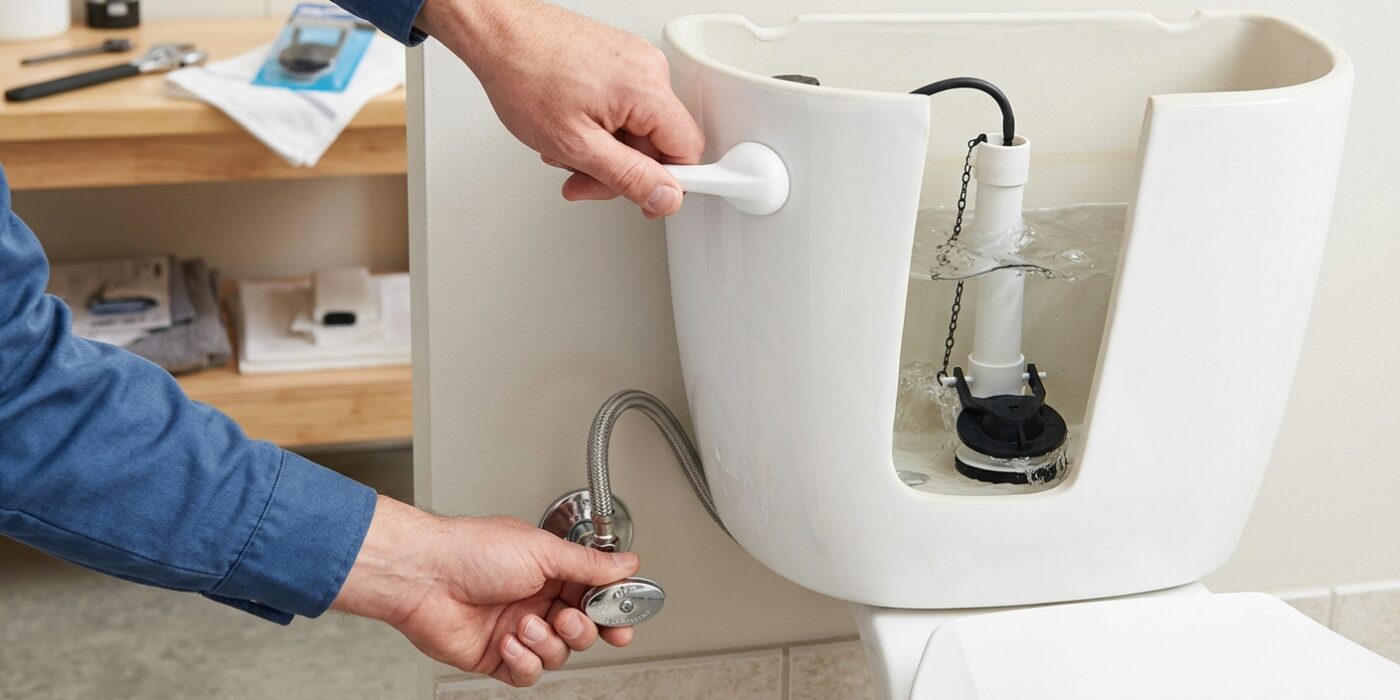
Before you get your hands inside the tank, you need to stop the flow of water to prevent a messy overflow. Look at the wall or floor behind your toilet for a small, oval-shaped handle attached to a thin pipe – this is your water supply valve. Turn this valve clockwise (to the right) until it stops completely. If the handle is stiff, don’t force it; a firm, steady grip is all you need.
Once the water is off, lift the toilet tank lid and set it aside in a safe, flat spot where it won’t be knocked over. Now, press the flush handle down and hold it for a few seconds. The water inside the tank will drain into the bowl, leaving the tank mostly empty. You do not need to sponge the tank completely dry for this repair. The flapper sits at the very bottom, and working with a few inches of shallow, clean water is perfectly normal – it actually helps you see the chain and connections more clearly.
Beginner Tip: Avoid turning the valve too hard or quickly. If the valve feels stuck, try spraying a little lubricant like WD-40 on the threads and letting it sit for ten minutes before trying again. Never use pliers on the valve handle, as you could accidentally snap the plastic or scratch the chrome finish.
Pro Tip: Before you start, place a small, dry towel inside the bottom of the toilet bowl. This prevents any accidental drips from splashing and keeps your workspace clean while you focus on the repair.
Step 3: Remove the Old Flapper
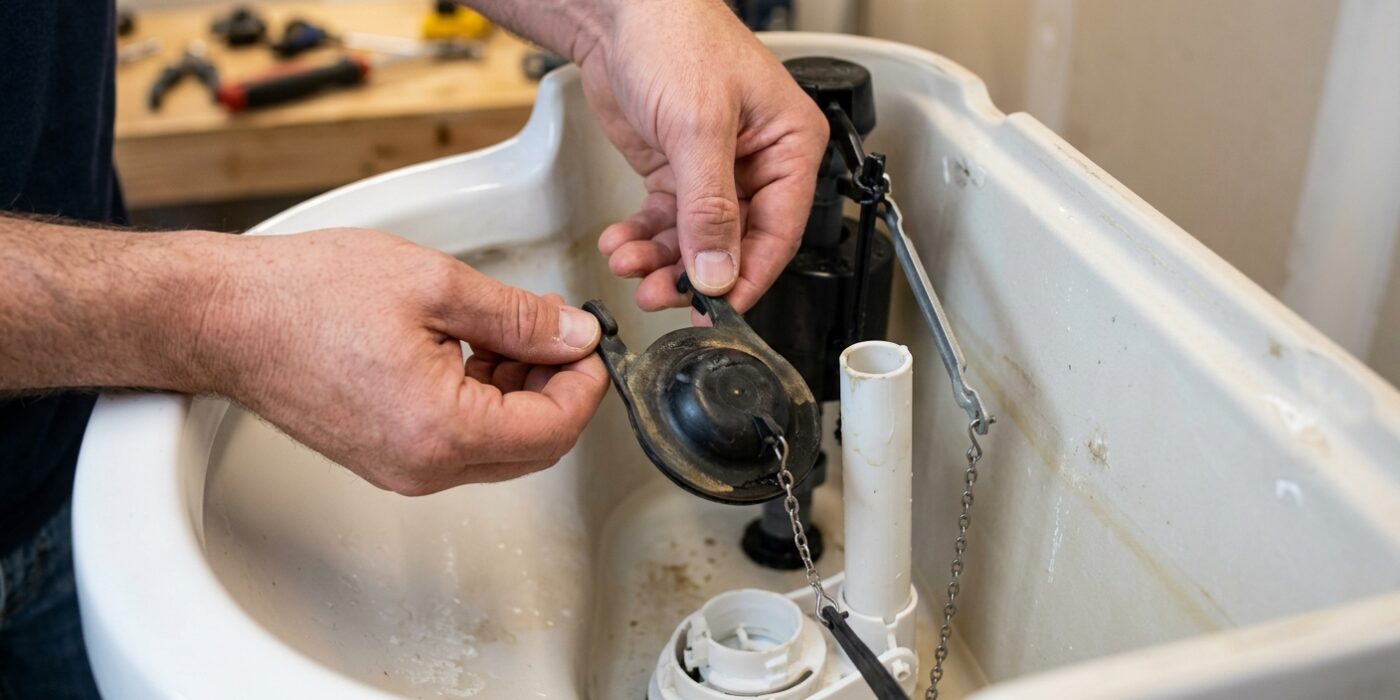
Now that your tank is empty, it is time to remove the old flapper. First, look for the metal or plastic chain connecting your flapper to the flush handle arm. Unclip the chain from the arm; if it is held by a simple hook, just slide it off. Keep an eye on which hole on the flush arm the chain was attached to, as this specific placement controls how much water releases during a flush. Next, locate the two circular pegs on the overflow tube – the tall, open-ended pipe in the center of the tank. The flapper is held in place by its two side loops, or "ears," which hug these pegs. Use your thumb and index finger to gently pull each ear outward until it pops off the peg. Once both sides are free, the flapper will lift right out of the tank.
Beginner Tip: A common mistake is pulling too hard and accidentally snapping the plastic pegs on the overflow tube. These pegs are often made of brittle plastic; use a gentle, steady outward pressure rather than a sharp tug to release the ears.
Pro Tip: Before you toss the old flapper, snap a quick photo of the chain’s connection point on the flush arm. When you install your new one, you will know exactly where to clip the chain so that your toilet flushes with the same strength as before, saving you from trial-and-error adjustments later.
Step 4: Install the New Flapper
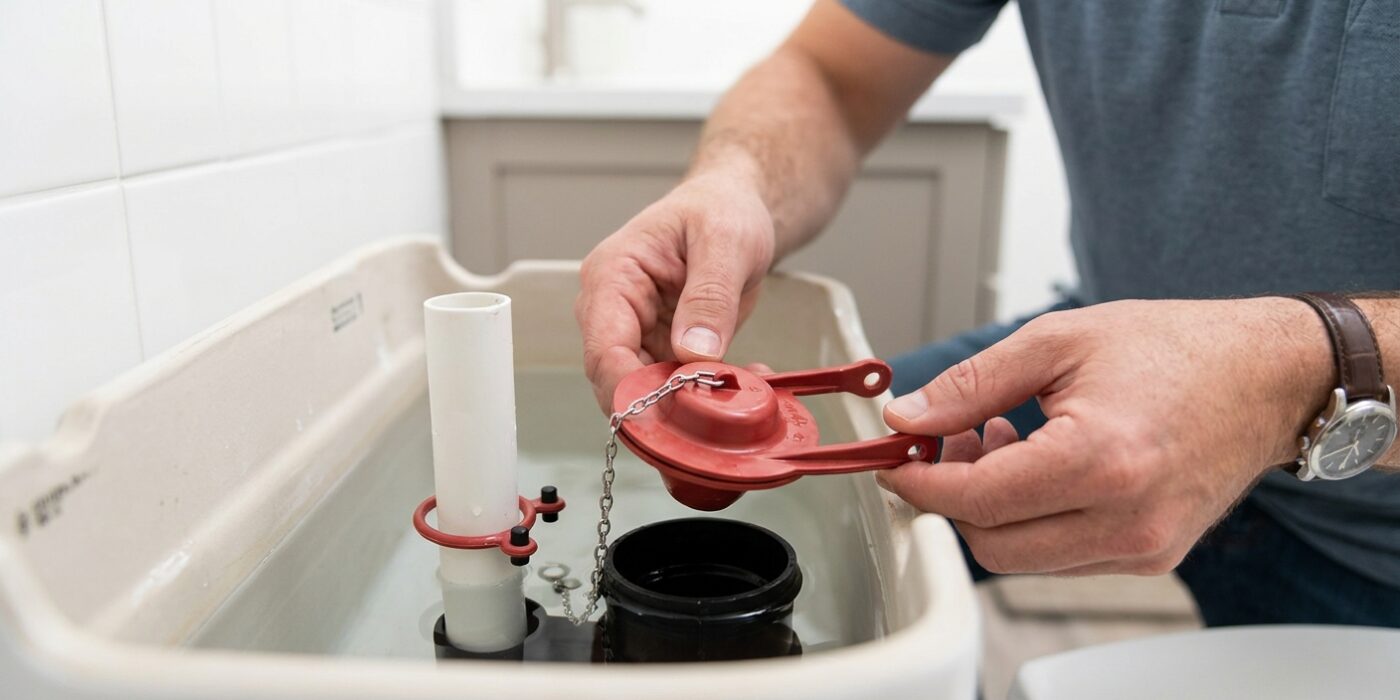
Now it is time to install your new flapper. Locate the two small, protruding pegs on either side of the vertical overflow tube in your tank. Slide the circular loops – often called “ears” – of your new flapper onto these pegs. Once attached, lower the flapper so it sits directly over the drain opening at the bottom of the tank. It is essential that the rubber seal is centered perfectly; if it sits crooked, water will continue to leak into the bowl, causing that annoying phantom flush. Finally, attach the chain to the flush handle arm. Aim for the same link position as your old chain, ensuring there is just a tiny bit of slack – about half an inch – so the flapper can close completely without the chain pulling it open.
Beginner Tip: The most common mistake is leaving the chain too tight or too loose. If the chain is too tight, the flapper will never fully seal; if it is too loose, the chain may get caught under the flapper, preventing it from closing. Always test the handle before refilling the tank to ensure it moves smoothly.
Pro Tip: To get the perfect chain tension, pull the chain taut and hold it against the handle arm, then drop it down exactly one link from that point. This slight bit of slack provides the “magic” amount of wiggle room needed for the flapper to drop into place firmly every single time you flush.
Step 5: Adjust the Chain Length
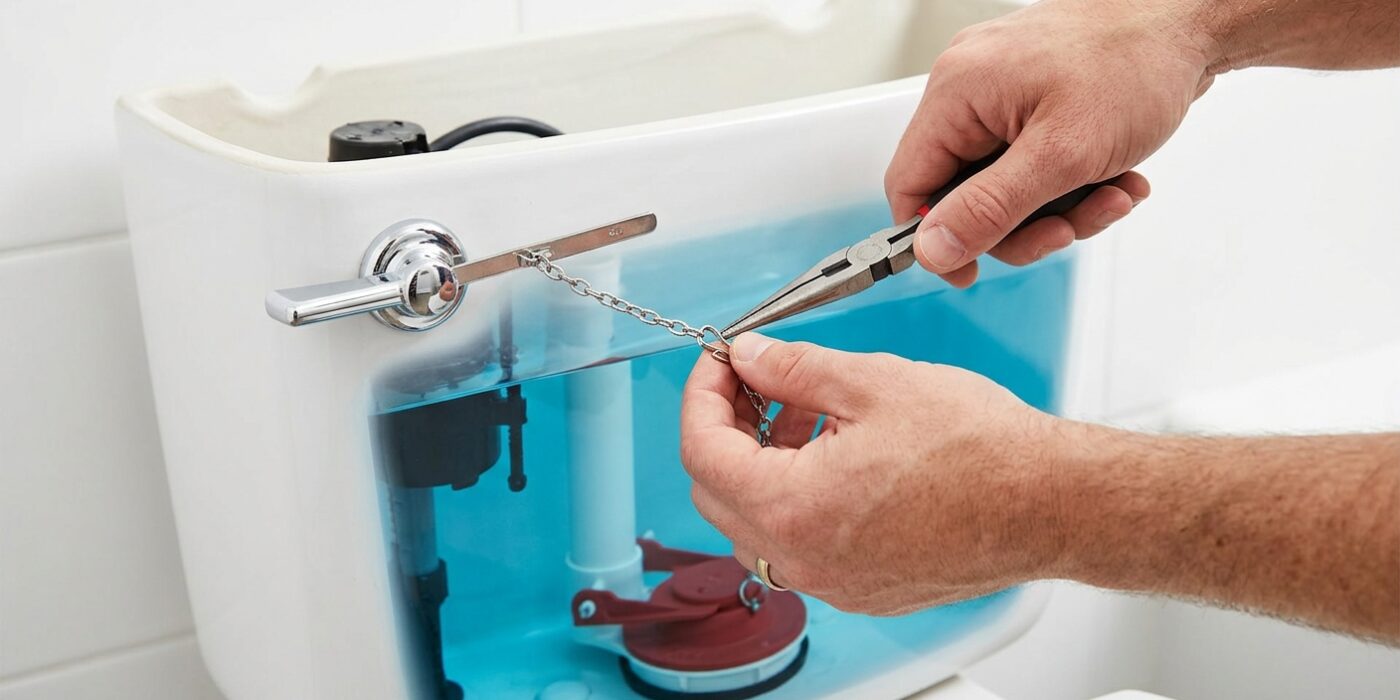
Now that your new flapper is in place, we need to connect the chain to the flush handle arm. This connection is the heartbeat of your toilet; it needs to be just right. The goal is to have exactly 1/2 inch of slack – about the width of your index finger – when the flapper is closed and resting at the bottom of the tank. If the chain is too tight, the flapper will be pulled slightly open, causing that annoying phantom flush. If it is too loose, the chain will tangle or fail to lift the flapper high enough, leading to a wimpy flush that doesn’t clear the bowl.
To set this up, hook the chain onto the handle arm so that you have that slight bit of wiggle room. Once you have found the perfect link, gently attach the clip. If you have several inches of extra chain dangling, use a pair of household scissors or wire cutters to trim the excess. Just be sure to leave a little extra length attached to the handle, just in case you need to make a minor adjustment later.
Beginner Tip: A common mistake is testing the chain while the tank is empty. Always fill the tank back up with water before finalizing your adjustment, as the water level changes the angle of the flapper and can affect how the chain pulls.
Pro Tip: To get the perfect length without guessing, hold the flush lever down with one hand and attach the chain to the arm with the other. This ensures the chain is taut when the handle is engaged, guaranteeing a strong, full flush every time.
Step 6: Test
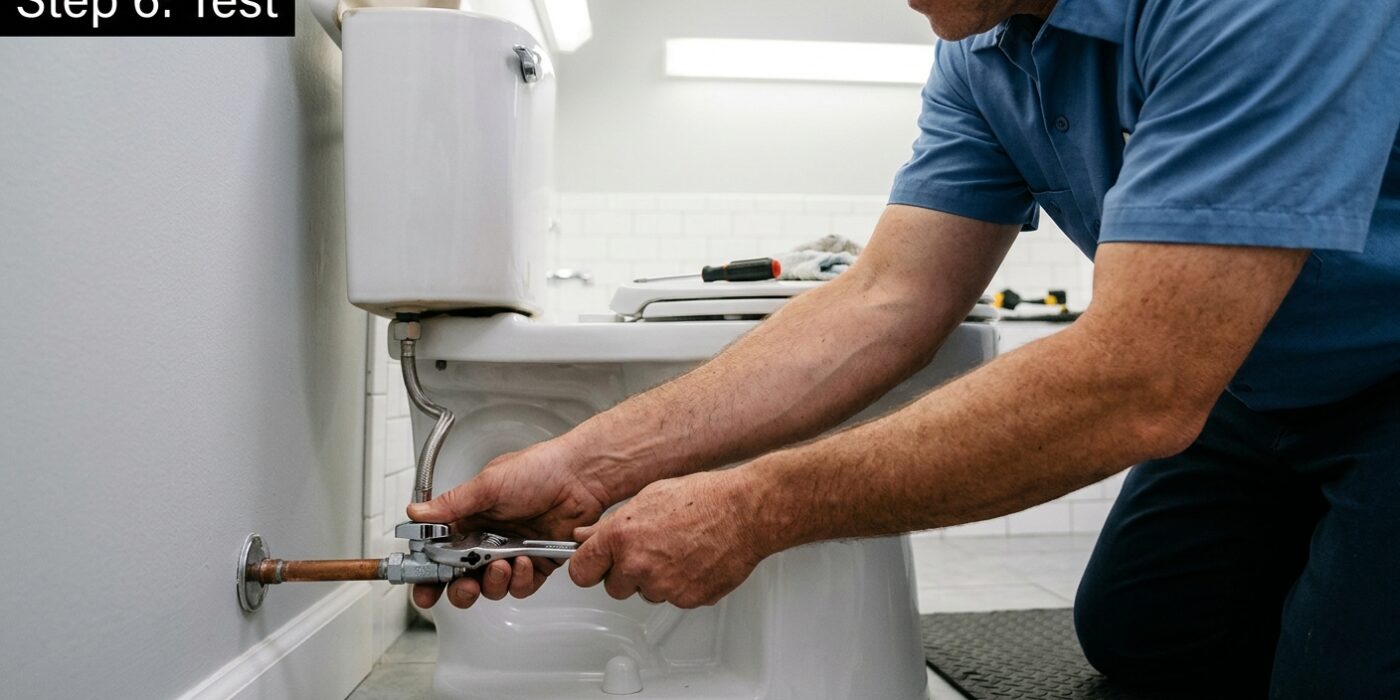
Now that your new flapper is installed, it is time to see if your hard work paid off. First, turn the water supply valve counter-clockwise until it is fully open. Watch the tank fill up. Once the water stops, flush the toilet and observe the flapper; it should rise completely, allow the water to exit, and then drop back down to form a watertight seal. To verify the seal, add a few drops of food coloring to the water in the tank and wait 15 minutes. If you see any color seep into the toilet bowl, your flapper is not sealing perfectly. This is usually due to a chain that is too short, a piece of debris under the seal, or the flapper being slightly misaligned.
Beginner Tip: Do not panic if the toilet still makes noise after the test. A common mistake is assuming a running toilet is always a flapper issue. If your dye test shows no leak in the bowl, the water level is likely too high and is spilling into the overflow tube. Simply adjust your fill valve’s float downward until the water level sits about an inch below the top of that open pipe.
Pro Tip: Before you even drop the new flapper into place, run a clean, damp cloth around the flush valve seat – the circular rim where the flapper rests. Over time, mineral deposits create a bumpy, uneven surface that prevents even brand-new rubber from forming a perfect seal. A quick wipe ensures a smooth, leak-proof surface.