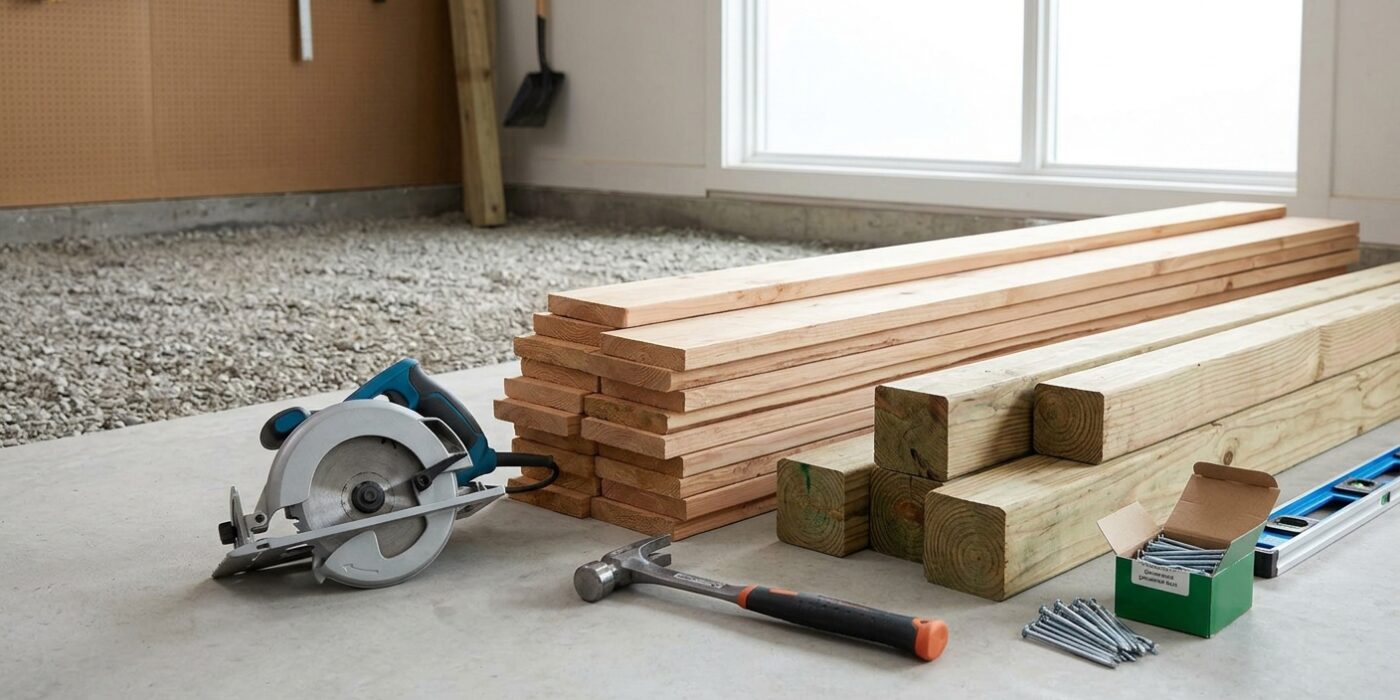
Project Shopping List
A lean-to shed is the most efficient design for a small tool storage building: three walls, a sloped roof, and maximum interior volume for minimum materials. Leaning against an existing structure (a fence, garage wall, or outbuilding) means one side of the shed already exists, reducing materials and simplifying construction. A 6 x 8-foot lean-to holds a full complement of garden tools, a lawn mower, bags of fertilizer, and still has room for a potting shelf.
This guide builds a freestanding 6×8 lean-to with a shed roof sloping from 8 feet at the high (front) wall to 7 feet at the back wall. Freestanding means it works anywhere in the yard, not just against an existing structure. The framing is standard 2×4 construction with wood siding and corrugated metal or asphalt shingle roofing.
What You’ll Need
Tools
- Circular saw
- Drill and driver
- Level (4-foot minimum)
- Framing square
- Chalk line
- Post hole digger or rental auger
- Hammer
Materials
- Concrete tube forms and concrete mix (for footings)
- Pressure-treated 4×4 posts (4 corner posts)
- 2×4 PT lumber for floor framing and sill plates
- 2×6 lumber for roof rafters
- 2×4 lumber for wall framing
- Oriented strand board (OSB) or plywood: wall sheathing and roof deck
- T1-11 plywood siding or horizontal lap siding
- Corrugated metal roofing panels or asphalt shingles
- Roofing felt (15 lb)
- Pre-hung shed door or build your own from 2×4 and plywood
Step 1: Set the Footings

Before you build your shed, you must create a solid, level foundation. First, mark the four corners of your 6×8 footprint using stakes and string. Dig a hole at each corner that is 12 inches wide and at least 24 inches deep – or deeper if your local building codes require it to stay below the frost line. The frost line is the depth at which the ground freezes; if your footings are too shallow, freezing soil can shift your shed, causing the frame to warp over time.
Place cardboard tube forms into the holes, fill them with premixed concrete, and smooth the tops. While the concrete is still soft, press your post base hardware into the center of each pier, ensuring the metal plates are perfectly level and aligned with your string lines. Let this set for at least 48 hours. By using these elevated bases, you keep your 4×4 wooden posts from touching the concrete, which prevents moisture from wicking into the wood and causing rot.
Beginner Tip: The biggest mistake is moving too quickly. Use a long level to check that your post bases are perfectly aligned with one another before the concrete hardens. If one base is higher or lower than the others, your shed floor will be crooked, making it nearly impossible to attach your wall frames later.
Pro Tip: To keep your post bases perfectly positioned while the concrete dries, clamp them to a temporary wooden frame constructed from scrap 2x4s. This holds the hardware in place so it cannot shift or sink while you are pouring.
Step 2: Set Corner Posts and Frame the Floor
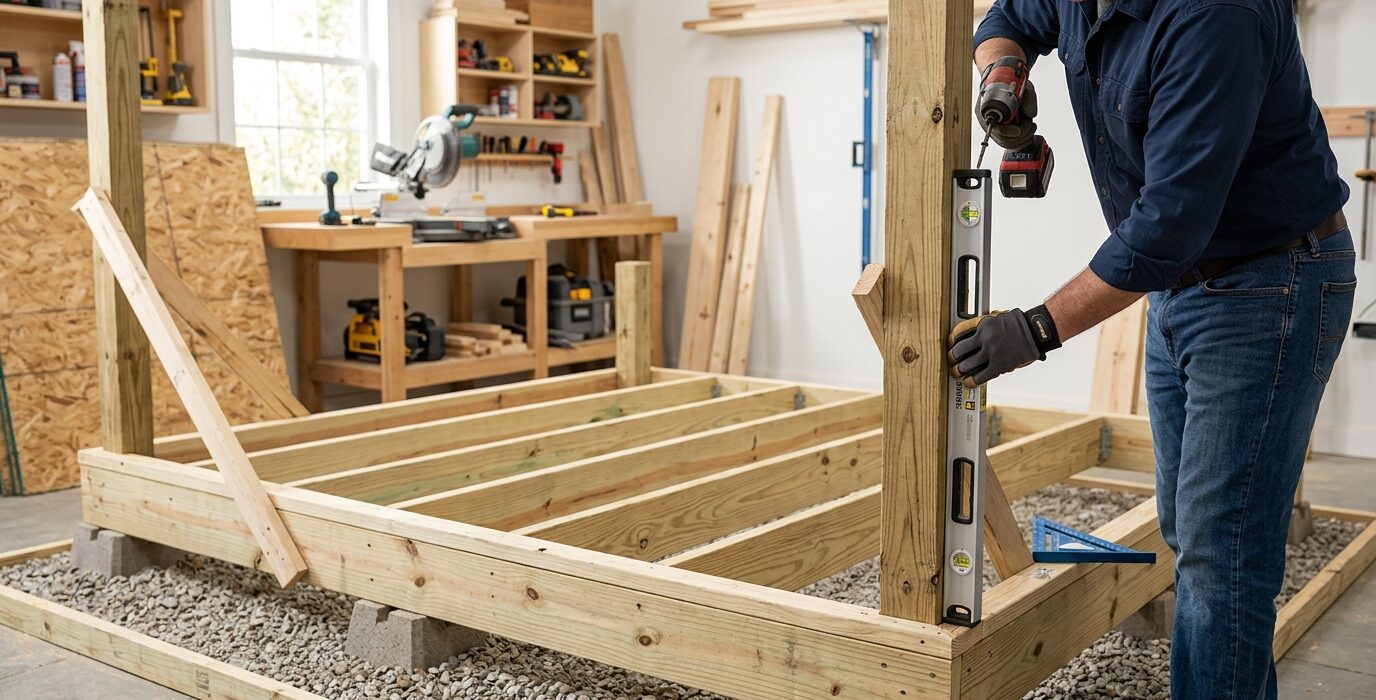
Now that your site is prepared, it is time to give your shed its foundation. First, install your 4×4 pressure-treated posts into the post bases at each corner. You will notice your front posts are 96 inches (8 feet) tall, while the rear posts are 84 inches (7 feet). This 12-inch difference over the 6-foot depth of the shed creates a gentle slope, ensuring rain and snow slide off the roof rather than pooling on top. Once the posts are secure, attach 2×4 pressure-treated lumber between them at ground level to create a sturdy perimeter frame. Next, install your floor joists horizontally between the long sides, spacing them exactly 16 inches apart from the center of one to the center of the next. Finally, lay your 3/4-inch plywood sheets over the joists and screw them down to create your solid floor deck.
Beginner Tip: Double-check that your corner posts are perfectly level and square before tightening the bolts. If your foundation is slightly crooked now, your walls will not fit together correctly later, and the door may refuse to hang straight.
Pro Tip: To keep your 16-inch floor joist spacing perfectly consistent, cut a small piece of scrap wood to exactly 14.5 inches long. Use this as a spacer block between joists while you nail them in; it eliminates the need to measure every single gap with a tape measure.
Step 3: Frame the Walls
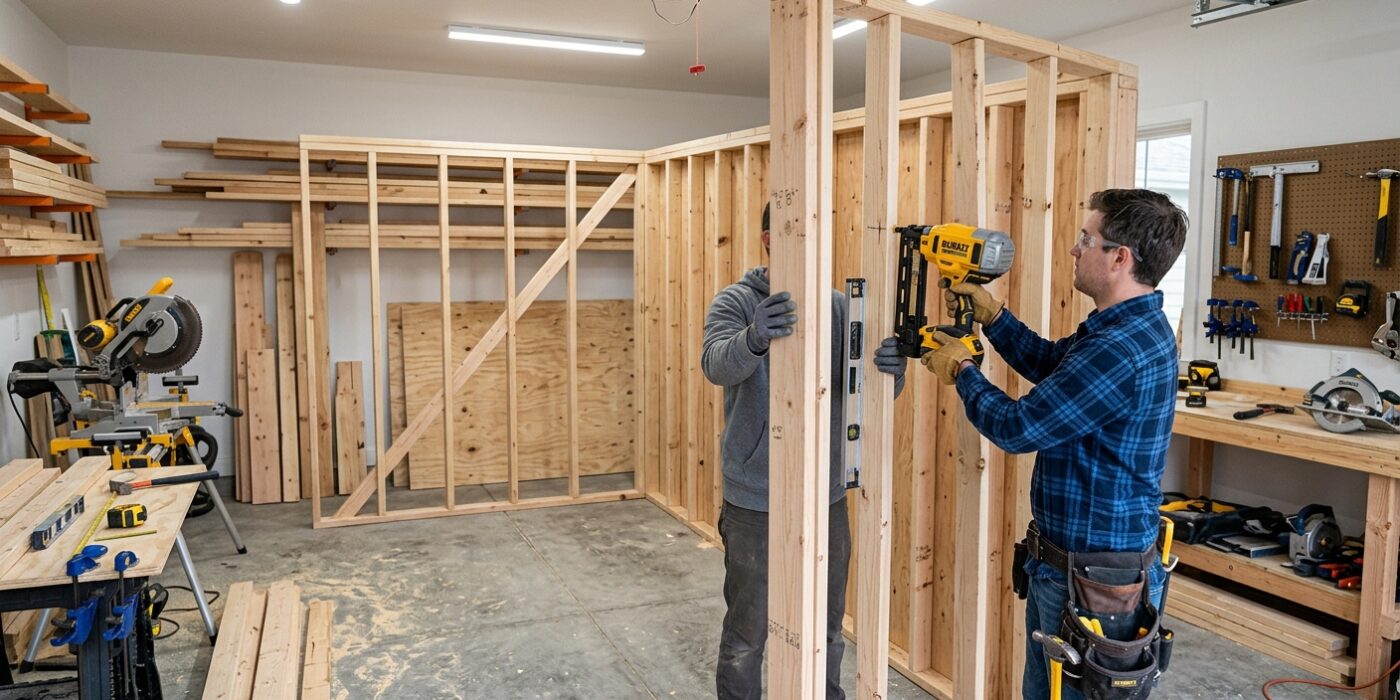
Now it is time to build your wall frames. Think of a wall frame as a wooden ladder lying flat on the ground: it consists of a bottom plate, a top plate, and vertical studs placed every 24 inches. For your side walls, you are creating a slope to help rain run off; one end of the top plate will be 8 feet high, and the other 7 feet high. Measure and mark your 2×4 studs clearly before cutting to ensure they fit snugly between the plates.
When framing the front wall, remember to leave a hole for your door. You need a “rough opening” – this is simply a rectangular gap that is 2 inches wider and 2 inches taller than your actual door unit. This extra space gives you room to adjust the door so it swings perfectly once installed. Use your level constantly to ensure every stud stands perfectly vertical, or “plumb.”
Beginner Tip: A common mistake is measuring your stud spacing from the edge of the first stud rather than the center. Always place the center of your stud at the 24-inch mark on your tape measure. This ensures your wall panels will line up perfectly when it is time to attach the siding later.
Pro Tip: Before you nail the studs to the plates, use a “layout square” to draw a crisp line where each stud should sit. Instead of guessing, you can simply align the edge of your stud with your pencil line, making the assembly process much faster and keeping your wall perfectly square.
Step 4: Sheathe the Walls
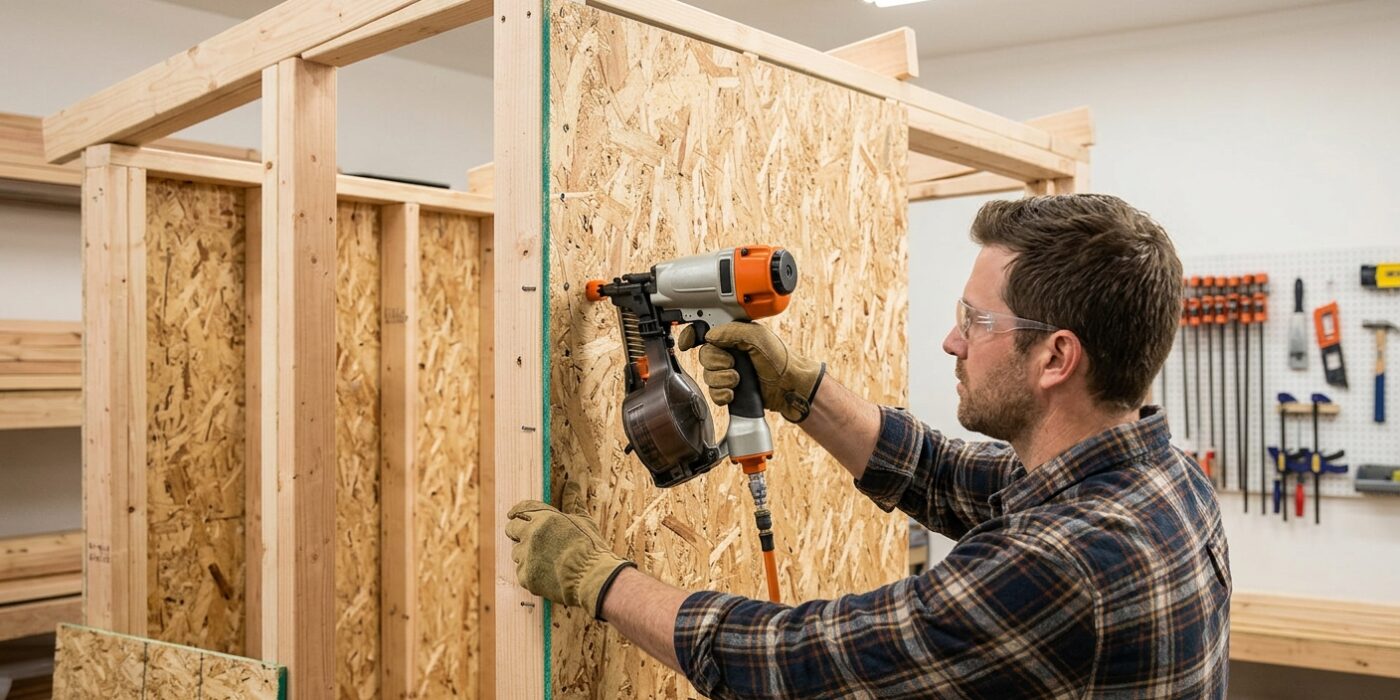
Now that your wall frames are standing, it is time to enclose them. Sheathing turns your skeletal frame into a solid, rigid structure. You will be using 4×8 foot sheets of OSB or plywood. Start at the bottom corner of a wall, ensuring the bottom edge of the sheet is flush with the bottom plate of your frame. As you move upward or across, keep the edges of the sheets centered over your vertical wall studs. This ensures every edge is fully supported, which is vital for structural strength.
Use galvanized nails to secure the sheets. Space your nails every 6 inches along the perimeter edges and every 12 inches across the middle of the sheet – this area is called the “field.” At the corners, let your sheathing overlap the edge of the adjacent wall to create a tight, weather-resistant joint. Once finished, cover the entire structure with housewrap or building paper. This acts like a raincoat for your shed, allowing moisture to escape from the inside while blocking rain and wind from entering.
Beginner Tip: A common mistake is “missing” the stud behind the sheathing. Before you nail, use a pencil to mark the center of each wall stud on your bottom and top plates. Once the heavy sheet is covering the frame, you can easily line up your nail path with those marks to ensure every nail bites into solid wood.
Pro Tip: To keep your sheets perfectly flush with the bottom of the shed without struggling to hold them in place, temporarily screw a scrap piece of wood along the bottom of your wall frame. This acts as a “cleat” or shelf, allowing you to rest the weight of the heavy OSB sheet on it while you secure it.
Step 5: Frame and Sheathe the Roof
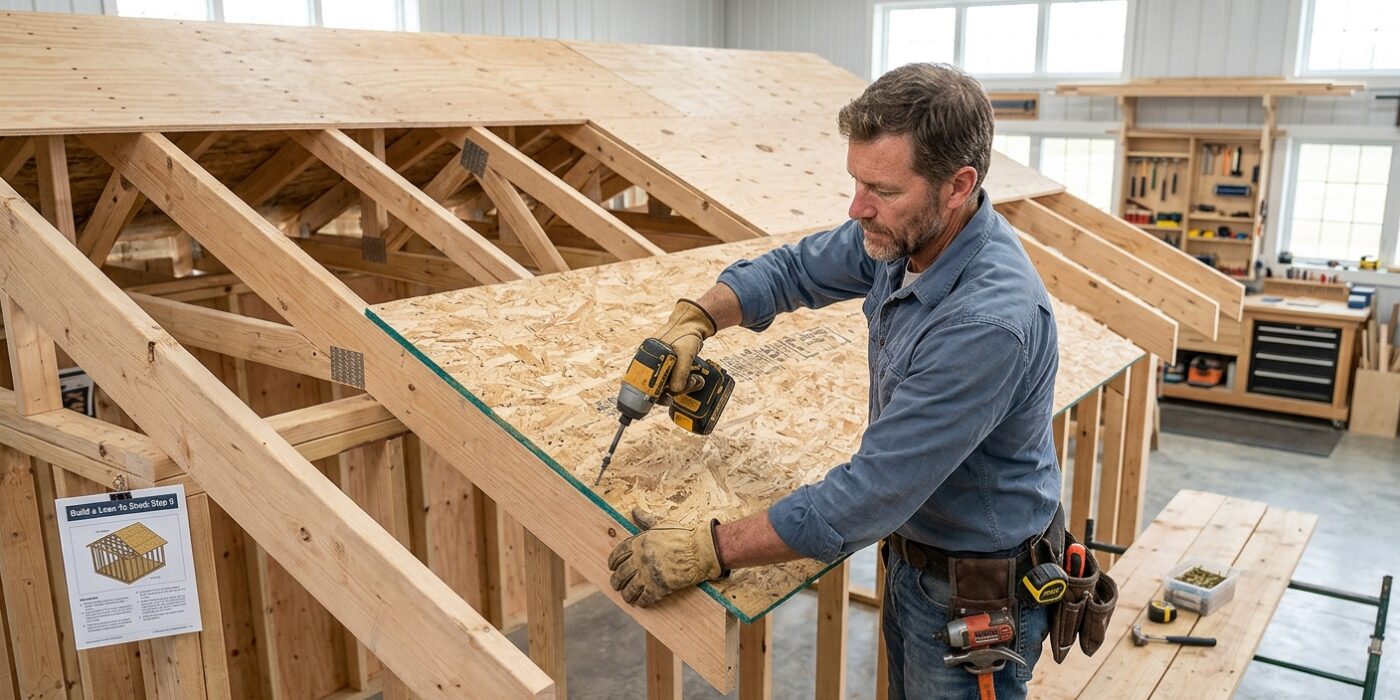
Now that your walls are standing, it is time to build the roof. You will use 2×6 lumber for the rafters, which act as the skeleton for your roof. Each rafter needs a “seat cut” – a small triangular notch – so it sits flat against the top of your wall plates rather than just balancing on the edge. Measure and cut these to span the distance from your front wall to your back wall, maintaining a consistent slope so rainwater runs off easily. Space your rafters 24 inches apart, measuring from the center of one to the center of the next, and secure them with framing nails.
Once the frame is steady, install the OSB roof sheathing. Start at the lowest point (the back wall) and work your way upward toward the front. Ensure your top row of boards extends 12 to 18 inches past the front wall to create a protective eave, which shields your door from the elements.
Beginner Tip: Never walk on the roof sheathing until it is fully nailed down to every rafter. It is easy to misjudge the edge of a board and step into a void between the rafters, which is dangerous. Stay on your ladder or sturdy scaffolding until the panels are secure.
Pro Tip: Use a chalk line to mark the exact center of each rafter across the top of your wall plates before you begin. This allows you to quickly align your rafters without having to re-measure every two feet, ensuring your roof frame remains perfectly square and sturdy.
Step 6: Apply Roofing
Now that your frame is sturdy, it is time to make your shed watertight. You have two popular choices: corrugated metal or asphalt shingles. Both are excellent for a 6×8 lean-to, provided your roof has a slope of at least 3 inches of drop for every 12 inches of run to shed rainwater effectively.
If choosing corrugated metal, start at the lowest edge of the roof and work your way up toward the high side. Lay your first panel, then overlap the next one by exactly one corrugation hump. Use hex-head roofing screws with rubber washers; it is vital that you drive these screws through the high ridges of the metal, not the valleys, to prevent water from pooling and leaking around the fasteners.
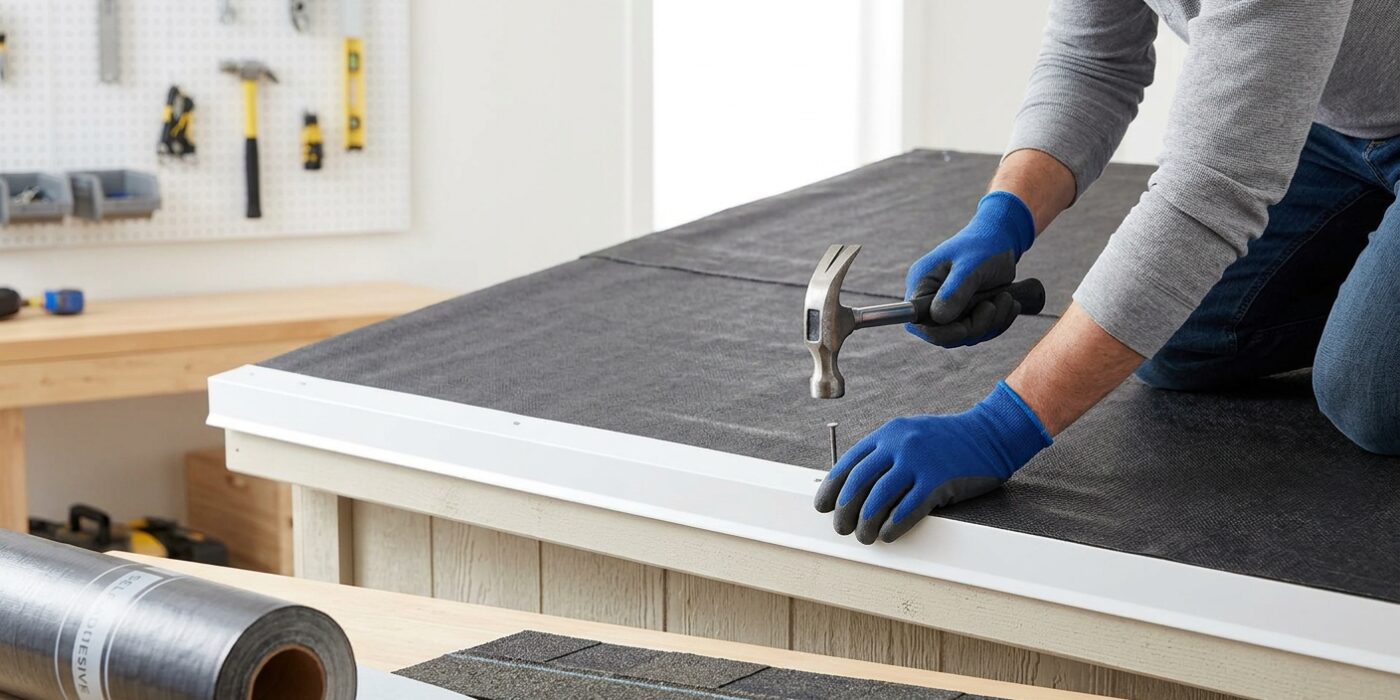
If you prefer asphalt shingles, start by nailing a metal drip edge along the bottom perimeter. Cover the roof deck with 15-lb felt paper, working from bottom to top so each layer overlaps the one below like shingles on a house. Nail your shingles starting at the eave, working upward, and finish by capping the highest ridge with specialized ridge shingles to seal the peak.
Beginner Tip: Never overdrive your screws or nails. If you crush the rubber washer on a metal screw or drive an asphalt nail so deep it cuts the shingle, you have created an entry point for water. Stop as soon as the fastener head sits snugly against the surface.
Pro Tip: Before you start, snap a chalk line across the roof deck parallel to the eaves. Use this as a visual guide to ensure your metal panels or shingles stay perfectly square as you work upward; it prevents your rows from slowly angling off-center.
Step 7: Install Siding and Door
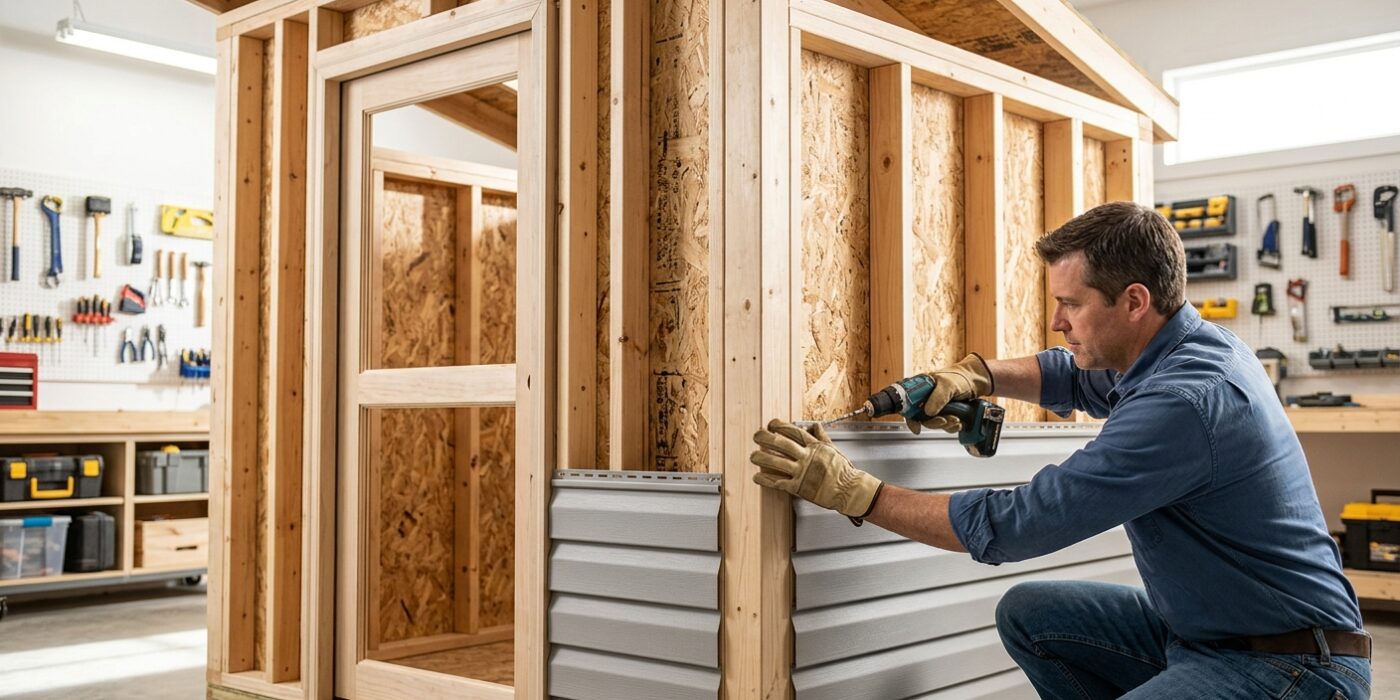
Now that your frame is sturdy, it is time to wrap the shed in siding and add your door. Installing siding protects your tools from the elements and gives your shed a finished look. Begin by installing your chosen siding, such as T1-11 plywood sheets, starting from the bottom corner of each wall. Use 2-inch galvanized siding nails spaced every 8 inches along the studs to ensure a tight, weather-resistant hold. Once the walls are covered, install 4-inch wide pine trim boards over the vertical seams at the corners to seal gaps and enhance the aesthetic. Finally, place your pre-hung door into the rough opening. Use a spirit level to ensure the frame is perfectly vertical – this is critical, or the door will swing open on its own. Insert wooden shims between the door frame and the wall studs until it is perfectly plumb, then secure the frame through the hinge side using 3-inch exterior screws.
Beginner Tip: Never fasten the door frame tight against the studs without shims. If you skip shimming, the frame will bow, causing the door to stick, rub, or fail to latch correctly. Always check with your level before driving those final screws.
Pro Tip: Before you hang the door, apply a bead of exterior-grade silicone caulk along the bottom threshold and behind the exterior trim. This creates an invisible gasket that prevents water from seeping into your shed floor, keeping your equipment dry for years to come.