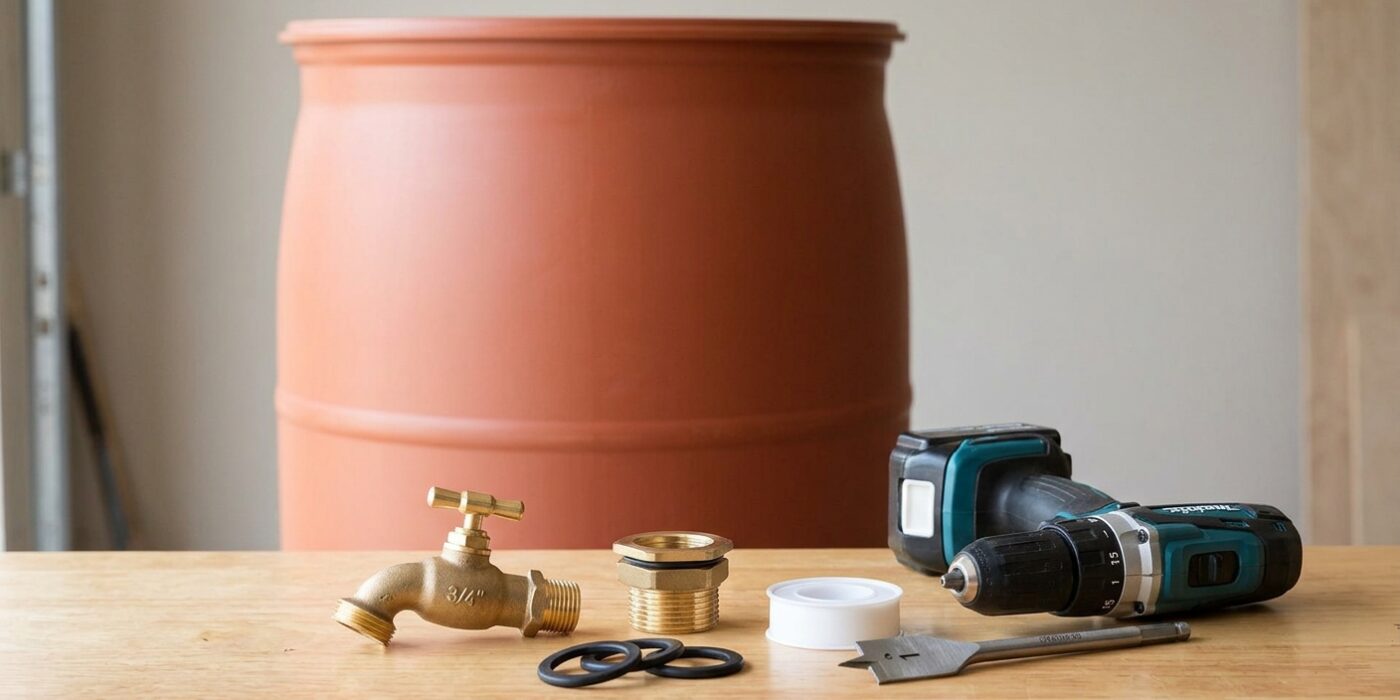
Project Shopping List
A rain barrel collects water from your roof downspout and stores it for garden irrigation. A typical 55-gallon barrel fills completely during a single moderate rain event and can supply a garden hose or drip system for days between rains. Beyond saving money on water bills, rainwater is better for plants — it contains no chlorine or fluoride and is typically slightly acidic, which most garden plants prefer over municipal tap water.
What You Will Need
The core components are a barrel or food-grade container with a lid, a downspout diverter kit, a spigot fitting near the bottom, a screen to keep debris and mosquitoes out, and overflow tubing to direct excess water away from your foundation. You can buy a purpose-made rain barrel kit or assemble one from a used 55-gallon food-grade drum, which are often free or very cheap from food processing facilities, car washes, or pickle suppliers.
Tools You Will Need
- Drill and hole saw bits (3/4-inch and 1-1/2-inch)
- Adjustable wrench
- Utility knife
- Hacksaw or jigsaw for cutting downspout
- Teflon tape
- Level
Materials
- 55-gallon food-grade barrel with lid, or purpose-made rain barrel
- Downspout diverter kit
- 3/4-inch brass or plastic spigot with lock nut and washers
- 3/4-inch bulkhead fitting for overflow port
- Window screen mesh material
- Concrete blocks or wood platform to elevate the barrel
- 1-1/2-inch vinyl hose for overflow
Step 1 — Choose and Prepare Your Location
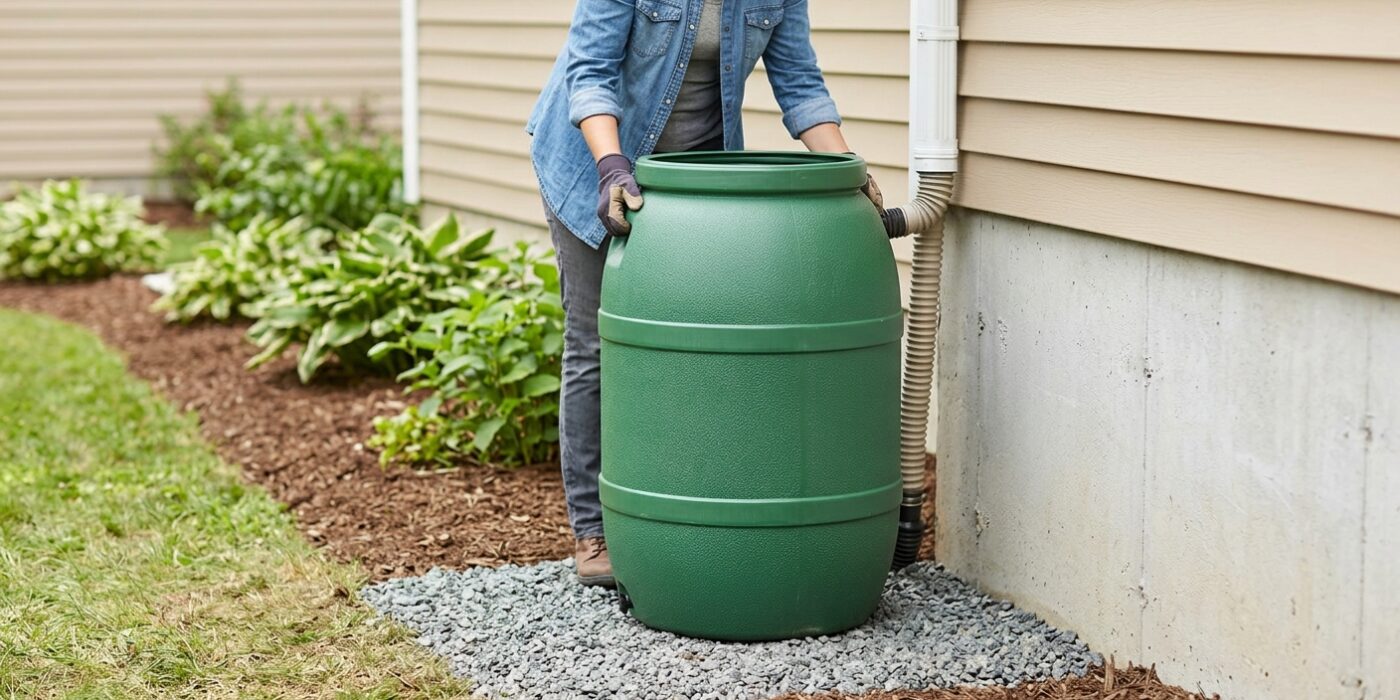
Your journey to harvesting rainwater begins by finding the perfect spot. Walk around your home and identify a downspout that is nearest to your garden or flower beds. The closer the barrel, the less hose you will need to drag around later.
Once you have selected the downspout, you need to create a solid foundation. You must elevate your rain barrel 12 to 18 inches off the ground using cinder blocks, a sturdy wooden frame, or decorative pavers. This height is essential because it uses gravity to build water pressure; without this elevation, the water will barely trickle out of the spigot. Since a full 55-gallon barrel weighs over 450 pounds, ensure your base is perfectly level and sits on firm, packed soil so it does not tilt or sink once filled.
Beginner Tip: A common mistake is placing the barrel on soft grass or loose mulch. Over time, the weight of the water will cause the ground to settle unevenly, potentially causing the barrel to tip. Always clear away grass and use a thin layer of leveled gravel or solid pavers to create a rock-solid, flat base.
Pro Tip: Before you finalize the location, hold your barrel in place and use a piece of painter’s tape to mark where the downspout aligns with the intake hole. Seeing this visual guide before you start cutting or drilling will save you from making costly alignment errors.
Step 2 — Install the Spigot
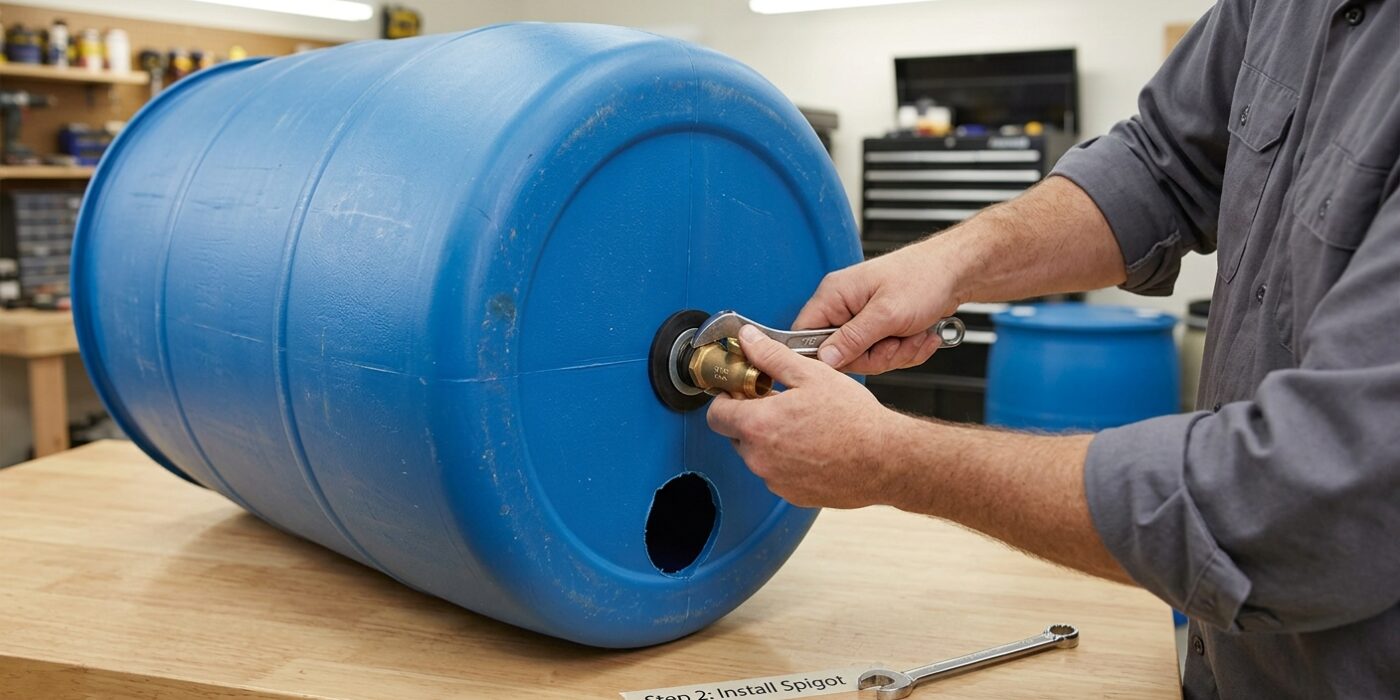
Now it is time to install the spigot, which acts as your garden faucet. First, measure exactly 3 inches up from the bottom of your barrel and mark the center point with a permanent marker. This placement ensures you can capture most of the water without picking up the sediment that naturally settles at the very bottom.
Using a 3/4-inch spade bit or hole saw, drill straight into the barrel. Take your time to keep the drill perpendicular to the plastic to ensure a clean, round hole. Next, wrap the threaded end of your spigot with two layers of Teflon tape, wrapping in a clockwise direction to ensure it doesn’t unspool when you screw it in. Insert the spigot from the outside, then reach inside the barrel to thread on the washer and lock nut. Use an adjustable wrench to tighten the nut until firm. Do not overtighten, as too much pressure can crack the plastic or strip the threads.
Beginner Tip: A common mistake is drilling the hole too low or too high. If it is too low, you cannot fit your wrench inside to tighten the nut; if it is too high, you will waste the water sitting below the spigot level. Stick to the 3-inch mark to keep your setup functional and easy to assemble.
Pro Tip: If you are struggling to reach inside the barrel to hold the nut, tape the nut to the end of a long stick or a piece of stiff cardboard. This acts as a handle, allowing you to position the nut perfectly behind the hole while you screw the spigot in from the outside.
Step 3 — Install the Overflow Port
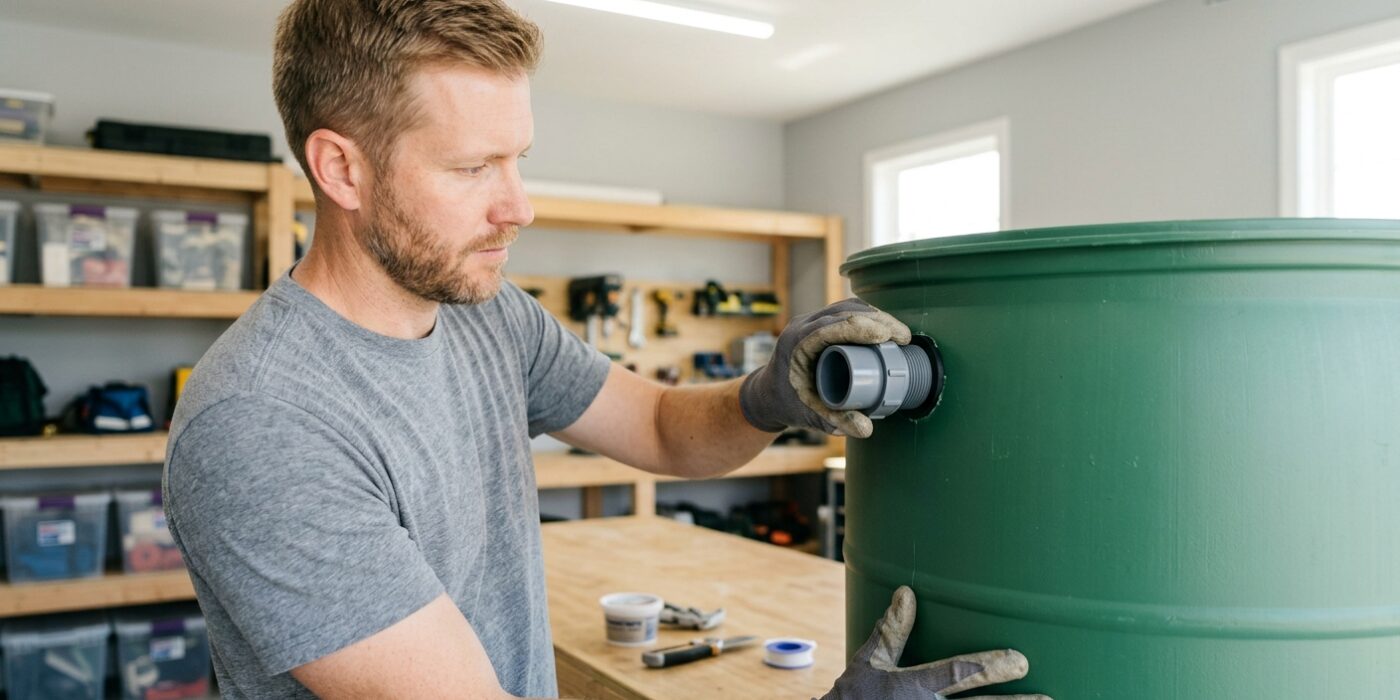
Now it is time to install your overflow port. This is a crucial step because once your rain barrel reaches capacity, any extra water needs a place to go. Without this escape route, water will back up into your downspout or pool around your home’s foundation, which can cause structural issues. To start, use a 1-1/2-inch hole saw bit to drill a clean hole near the very top of your barrel, ideally just an inch or two below the rim.
Insert your bulkhead fitting through the hole, ensuring the rubber gasket is on the outside to create a watertight seal. Hand-tighten the nut on the inside of the barrel until it is snug. Finally, thread your 1-1/2-inch vinyl hose onto the fitting and run it at least six feet away from your house, directing the flow toward a garden bed or a sloped area of your lawn.
Beginner Tip: A common mistake is tightening the bulkhead nut with pliers. These fittings are usually made of plastic, and overtightening can cause them to crack or strip. Use your hands to tighten the nut until it feels firm, then give it just a quarter-turn more to ensure it is secure.
Pro Tip: Before you begin drilling, place a small piece of painter’s tape over the spot where you intend to drill. This helps prevent the drill bit from slipping or scratching the smooth plastic surface of the barrel, giving you a much more professional and precise finish.
Step 4 — Prepare the Lid
Now it is time to turn your solid lid into a functional entry point for your rainwater. Your goal is to cut a circular hole in the center of the lid that matches the diameter of your downspout diverter or pipe – typically about 3 to 4 inches wide. Using a hole saw attachment on a drill is the cleanest way to do this, but you can also use a jigsaw. Once the hole is cut, lay a piece of fine metal or fiberglass window screen over the opening, allowing at least two extra inches of overlap on all sides. Secure the mesh firmly using a large hose clamp or heavy-duty staples. This step is critical because it acts as your first line of defense; it filters out leaves and debris while preventing mosquitoes from turning your barrel into a breeding ground.
Beginner Tip: Do not skip the screen. It is easy to think a quick rinse of the barrel will suffice, but mosquitoes can lay eggs in even the smallest amount of standing water. A simple mesh screen prevents this entire problem and keeps your water clean for your garden.
Alternative Method: If you do not have a power drill or a hole saw, you can carefully trace your pipe onto the lid and use a utility knife with a fresh blade to score the plastic repeatedly until it cuts through. Just take your time and keep your hands safely behind the blade.
Pro Tip: Before tightening your hose clamp, fold the edges of the screen down over the lip of the hole. This creates a “basket” shape that keeps the mesh taut and prevents it from sagging into the barrel when debris piles up on top.
Step 5 — Install the Downspout Diverter
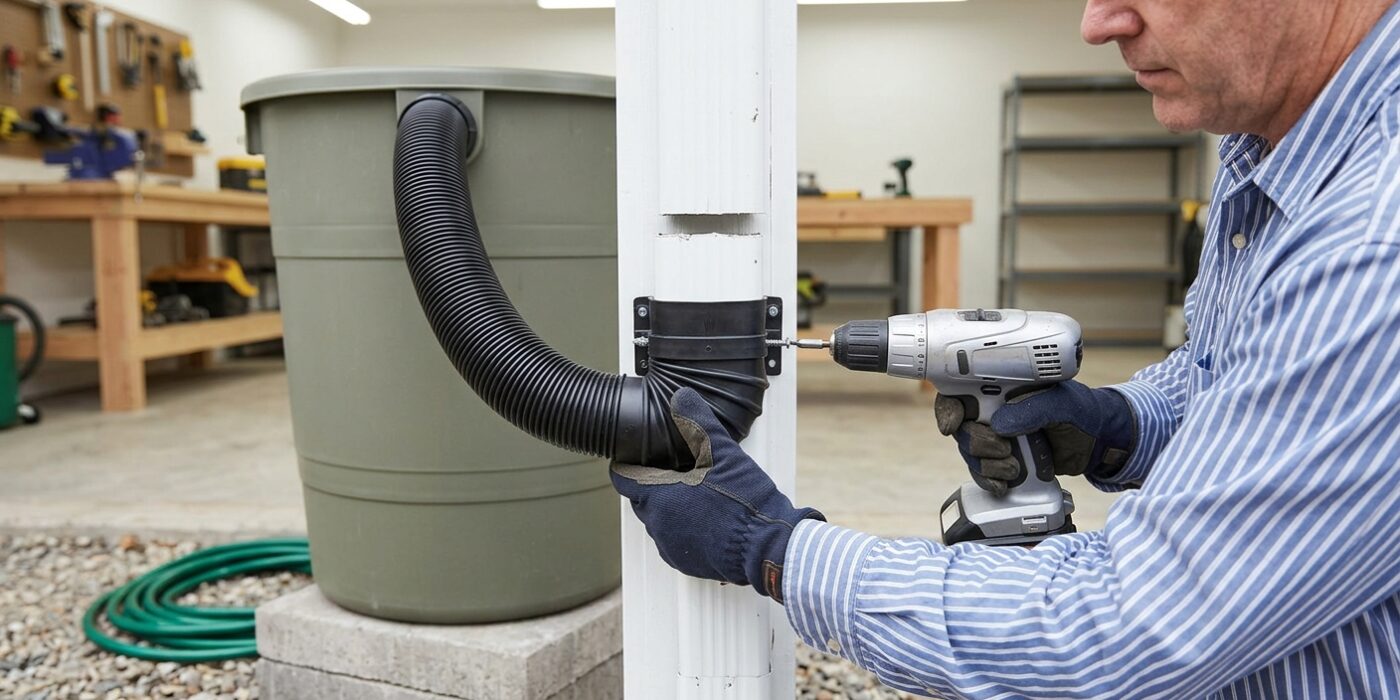
The downspout diverter is the smartest part of your system. Its job is to intercept rainwater as it flows down your gutter pipe and redirect a portion of it into your barrel. To install this, you will need to measure the distance from the ground to the top intake hole of your barrel. Mark this height on your downspout, ensuring it aligns perfectly with the diverter’s intake port. After double-checking your measurement, use a hacksaw to cut out a section of the downspout according to your specific kit’s instructions. Once the piece is removed, slide the diverter into place and secure it with the provided screws. Because the diverter is designed with an internal overflow mechanism, once your barrel reaches capacity, the excess water simply bypasses the intake and continues safely down the lower portion of your downspout, preventing any messy overflowing.
Beginner Tip: Avoid cutting your downspout too short. It is much easier to trim a little extra off later than it is to fix a gap that is too wide. Always cut a slightly smaller section first, test the fit, and then trim more if necessary.
Pro Tip: Before you finalize the installation, apply a small bead of exterior-grade silicone sealant around the seams where the diverter meets the downspout. This creates a watertight seal that prevents annoying drips and ensures every drop of precious rainwater is directed exactly where you want it to go.
Step 6 — First Fill and Leak Check
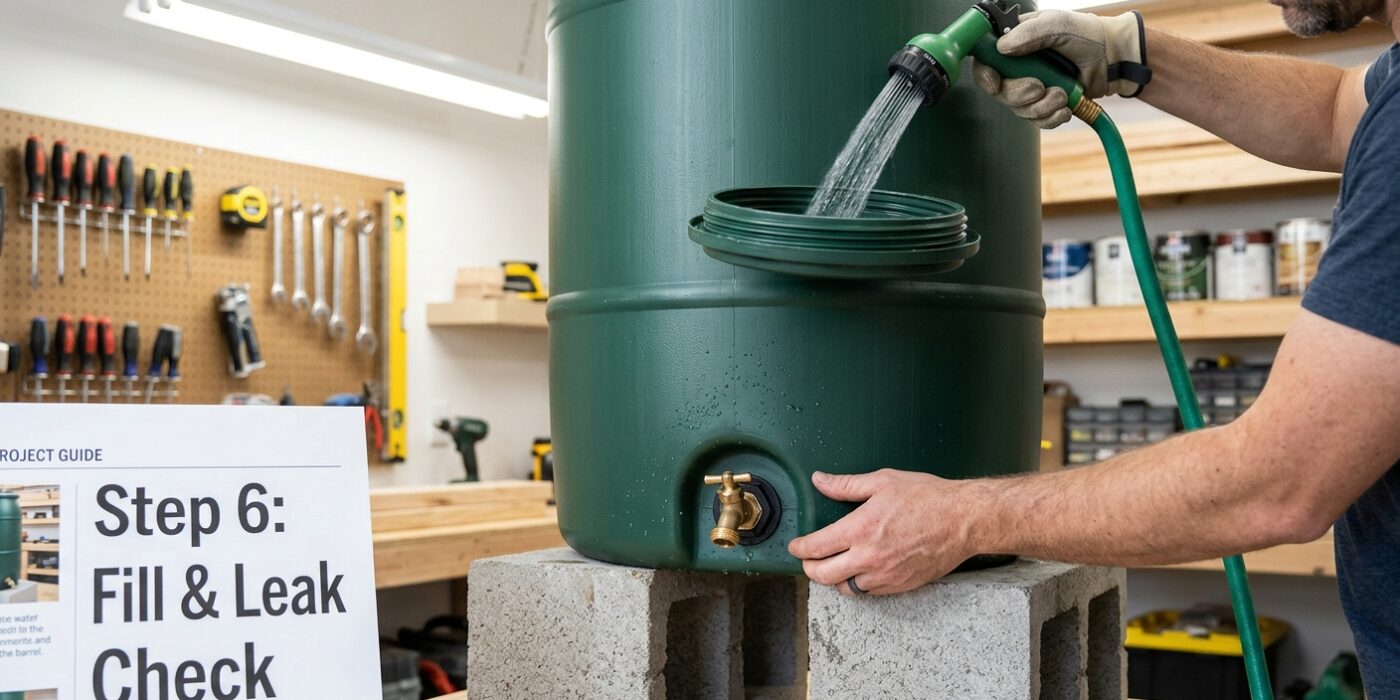
Now that your rain barrel is securely installed, it is time for the final test. Wait for the next rainfall to observe how the system performs. As the barrel begins to fill, inspect every fitting, especially around the spigot and the overflow hose, for any signs of moisture. If you notice a drip, use your wrench to gently tighten the connection. Be careful not to overtighten, as this can crack the plastic or warp the rubber washers, causing more leaks.
Confirm that your overflow hose is angled slightly downward, pointing at least four feet away from your home’s foundation. Proper drainage prevents soil erosion and protects your basement from water damage. Finally, open the spigot to ensure a steady flow. If the water trickles slowly, your barrel may be creating a vacuum; ensure your lid is vented to allow air displacement.
Beginner Tip: A common mistake is overtightening fittings. If a connection is still leaking, don’t just keep cranking the wrench. Sometimes, backing the nut off slightly and re-seating the rubber washer is all it takes to create a perfect, watertight seal.
Pro Tip: To check for leaks before the next rain, fill the barrel with a garden hose until it reaches the overflow point. This allows you to test your seals immediately rather than waiting for a storm, giving you time to make adjustments while the weather is clear.
Winterizing Note: Always remember that ice expands. Before the first frost, fully drain your barrel, open the spigot, and remove the diverter to prevent the plastic from splitting during the cold winter months.