Project Shopping List
Buckled and cupped hardwood floors look alarming – boards that were flat for years suddenly seem to be rising at the edges or humping up in the middle. In most cases, this is not a sign of catastrophic floor failure. It’s wood responding to moisture, and in many situations it will partially or fully correct on its own once the moisture source is addressed. The key is identifying the cause, eliminating it, and deciding whether you need professional intervention or whether patience and humidity control will do the job.
This guide explains the difference between cupping and buckling, how to identify the moisture source, and what corrective steps are available – from simple humidity control through full re-installation.
What You’ll Need
Tools
- Moisture meter (pin-type for wood, both pin and non-pin for scanning)
- Hygrometer (to measure room humidity)
- Humidifier or dehumidifier depending on the problem
- Circular saw for cutting out severely buckled sections
- Floor sander for re-flattening cupped boards after drying
- Pry bar for removing badly buckled sections
Materials
- Replacement boards (if sections must be replaced)
- Flooring cleats and nailer for re-installation
- Vapor barrier material for under-floor moisture
Step-by-Step Instructions
Step 1: Identify Cupping vs. Buckling
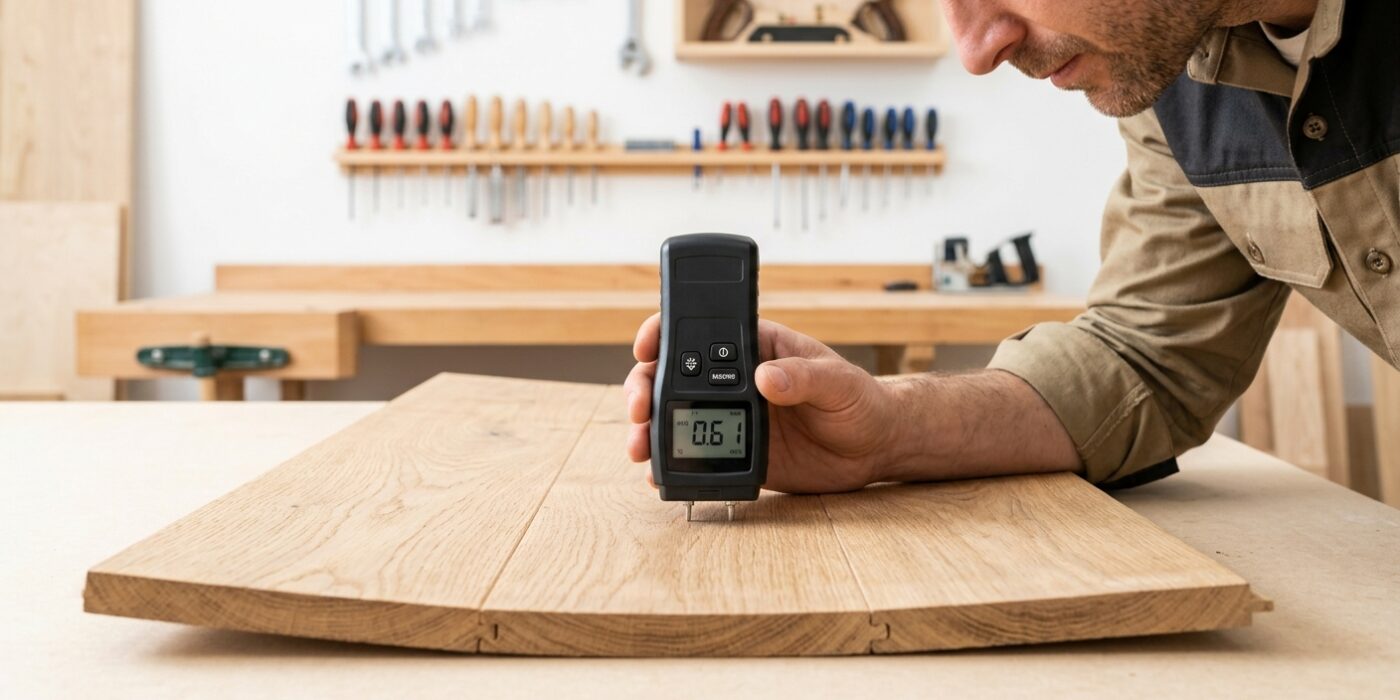
Cupping means the edges of individual boards are higher than the center – the board looks like a very shallow U in cross-section. This is almost always caused by higher moisture on the bottom of the board than the top, creating differential expansion. Buckling means boards have lifted significantly above the subfloor – sometimes inches – and may have popped out of their fasteners. Buckling is a more severe moisture event, usually caused by flooding, a major leak, or very high subfloor moisture combined with expansion gaps that were inadequate. Both problems require finding and eliminating the moisture source before any repair is effective.
Step 2: Find the Moisture Source
Check with a moisture meter in multiple locations – both the visible boards and the subfloor in the affected area. Common moisture sources: plumbing leak (check under adjacent sinks, dishwashers, toilets), slab moisture transmission (elevated reading in one zone of a room over a concrete slab), exterior water intrusion (elevated readings near exterior walls after rain), and inadequate indoor humidity (very high relative humidity in the room). Identify the source before spending any money on repairs – uncorrected moisture problems will recur.
Step 3: Eliminate the Moisture Source
Fix leaks before doing anything to the floor. If the problem is high ambient humidity (common in basements and in hot, humid climates), run a dehumidifier in the space until room humidity reaches 35% to 55%. If the problem is slab moisture transmission, address it with a moisture-vapor barrier system – this is more involved and may require professional consultation. Do not proceed to floor repair until the source is confirmed eliminated and moisture readings are returning to normal levels.
Step 4: Allow Natural Drying
Many cupped floors partially or fully flatten on their own once the moisture source is eliminated and indoor humidity is normalized. Give the floor 4 to 8 weeks of stable humidity conditions (35% to 55% RH) and check the boards frequently. Mild cupping often resolves by 50 to 80% through natural drying – this is actually the best-case scenario because the boards return to their original state without any mechanical intervention. Only proceed to sanding or replacement if the cupping does not resolve after a full drying period.
Step 5: Sand Cupped Boards After Drying
If cupping is mild and has improved but not fully flattened, light sanding after the drying period is the correct approach. Wait until the floor has reached stable moisture content (consistent readings over 2 to 3 weeks) before sanding – sanding while the wood is still drying removes the high edges and, when the wood finishes drying and flattens, the sanded areas will end up concave. Screen-sand the cupped zone and refinish. For moderate cupping, a drum sander starting at 60-grit may be needed.
Step 6: Address Buckled Boards
Buckled boards that have lifted significantly won’t flatten naturally – they’ve been permanently deformed or the expansion against adjacent boards has caused mechanical damage. Sections of buckled boards must be cut out and replaced. Use a circular saw set to the exact floor thickness to cut through the buckled boards along the seams on each side of the affected zone. Remove the cut boards with a pry bar, taking care not to damage adjacent boards. Check the subfloor and address any damage or remaining moisture before re-installing replacement boards.
Step 7: Install Replacement Boards
Cut replacement boards to length and face-nail the first replacement board into the zone where the buckled boards were removed. Install subsequent boards using a flooring nailer if there’s room, or face-nail and fill nail holes if working in a narrow zone. The goal is to have replacement boards flush with the surrounding floor – check frequently with a straightedge. Sand the transition zone after all replacement boards are in to ensure a seamless level surface.
Step 8: Sand and Refinish
After repairs are complete and moisture is confirmed stable, sand and refinish the affected area (or the whole floor, for better color match). Touch-up refinishing on a small area of an existing floor rarely matches perfectly – the surrounding floor may be a different sheen or shade from age. Refinishing the entire floor produces the most uniform result.
Pro Tips
- Weighted boards (heavy furniture, sandbags) placed over mildly cupped boards during the drying period can help flatten them faster by providing mechanical pressure against the cupping force – remove the weight after drying to check results.
- If you have a moisture barrier under your hardwood over a slab and the readings are still high, the barrier may be damaged or insufficient. Have a flooring contractor inspect and assess whether a perimeter drain or better barrier is needed.
- Never sand a wet or even damp floor – water in wood grain during sanding creates raised fibers that require additional passes to remove, and wet dust clogs sanding equipment rapidly.
- Document moisture readings over several weeks after eliminating the source – this data is useful if the problem recurs and helps identify whether the source is truly eliminated or if there are multiple contributors.
Frequently Asked Questions
Will my cupped floor go back to normal on its own?
Mild to moderate cupping often resolves significantly once the moisture source is eliminated and humidity is stable. The speed and degree of recovery depends on how long the floor was exposed to elevated moisture and how severe the cupping is. Boards that have been cupped for months may have permanent set in the wood fibers and won’t fully flatten even after drying – these need sanding.
How do I know if my floor is permanently damaged?
After 6 to 8 weeks of controlled humidity (35% to 55%), take moisture readings and measure the cupping with a straightedge. If the boards are still cupped by more than 1/16 inch and moisture readings are normal, the boards have permanent set and must be sanded or replaced. A flooring professional can assess this more precisely and give you a replacement vs. refinishing recommendation.
Can I put a new floor over buckled hardwood?
Not directly. Buckled boards create an uneven surface that any overlay flooring would bridge unevenly, and the moisture that caused the buckle would continue to affect both the old and new floor. Remove and repair the buckled section, eliminate the moisture source, and allow the subfloor to dry before installing any new flooring over the affected area.