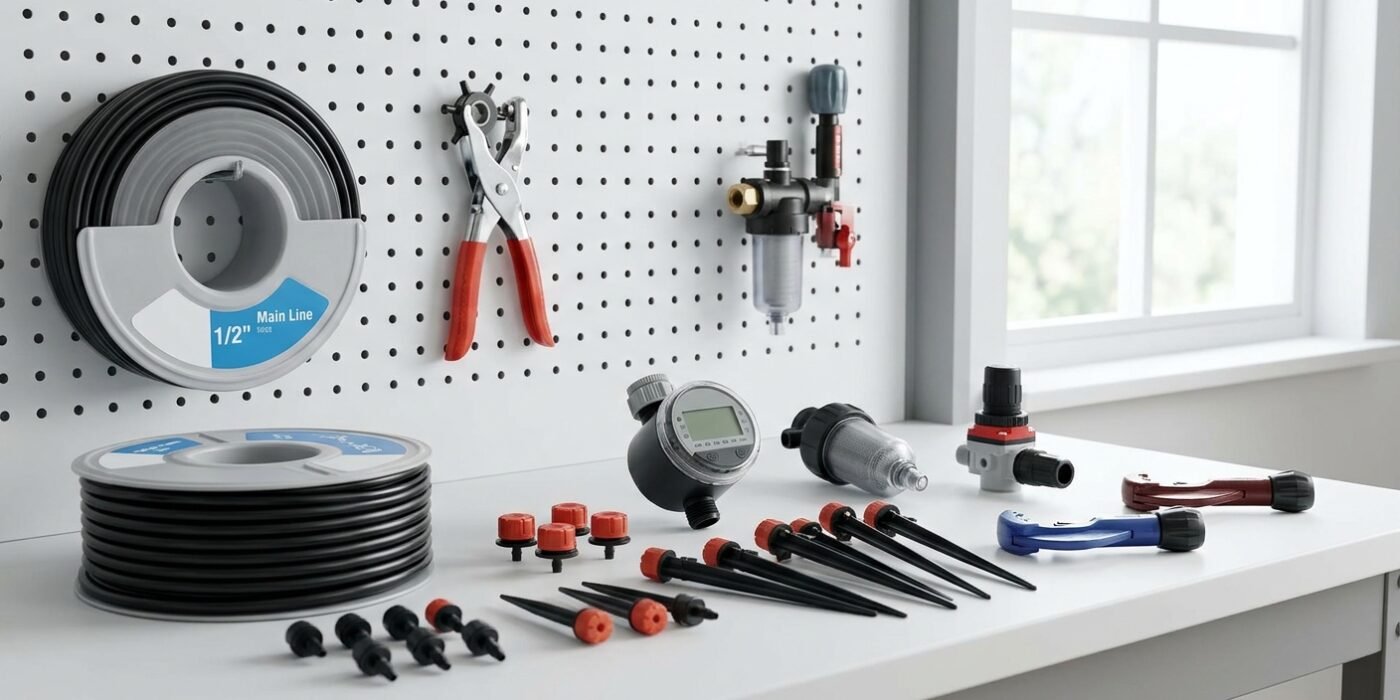
Project Shopping List
Drip irrigation delivers water directly to plant root zones, reducing water use by 30-50% compared to sprinklers while keeping foliage dry — which means fewer fungal diseases. A basic drip system for a vegetable garden or landscape bed requires no special skills, just a few hours and inexpensive components available at any hardware store.
What You Need
- Backflow preventer (connects to hose bib)
- Filter (often combined with backflow preventer)
- Pressure regulator (reduces to 25-30 PSI for drip systems)
- 1/2-inch poly main line tubing (as long as needed)
- 1/4-inch distribution tubing
- Emitters (drip heads): 0.5, 1, or 2 gallon-per-hour ratings
- Hole punch tool
- Timer (optional but highly recommended)
- End caps and stakes
Understanding the System
A drip system works at low flow rates (0.5 to 2 gallons per hour per emitter) over a long period rather than high-volume sprinkler delivery over a short period. Water soaks slowly into the soil directly at the root zone with minimal evaporation. The main line delivers water from the source to each planting area; 1/4-inch micro tubing branches off the main line to reach individual plants; emitters control the flow rate at each plant.
Step-by-Step Instructions
Step 1: Plan the Layout
Sketch your garden and mark each plant’s location. Determine emitter type for each plant: vegetables and tomatoes need 1-2 GPH emitters; small herbs and annuals need 0.5 GPH; trees and shrubs need 2 GPH or multiple emitters. Plan the main line route to reach all zones with as few bends as possible. Each zone (one valve) should supply plants with similar water needs.
Step 2: Connect the Head Assembly
Screw the backflow preventer to the hose bib, then the filter, then the pressure regulator, then the timer (if using one). The order matters: backflow preventer always goes first. The timer allows automated watering and is the single best upgrade to any drip system — a $30 battery-operated timer pays for itself in water savings and plant health within one season.
Step 3: Lay the Main Line
Connect 1/2-inch poly tubing to the output of the pressure regulator. Run the main line through the planting area, staying close to the base of the plants. Use landscape stakes every 3-4 feet to hold the tubing on the surface. Leave 12 inches of slack at turns — poly tubing stiffens in cold weather and needs room to move without pulling connections apart. Cap the far end of each main line run with an end cap or fold-end stake.
Step 4: Install Emitters and Micro Tubing
Use the hole punch tool to pierce the main line at each plant location. Insert a barbed connector into the hole — it snaps in with firm pressure. Connect a length of 1/4-inch micro tubing to the barbed connector and run it to the base of the plant. Insert the emitter at the plant end of the micro tubing. Stake the micro tubing to the soil surface. For plants that need multiple emitters, punch multiple holes in the main line or use a multi-outlet distributor.
Step 5: Test the System
Turn on the water and walk the system. Look for: leaks at connections (re-seat any barbed fittings that drip), clogged emitters (replace any that do not flow), and uniform coverage at each plant. Check that pressure at the far end of each main line run is adequate — if emitters at the far end flow much less than those at the start, the system is either too long for one zone or the emitter total GPH rating exceeds the supply capacity.
Step 6: Set the Timer and Mulch
Program the timer for your soil type: sandy soil needs shorter, more frequent watering; clay soil benefits from longer, less frequent cycles. Most vegetable gardens do well with 30-45 minutes of drip irrigation every 1-2 days in summer. Cover the system with 2-3 inches of mulch — it hides the tubing, reduces evaporation further, and prevents UV degradation of the tubing.
Pro Tips
- Flush the main line before inserting emitters — debris in new tubing clogs emitters before the system even runs.
- Mark emitter locations with small flags for the first season — when you are working in the garden, it is easy to pull up micro tubing with a hoe.
- Drain the system each fall before the first freeze — water left in tubing expands, cracks fittings, and destroys emitters.
Frequently Asked Questions
How long should I run drip irrigation?
Run times depend on emitter GPH rating and plant needs. A tomato plant needs about 1-2 gallons per day in peak summer; two 1-GPH emitters running for 1 hour deliver 2 gallons. Calculate based on plant water requirements and emitter flow rate. Adjust by checking soil moisture 6 inches down — it should be moist but not waterlogged after a watering cycle.
Do I need a filter?
Yes. Municipal water contains sediment and mineral deposits that clog drip emitters quickly without a filter. A 150-mesh filter (often built into combination head assemblies) is adequate for most municipal supplies. If using well water, a separate high-capacity filter is worth the investment — well water typically has more particulate matter than city water.