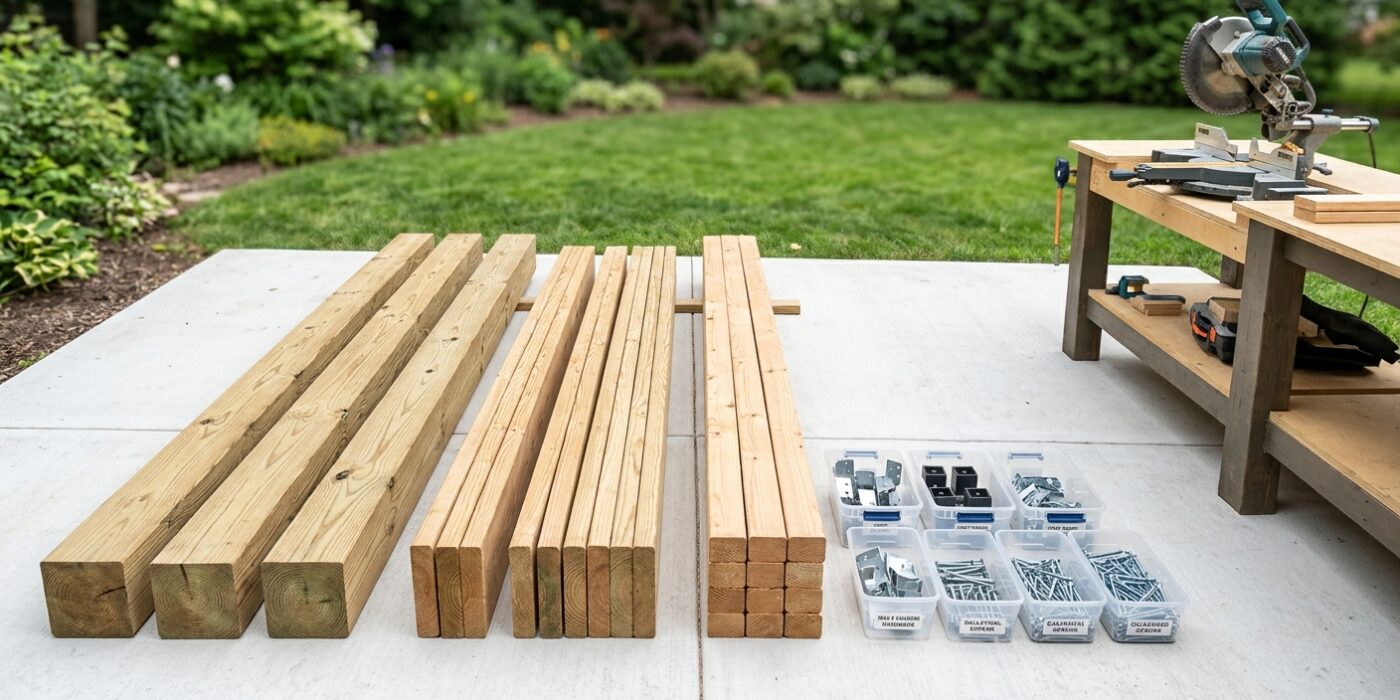
Project Shopping List
A pergola is the best return-on-investment outdoor structure you can build — it defines outdoor living space, provides filtered shade, supports climbing plants or a shade cloth, and costs far less than an enclosed addition. A basic freestanding pergola over a patio or deck takes a weekend for two people and the result lasts decades with minimal maintenance.
This guide covers building a freestanding 12×12-foot pergola with four posts, two beams, and evenly spaced rafters — the standard design that works on flat ground or over an existing deck.
What You Need
Tools
- Post hole digger or rented power auger
- Circular saw and miter saw
- Drill and impact driver
- Level (4-foot) and string line
- Speed square and tape measure
Materials
- Four 6×6 posts at 10-12 feet (adjust for desired height)
- Two 2×8 or 2×10 beams at 14 feet (2 feet overhang each end)
- Seven to nine 2×6 rafters at 14 feet
- Post base hardware (if mounting to deck) or concrete mix
- Structural screws and joist hanger hardware
- Post cap hardware
Step-by-Step Instructions
Step 1: Lay Out the Post Locations
Mark the four corner post locations using batter boards and string lines. The standard pergola spans 12 feet between post faces — the actual post-center to post-center dimension is 12 feet plus 5.5 inches (the post width) or approximately 12 feet 6 inches on center. Pull diagonal measurements across the layout — both diagonals must be equal for the posts to be square to each other. Drive stakes and confirm before digging.
Step 2: Set the Posts
Dig holes 12 inches in diameter and below the frost line (typically 36-42 inches deep depending on your region). Pour 6 inches of gravel in each hole for drainage. Set posts, brace them plumb with 2×4 braces staked to the ground, and pour concrete. Let concrete cure 48-72 hours before removing braces or loading the posts. If mounting to an existing deck, use code-approved post base hardware anchored to the deck framing — not just the decking surface.
Step 3: Cut Posts to Height
After the concrete cures, snap a level chalk line around all four posts at the finished beam height. A standard pergola sits 8 feet above the ground under the beam — so the beam bottom is at 8 feet. Snap your cut line at 8 feet on all posts and cut with a circular saw. Use a square to ensure the cuts are perfectly level — any discrepancy will be visible in the finished pergola.
Step 4: Install the Beams
The two beams run parallel to each other, spanning from post to post on opposite sides. Use post cap hardware to mount the beams — post caps are engineered connectors that carry the structural load safely. Position each beam with equal overhang at each end (1-2 feet looks proportional). Level each beam along its length before securing. Two people are needed to hold beams in position while driving fasteners.
Step 5: Install the Rafters
The rafters span between the two beams at right angles. Space them 16 or 24 inches on center depending on how much shade coverage you want — 16-inch spacing gives roughly 50% coverage, 24-inch spacing gives about 30%. Cut decorative tails on the rafter ends before installing: a simple 45-degree cut at the bottom corner gives a finished appearance. Notch rafters to sit over the beams (a “bird’s mouth” cut is not needed for a pergola — the rafter simply sits on top and is face-screwed through a rafter tie or toe-nailed).
Step 6: Decorative Cuts and Finishing
Decorative cuts on beam and rafter ends transform a utilitarian structure into an attractive feature. Common profiles: a simple 45-degree chamfer cut 4 inches back from the end, or a curved jig-saw cut for a more ornate look. Cut all matching pieces from the same template for consistency. Sand any rough cuts, and apply an exterior wood stain or sealer to all surfaces. Cedar and pressure-treated pine need sealing within the first year to prevent surface checking.
Pro Tips
- Use cedar or redwood for a pergola that will look good without painting — these species resist rot naturally. Pressure-treated pine requires paint or stain and can be harder to work with.
- A temporary ledger board nailed across two posts at beam height makes it much easier to hold beams in position while driving fasteners solo or with one helper.
- Check local codes before building — most jurisdictions require a permit for structures over a certain size and have setback requirements from property lines.
Frequently Asked Questions
Does a pergola need a permit?
Most jurisdictions require a permit for permanent structures, which includes freestanding pergolas. Requirements vary significantly — some areas exempt structures under 200 square feet; others require permits for anything with footings. Check with your local building department before digging any post holes.
How long do pergola posts last?
Ground-contact pressure-treated posts (marked LP22 or UC4B for ground contact) can last 30-40 years in the ground. Cedar posts in ground contact last 15-20 years. If you are using a post base that keeps the post above grade, standard cedar or pressure-treated above-ground posts last indefinitely with periodic sealing.